Form Builder
Build the form that kicks off an approval. Add text, date, file, currency fields and more, then reorder them to fit; no code required.
Updated
The form is the front door to an approval workflow: it decides what a requester has to tell you before anything reaches an approver. This guide covers adding fields to a workflow's form, setting a field's label and options, changing field order, and deleting fields you no longer want. You'll need a workflow you own that already has a form page — webhook, dynamic-schema, and mailbox flows have no form page to build on. Everything here is available on all tiers, and no code is involved.
Who this is for: an Administrator.
Add a field to the form
Every piece of information you want from a requester starts as a field, and the field type you pick determines what the requester can enter — text, email, date, file, currency, and more. Pick the type that matches the data so the request arrives usable.
-
Sign in as an Administrator.
-
Open the workflow whose form you want to build (the example screenshots use Purchase Requests).
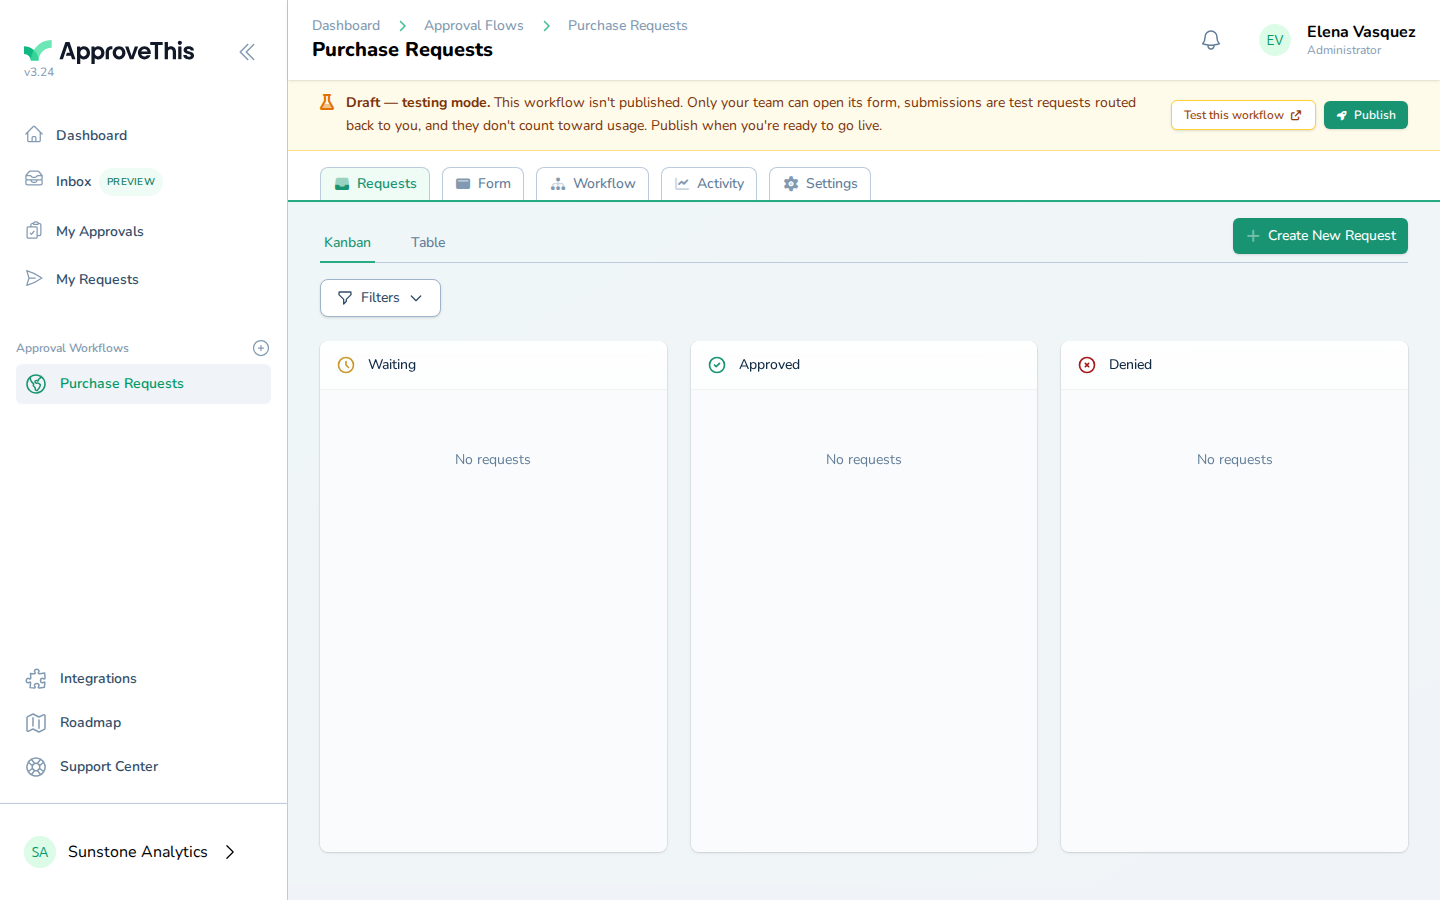
Open the workflow whose form you want to build (the example screenshots use Purchase Requests). -
Click Form to open the form builder for that workflow.
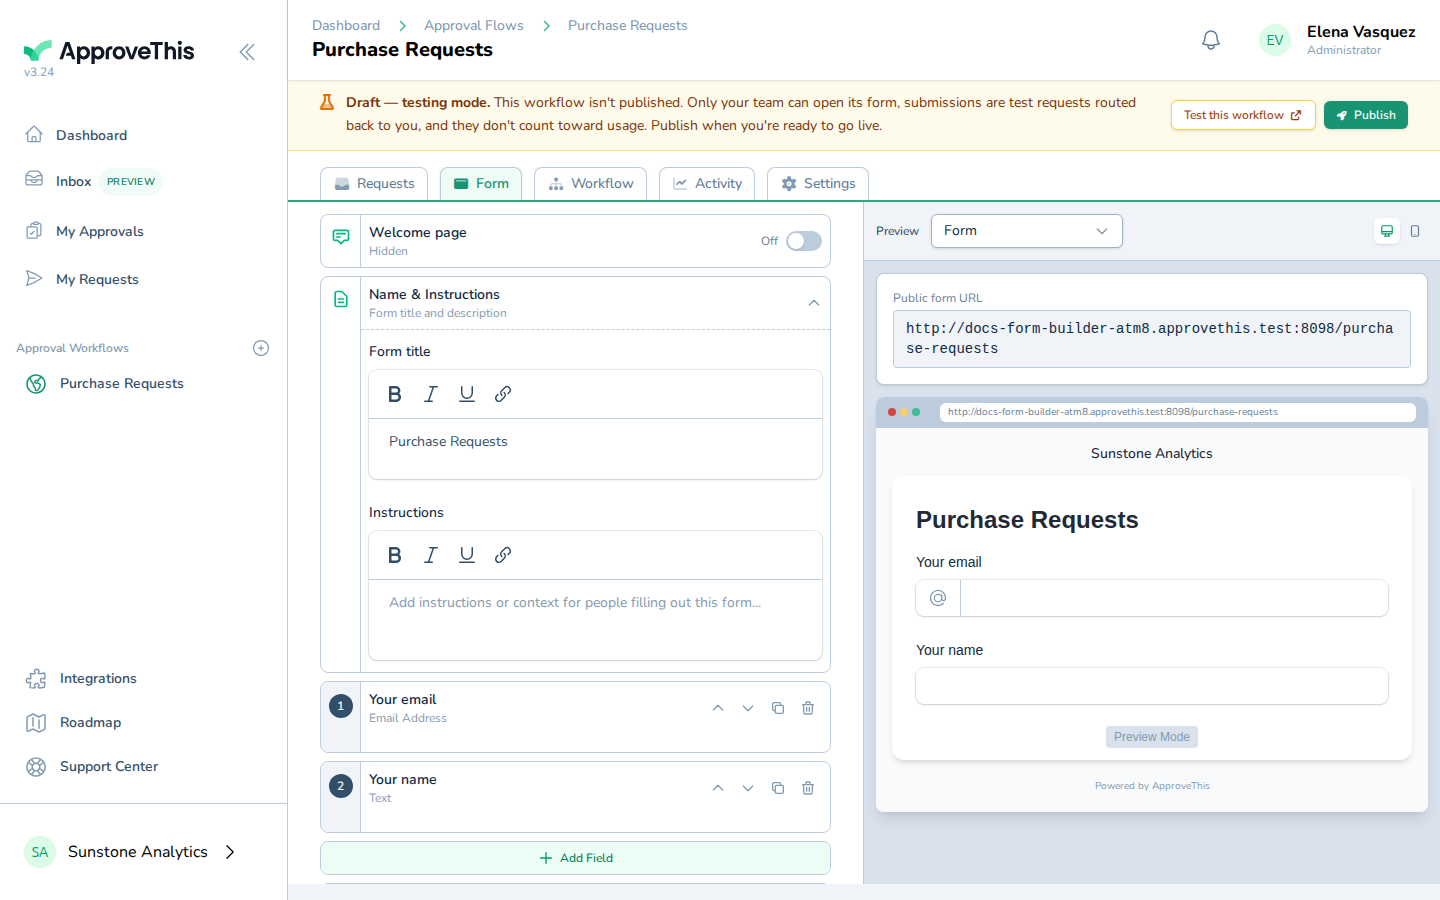
Click Form to open the form builder for that workflow. -
Click Add Field.
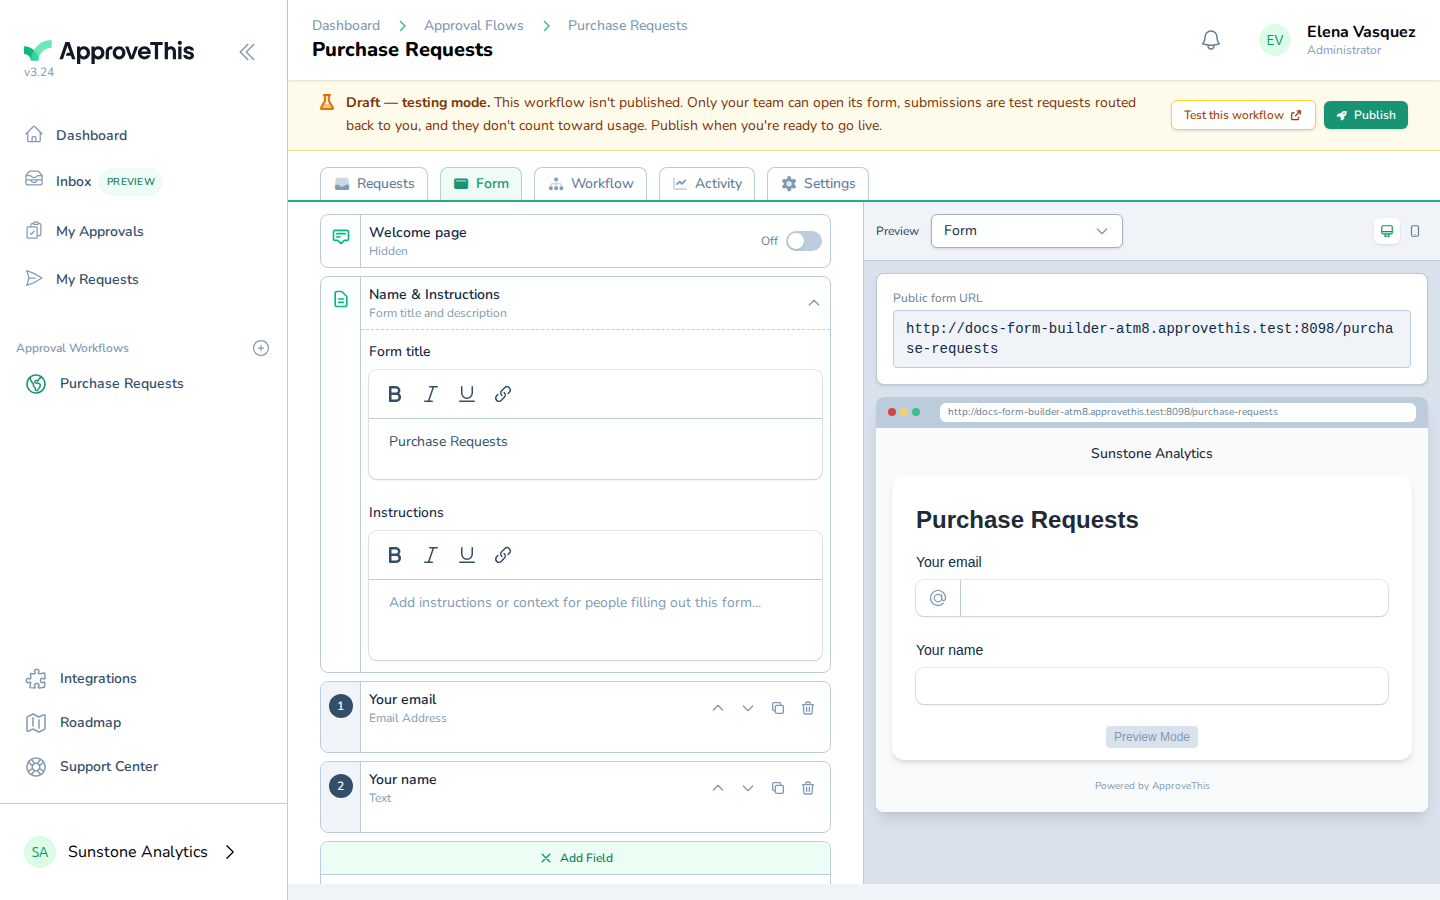
Click Add Field. -
Choose the field type that matches the information you're collecting — the example picks Currency Monetary amounts.
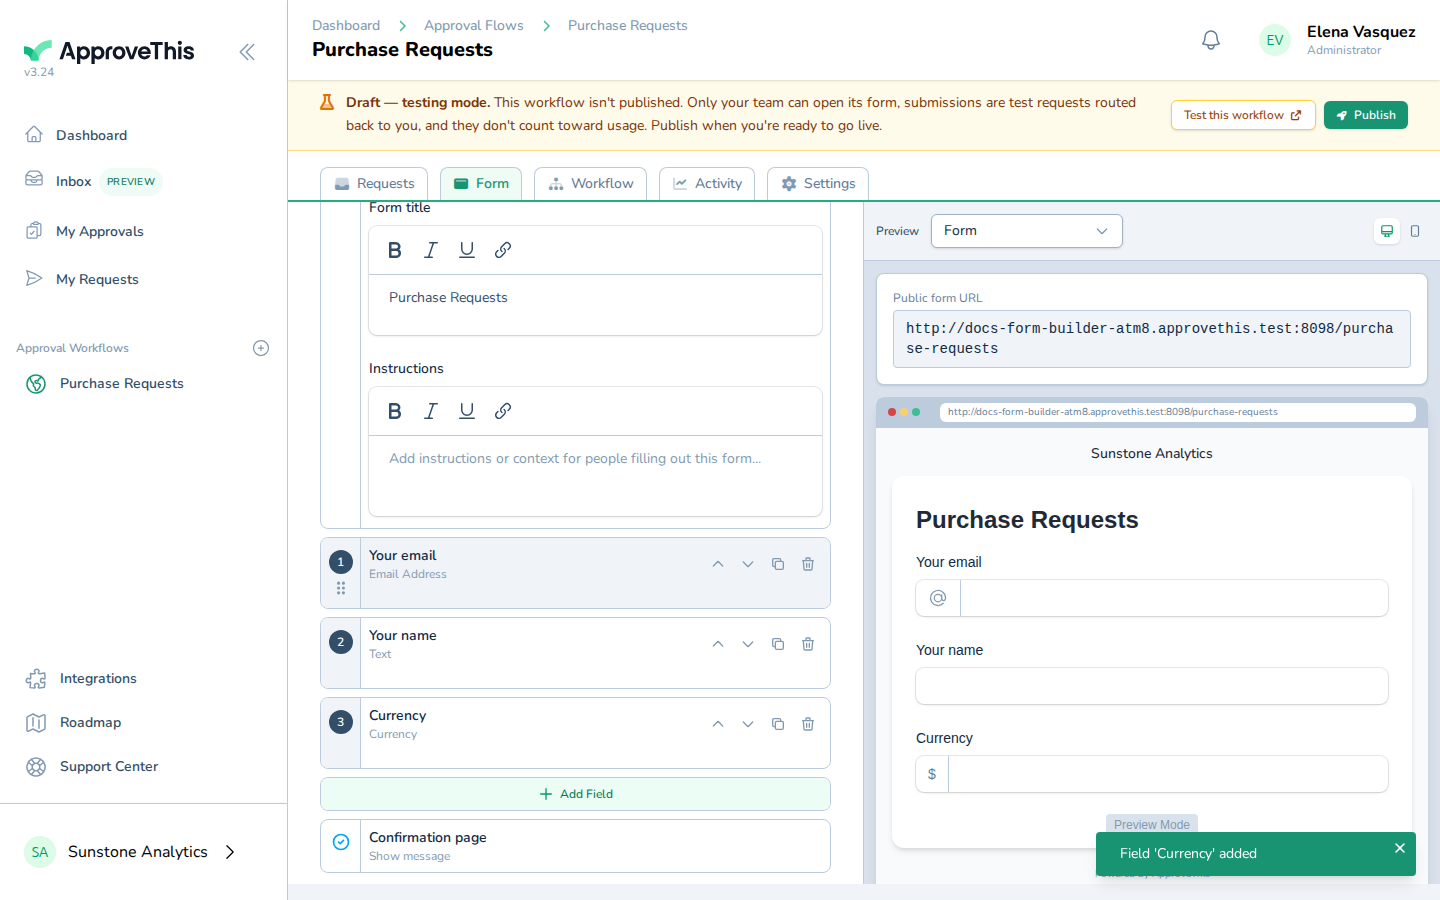
Choose the field type that matches the information you're collecting — the example picks Currency Monetary amounts.
Configure a field's label and settings
A field labeled with its type alone tells a requester nothing. Naming the field, marking it required, and adding help text is what keeps submissions complete and stops the back-and-forth over missing amounts or misread instructions.
-
Click the field you just added to open its settings (Currency in the example screenshots).
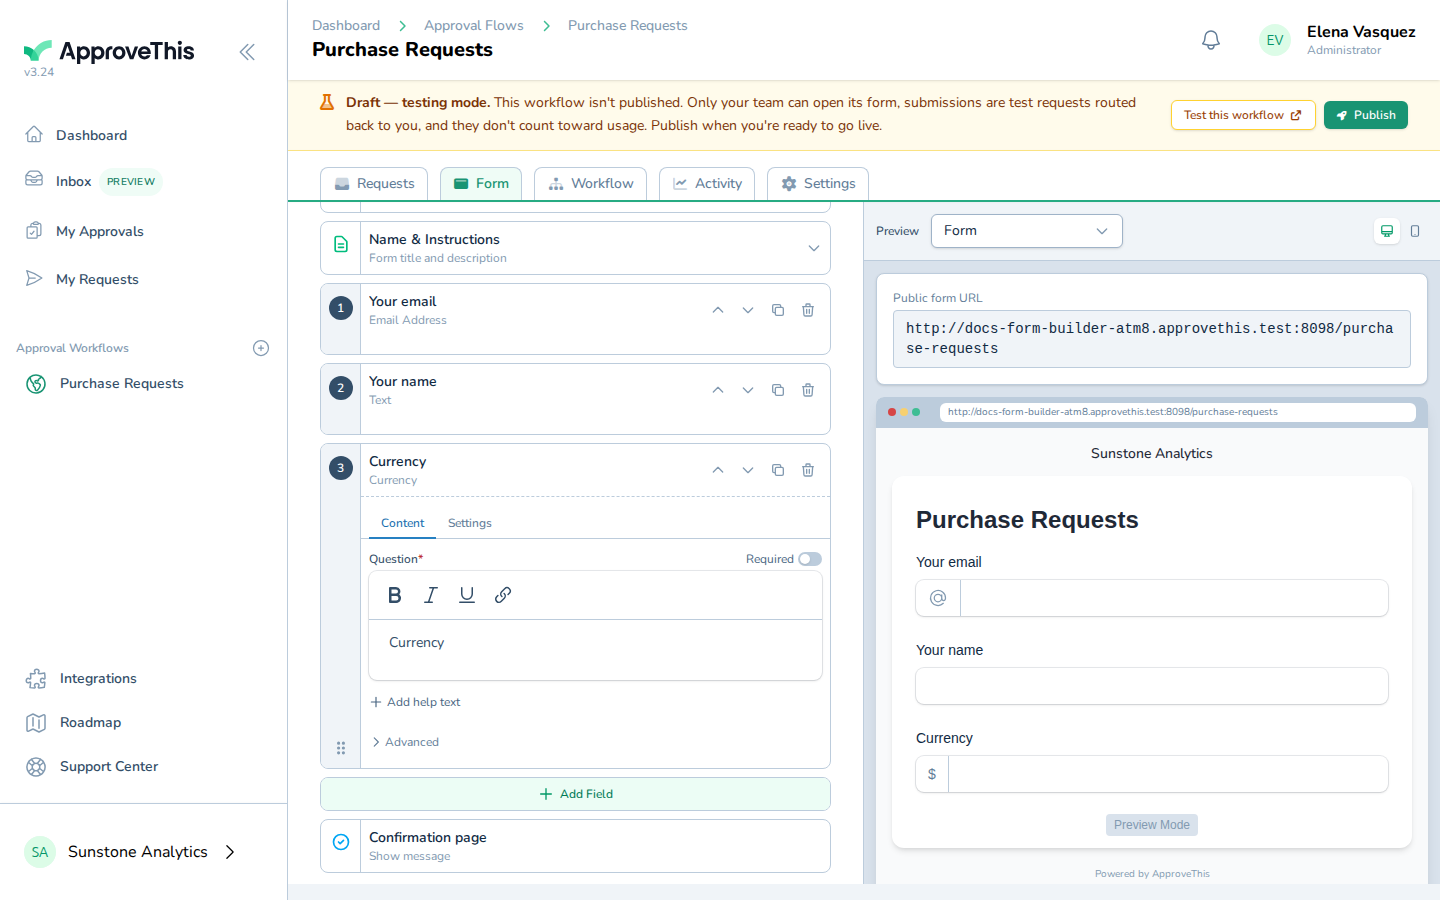
Click the field you just added to open its settings (Currency in the example screenshots). -
Enter a label describing what the field captures in Currency — the example uses
Total purchase amount.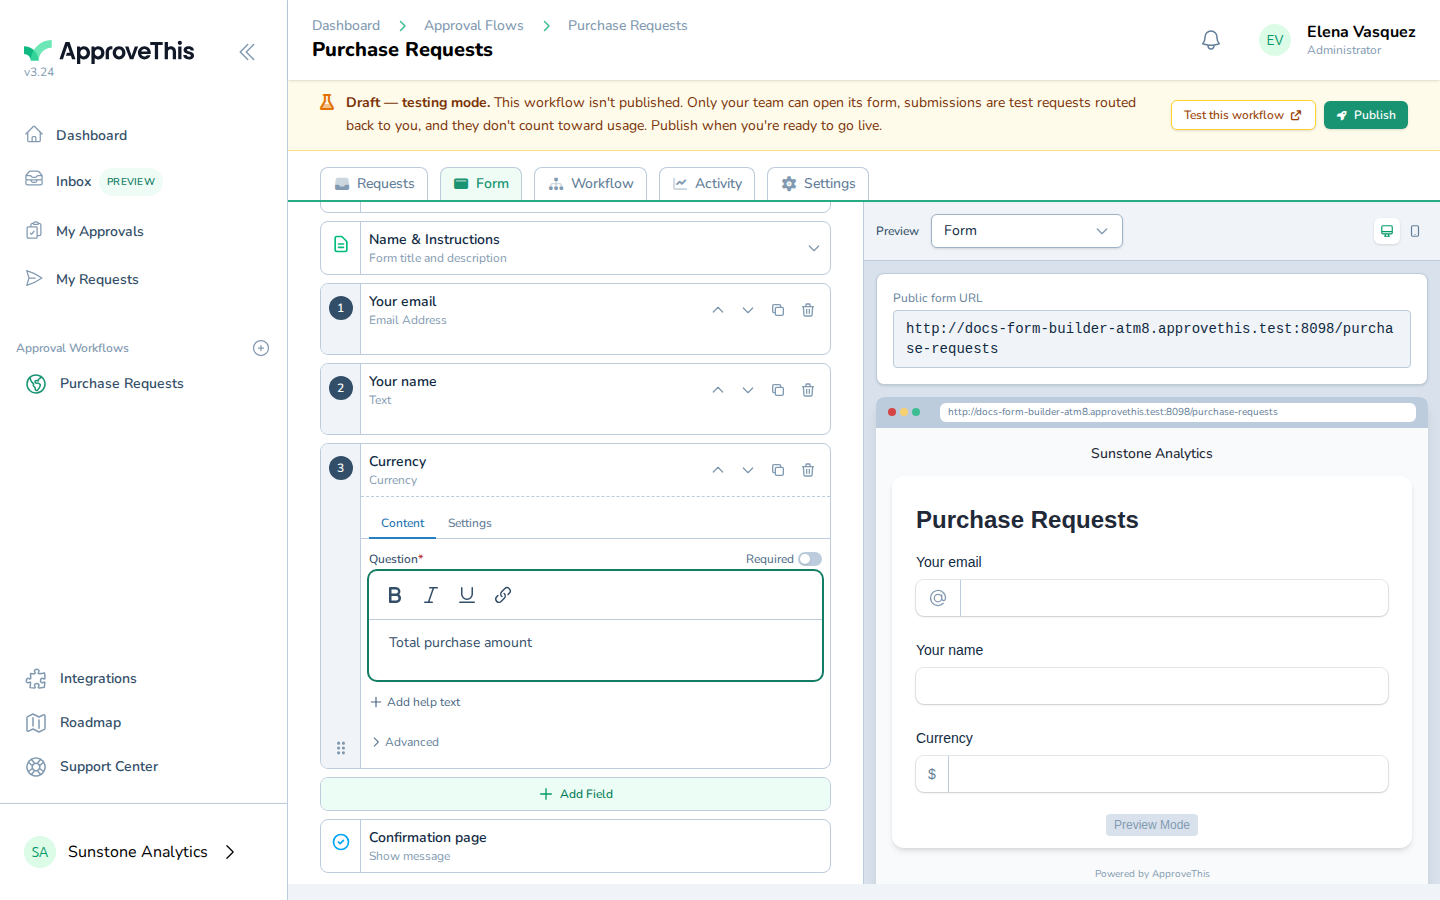
Enter a label describing what the field captures in Currency — the example uses Total purchase amount. -
Click Required if a requester must fill this field in before submitting.
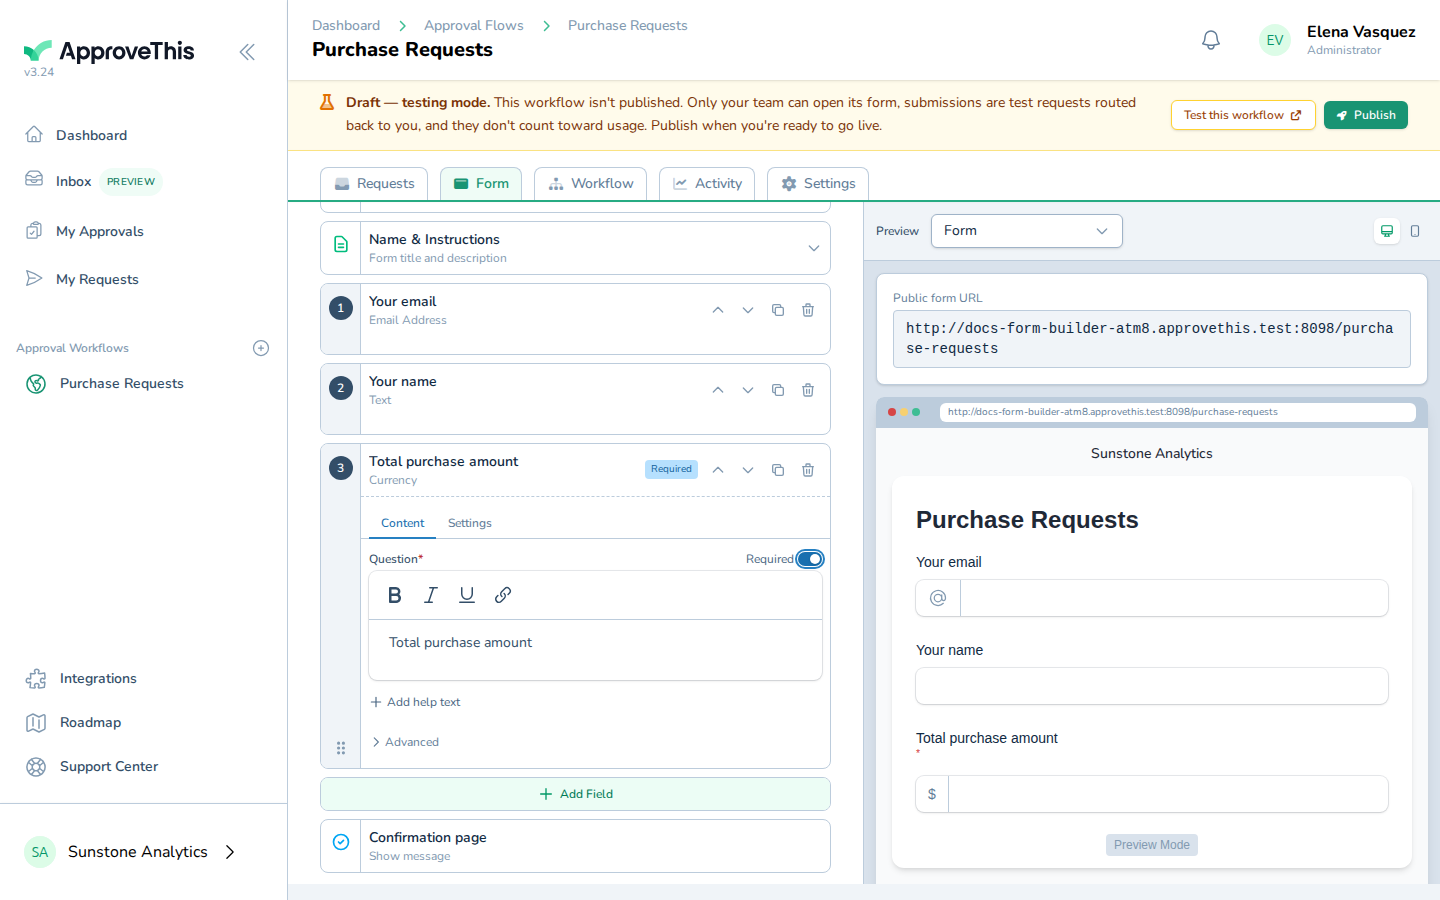
Click Required if a requester must fill this field in before submitting. -
Click Add help text.
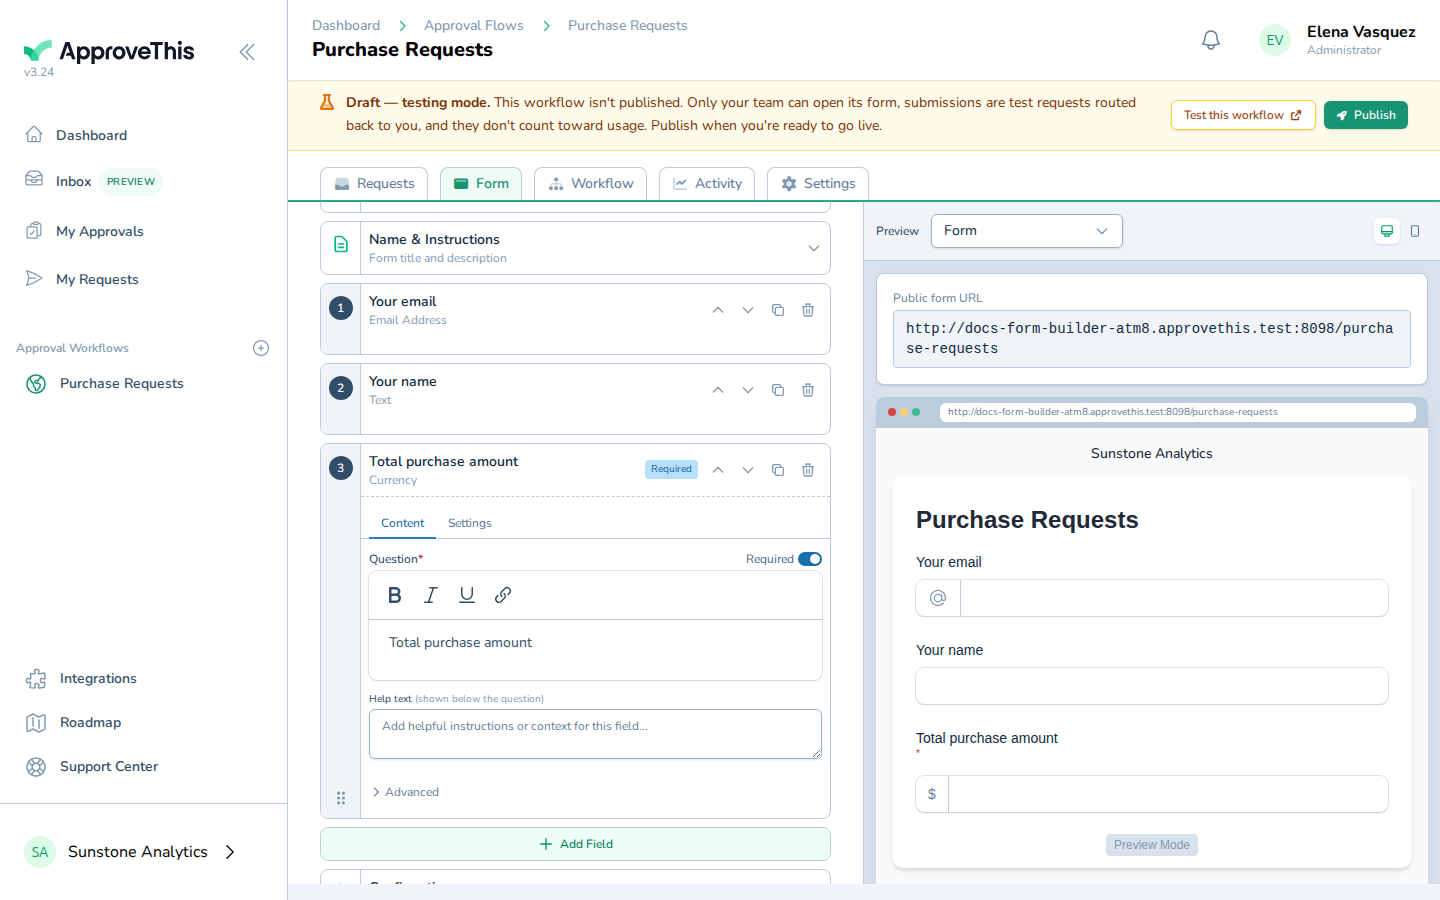
Click Add help text. -
Enter the guidance a requester should read under the field in Add helpful instructions or context for this field... — such as
Enter the total amount in USD, including tax and shipping.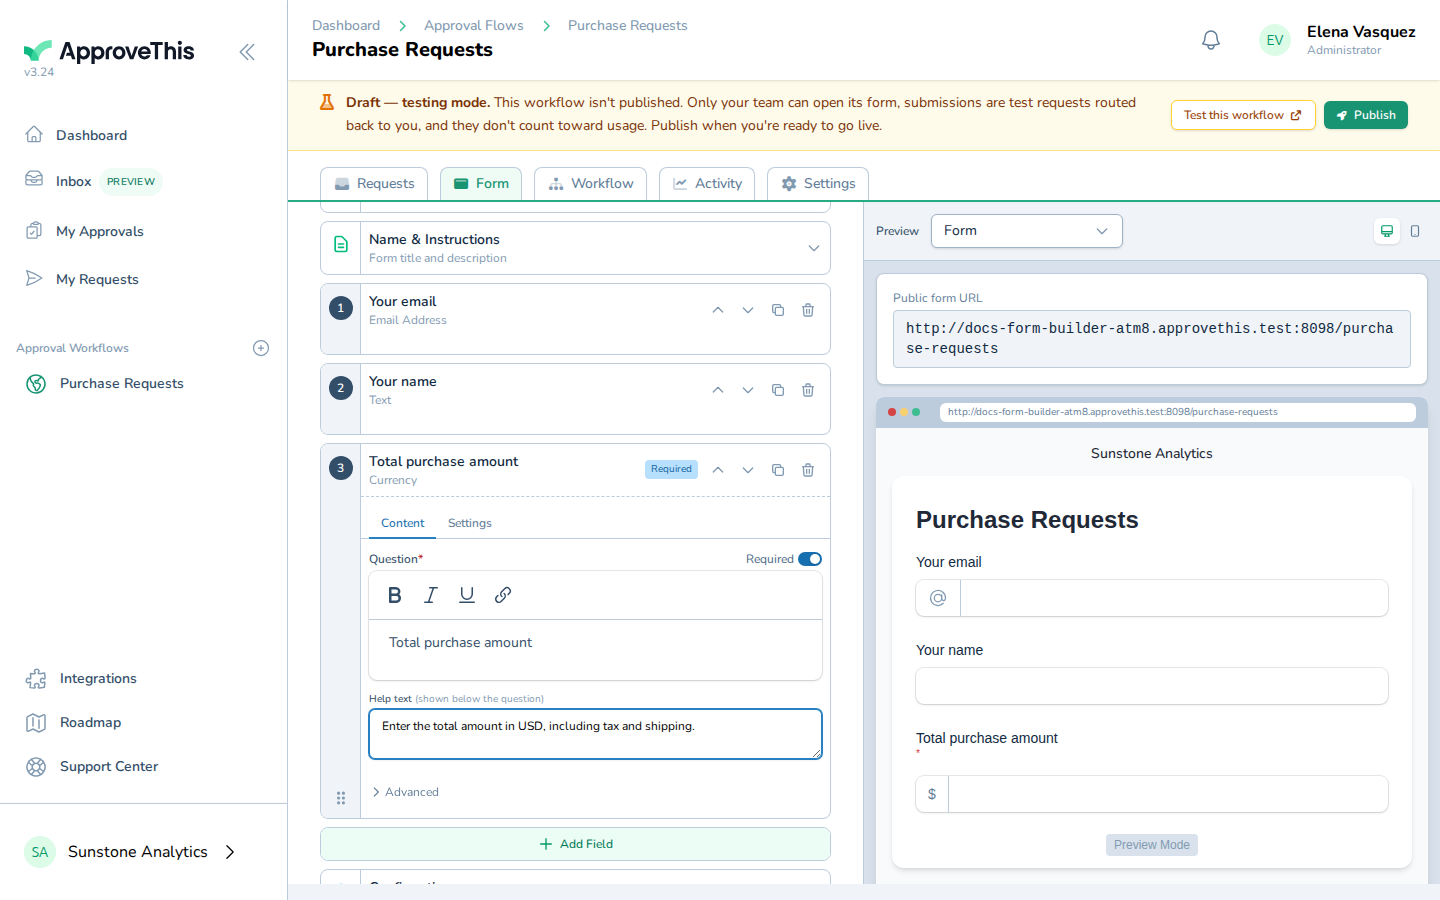
Enter the guidance a requester should read under the field in Add helpful instructions or context for this field... — such as Enter the total amount in USD… -
Click Settings to reach the options specific to this field type.
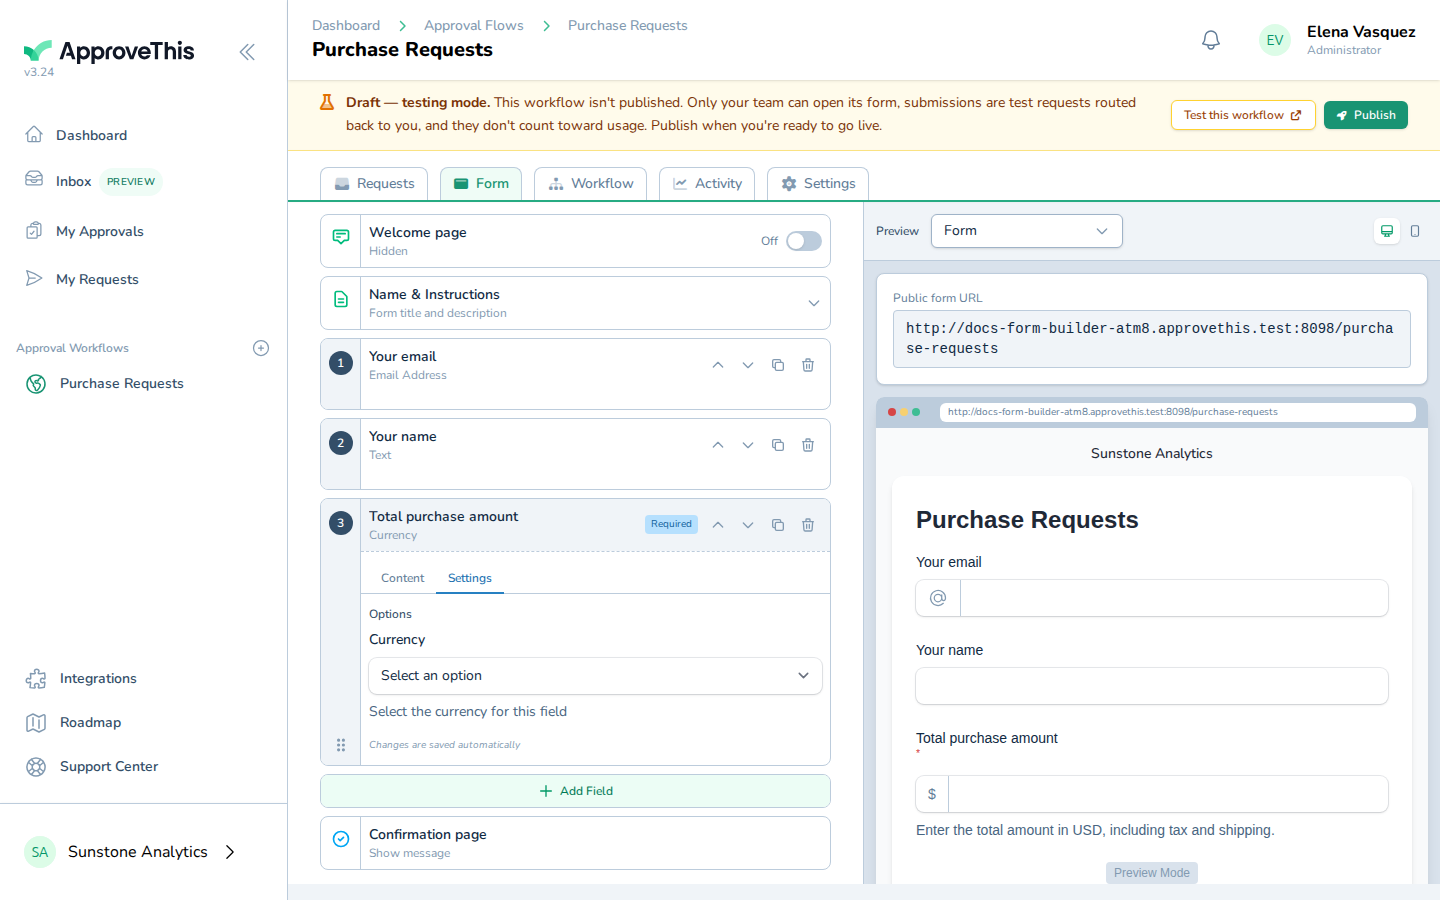
Click Settings to reach the options specific to this field type. -
Choose the currency the amount should be entered in from Currency — e.g., US Dollar ($).
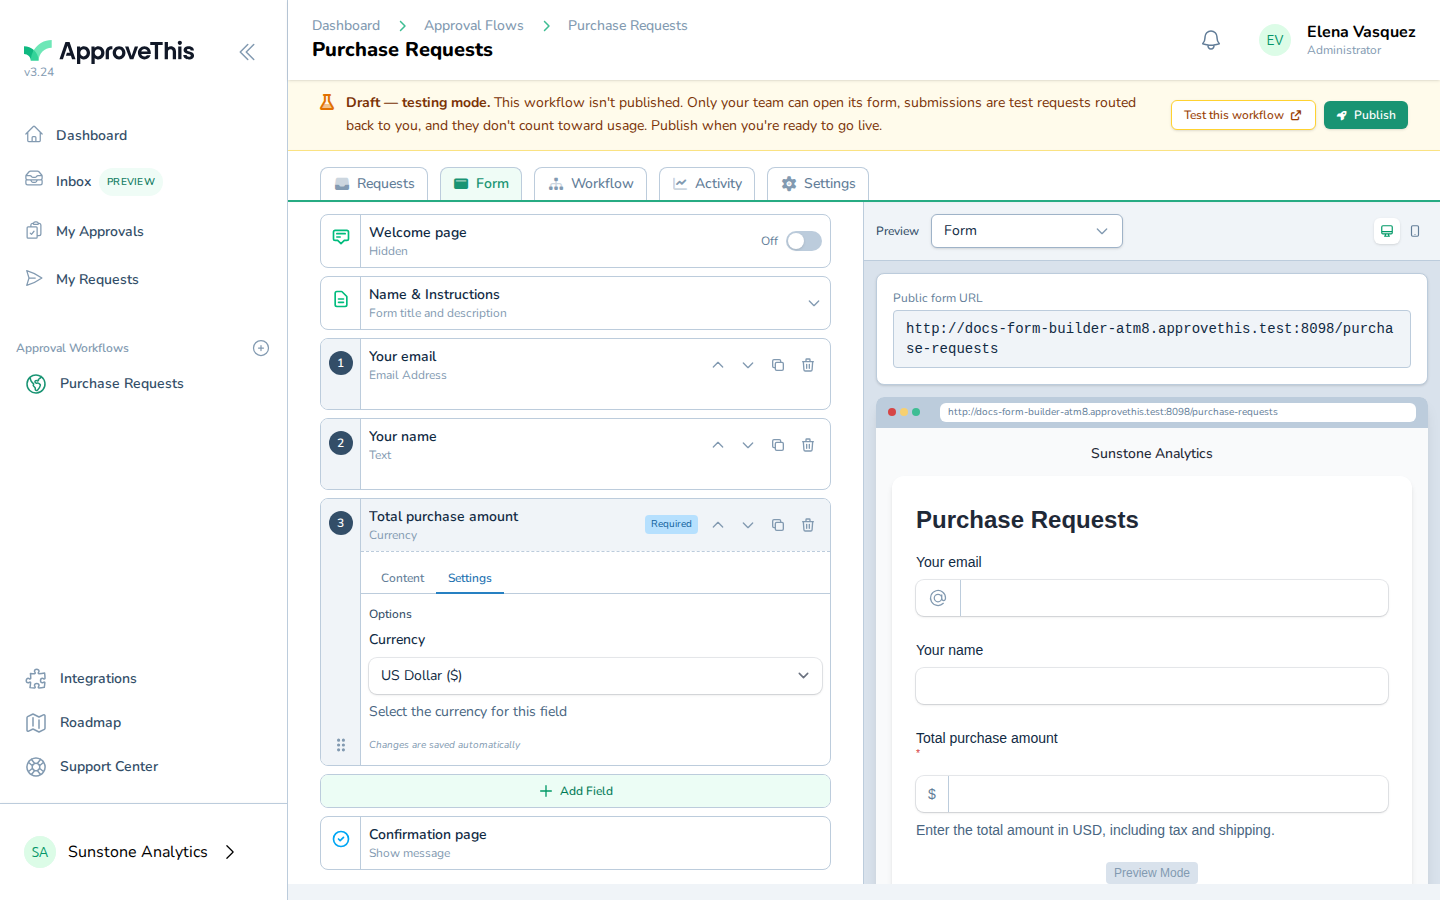
Choose the currency the amount should be entered in from Currency — e.g., US Dollar ($).
Reorder fields on the form
Field order is the order a requester reads and answers in, so a form built out of sequence can be fixed without rebuilding it. Move a field up as many times as it takes to land where it belongs.
-
Click Move up on the field you want earlier in the form.
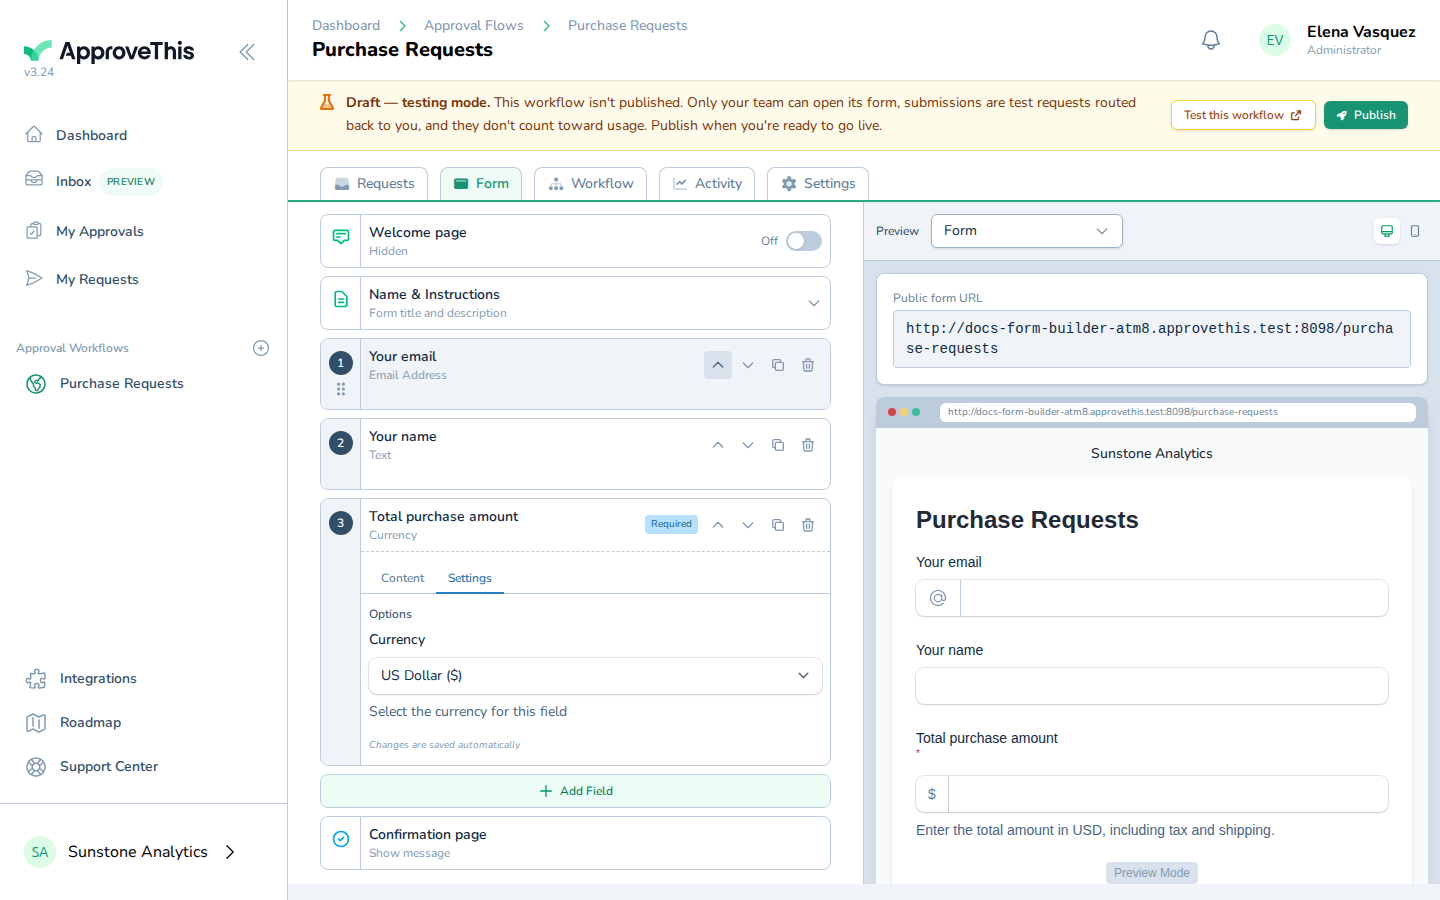
Click Move up on the field you want earlier in the form.
Remove a field
Requirements change, and a field that no longer earns its place only slows requesters down. Deletion asks for a confirmation, so a stray click won't wipe out a field's label and settings.
-
Click Delete field on the field you want to remove.
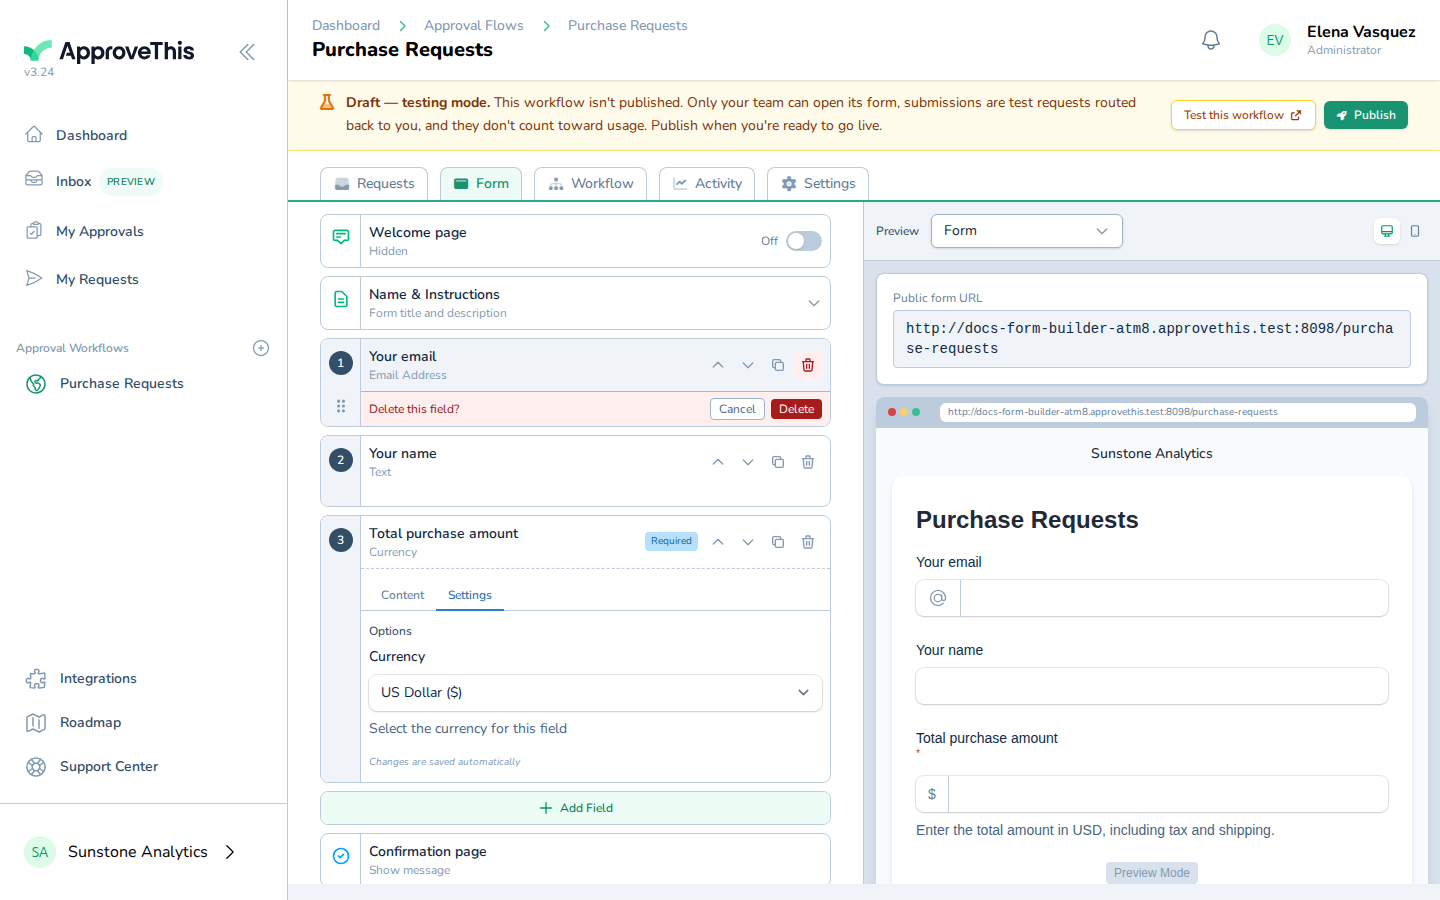
Click Delete field on the field you want to remove. -
Click Delete in the confirmation. Repeat these 2 steps as needed — the example runs them 3 times in total.
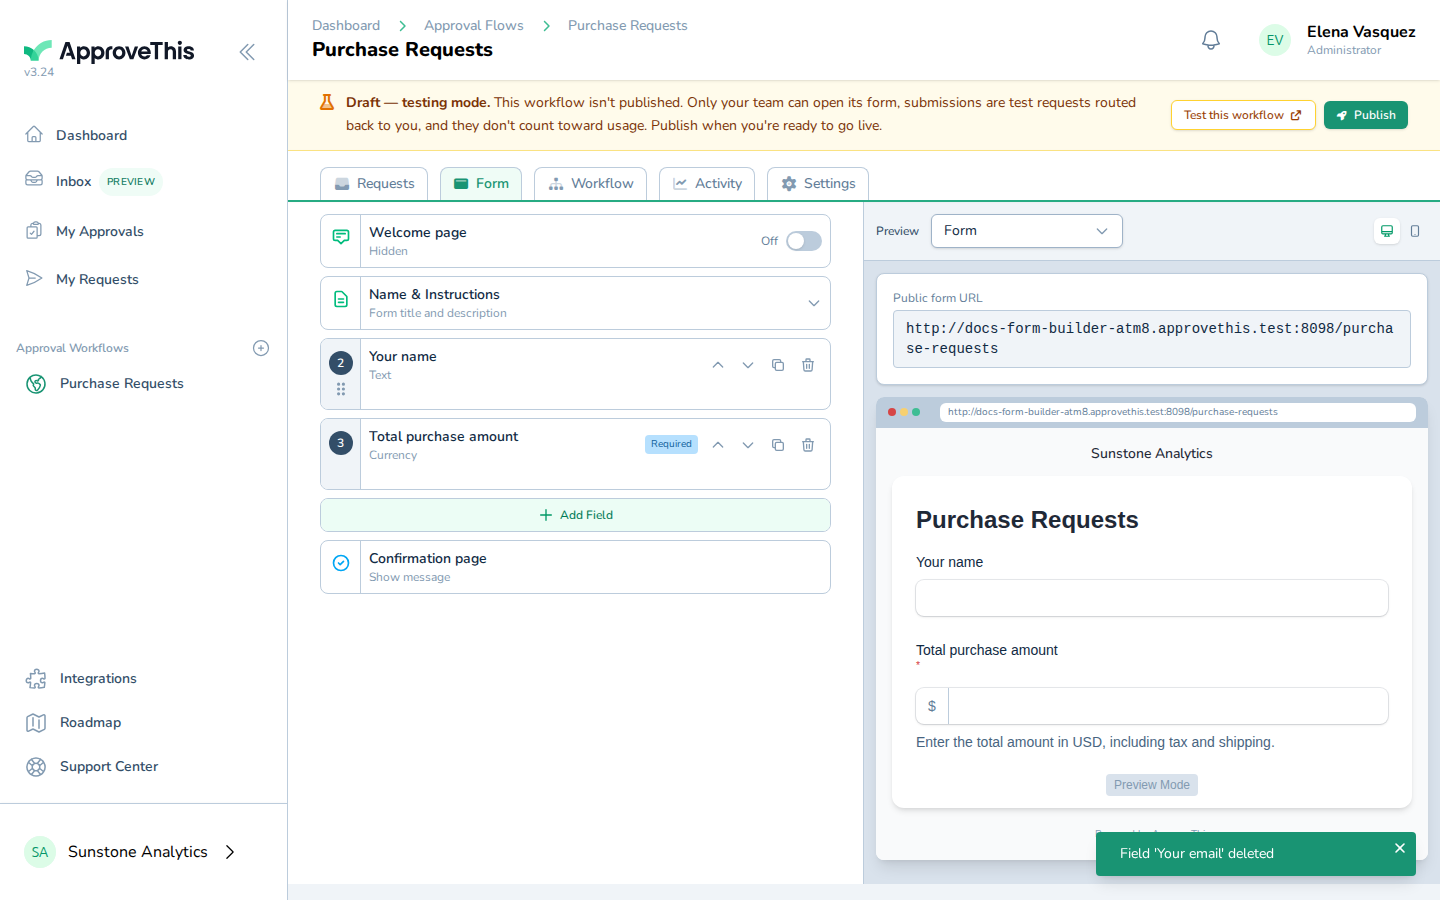
Click Delete in the confirmation. Repeat these 2 steps as needed — the example runs them 3 times in total.