Purchase order approvals with spend thresholds
A calculated total routes each PO through exactly the sign-offs its amount requires. The spend policy enforces itself.
Updated
Purchase orders get approved wherever the conversation already is: a reply in an email thread, a thumbs-up in chat. The written policy is clear enough. A direct manager can sign off small purchases, the controller must see anything over a set limit, and the CFO signs the big ones. But nothing enforces it. A manager okays a quote without adding up the line items, and the controller finds out at month-end close, when an invoice arrives for a commitment nobody above that manager ever saw.
This walkthrough follows the controller building one purchase-order workflow that carries the policy instead of relying on people to remember it: a request form that computes its own total, an approval chain where the manager always signs while conditions add the controller above one amount and the CFO above a higher one, and a routing preview that proves the gates work before going live. Then a department buyer submits a request, each approver decides from a link in their email, and the request's activity log keeps the timestamped record.
What you'll set up
- A request form with fields for the vendor and the line items being bought, with the decision-critical ones marked Required
- A calculated field that computes the PO total from the other answers, so the number that drives routing is never typed by hand
- Three approval steps: the manager always, the controller gated above one amount, the CFO gated above a higher one
- A pre-launch check with Preview approvers showing a large request hitting every step and a small one skipping the extra sign-offs
- One-click approval from the notification email, and a timestamped activity log on every request
A form whose total computes itself
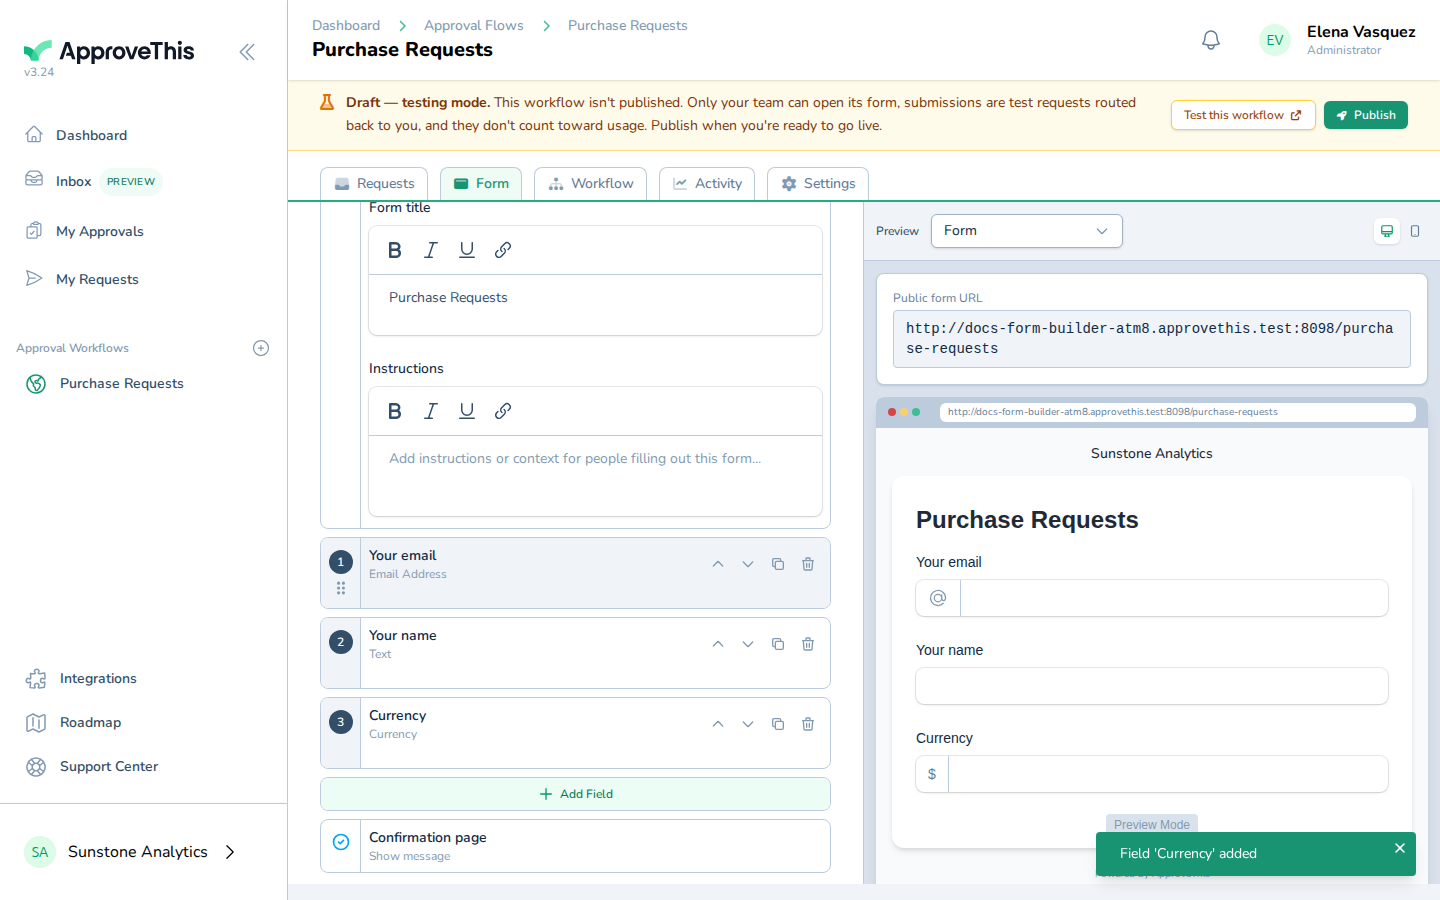
The form is what your approvers decide from, so it needs the vendor, what's being bought, and the money. On the workflow's Form tab, click Add Field for each piece of information: fields for the vendor and each line item, and for anything monetary, the Currency Monetary amounts type. Give every field a label that reads as a question, and mark the ones a decision depends on as Required so a request can't be submitted without them.
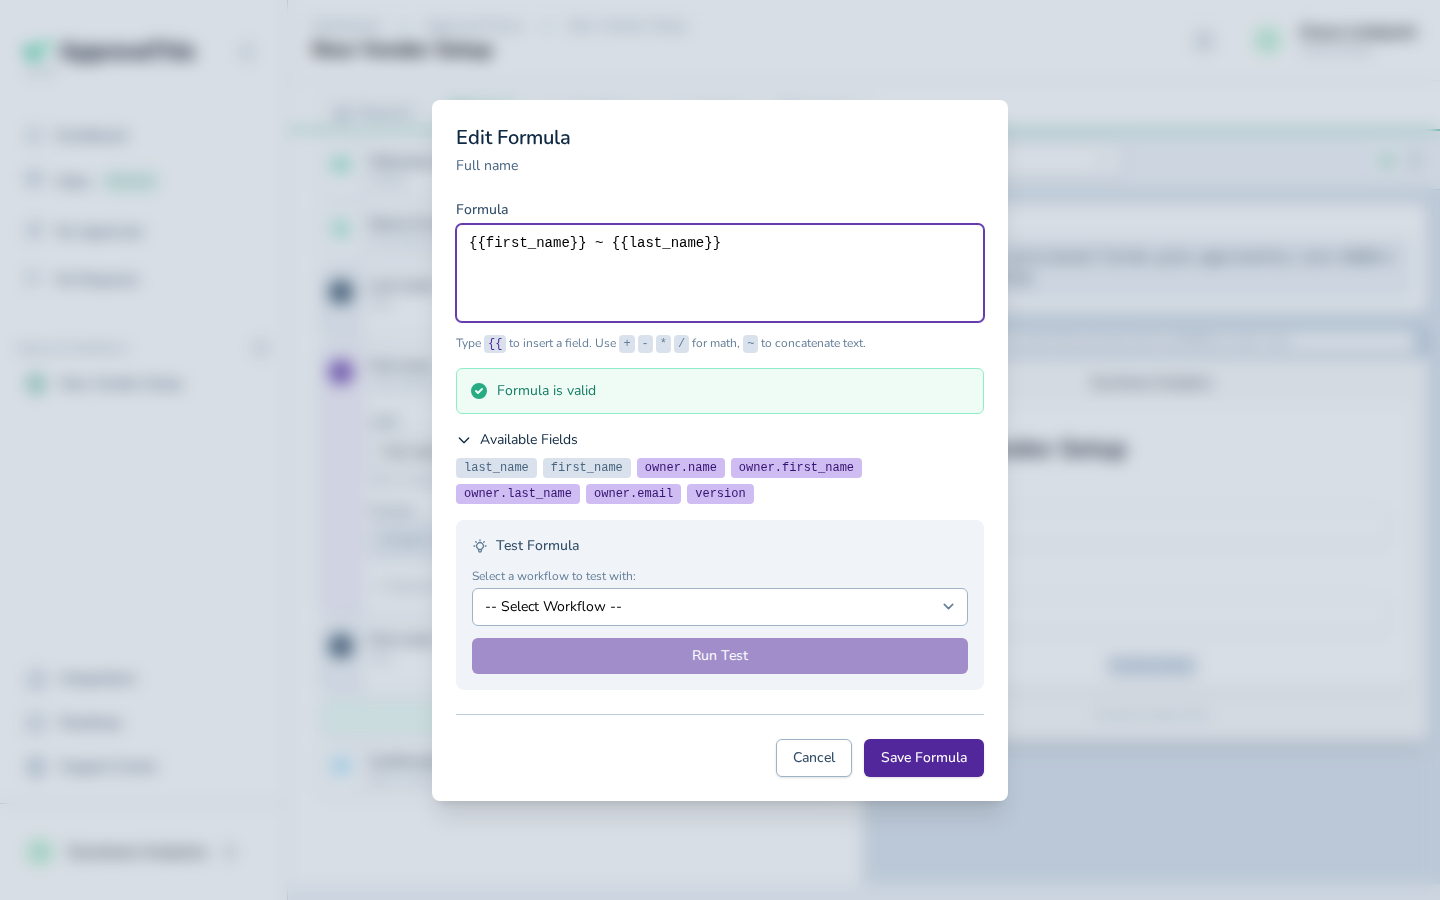
The total deserves extra care, because it is the number your thresholds will test, and a hand-typed total will sometimes be wrong. Add a calculated field instead and click Click to edit formula... to define it. Formulas reference other fields with {{field_slug}} syntax (click Available Fields to see the slugs) and support arithmetic, so a PO total can multiply a quantity by a unit price or sum several line totals. The example screenshot joins two name fields with {{first_name}} ~ {{last_name}}; in this workflow yours looks more like {{quantity}} * {{unit_price}}. Click Save Formula, and the field fills itself in on every submission from then on.
Full click-by-click: Form Builder and Calculated Fields
Manager always; controller and CFO by amount
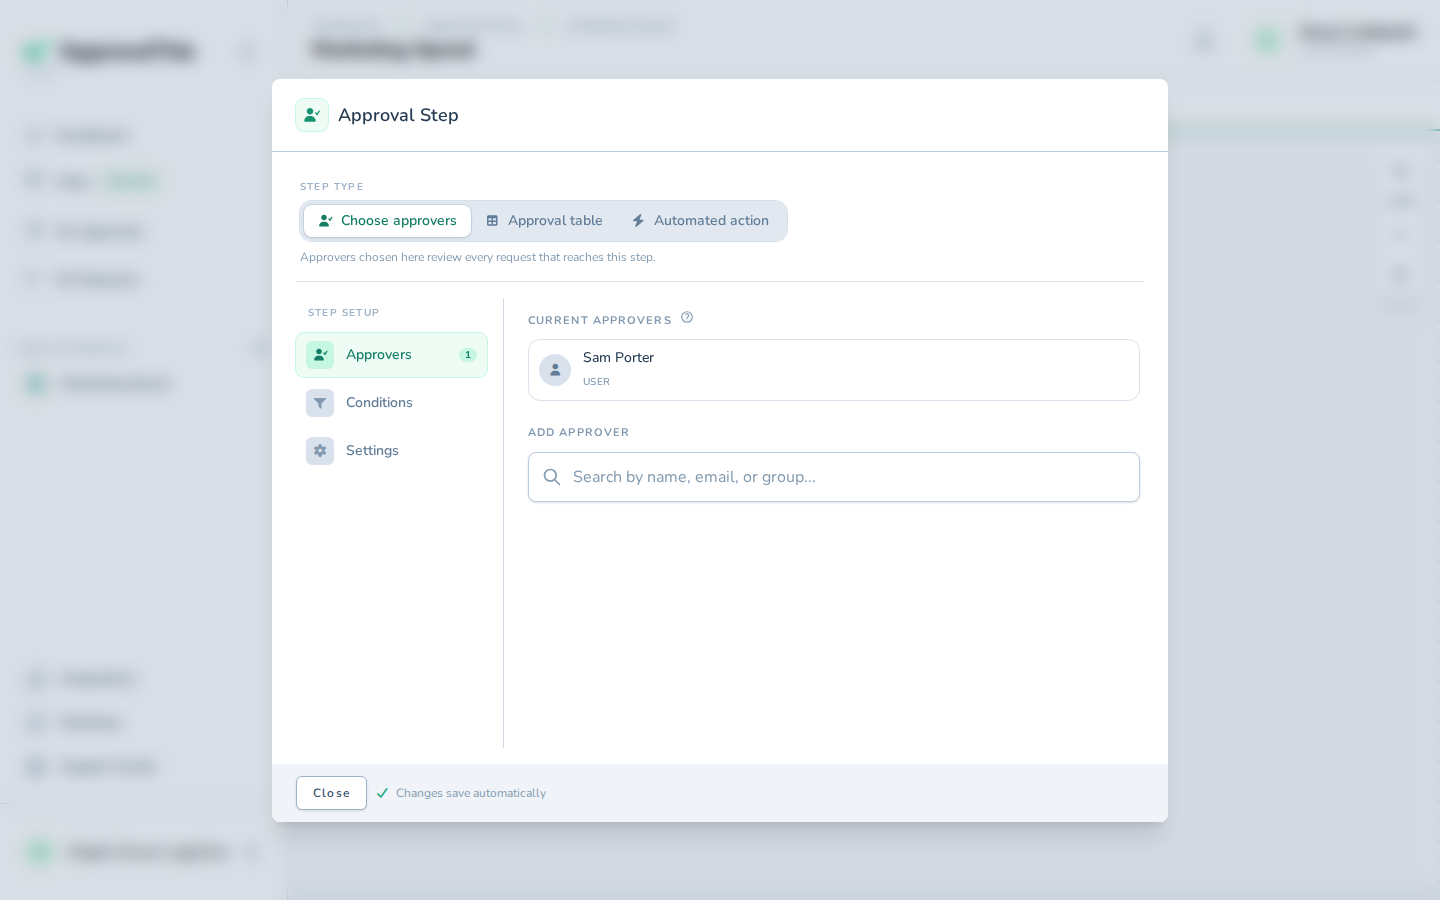
Switch to the Workflow tab, where the approval chain is drawn. Every step card has a + below it; click Add a new step below this one to insert each stage, and build three in order: manager, controller, CFO. On each step, type into Search for an approver and click the matching name to add that person — the example adds an approver named Sam Porter.
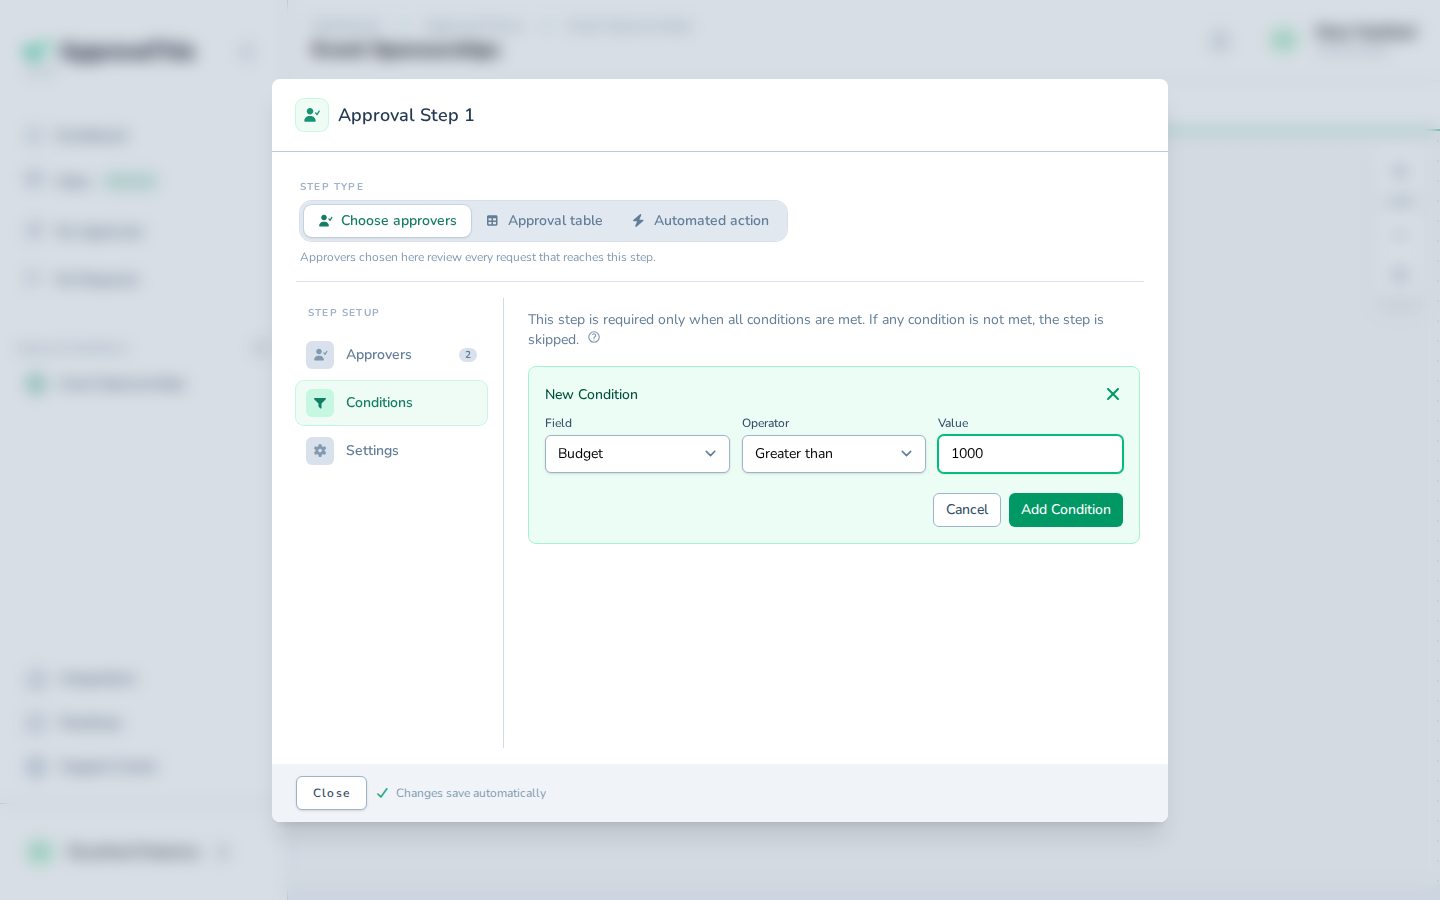
The manager's step gets no conditions, so every PO passes through it. On the controller's step, click Configure step, then Conditions, then Add Condition. From Field, choose your calculated total (the example gates on a field named Budget), set Operator to Greater than, and enter your policy limit in Value (the example uses 1000). Repeat on the CFO's step with the higher limit. A step whose conditions aren't met is skipped, which is exactly the policy: a small PO finishes after the manager, a mid-size one adds the controller, and only the largest reach the CFO.
Conditions on a step combine with AND, so add a second condition only if you mean to narrow the gate further. When a limit changes later, edit the condition's Value — the new limit governs future POs only, never requests already created.
The same shape fits a school district or clinic business office. Teachers or department heads submit requisitions, the principal or practice manager approves small ones alone, and conditions add the superintendent or CFO only above policy thresholds, without a separate workflow per amount band.
Full click-by-click: Add an Approval Step and Conditional & Threshold Routing
Prove the routing before you go live
A misplaced threshold fails in both directions: too low and the CFO reviews office chairs, too high and the exact purchases this workflow exists to catch slip past again. Check before launch. On the workflow's form, fill in values the way a large purchase would be entered and click Preview approvers — a button only members of the owning team with update permission ever see. It simulates the routing for the values currently on the form: which steps would run and who would approve. Confirm all three steps appear.
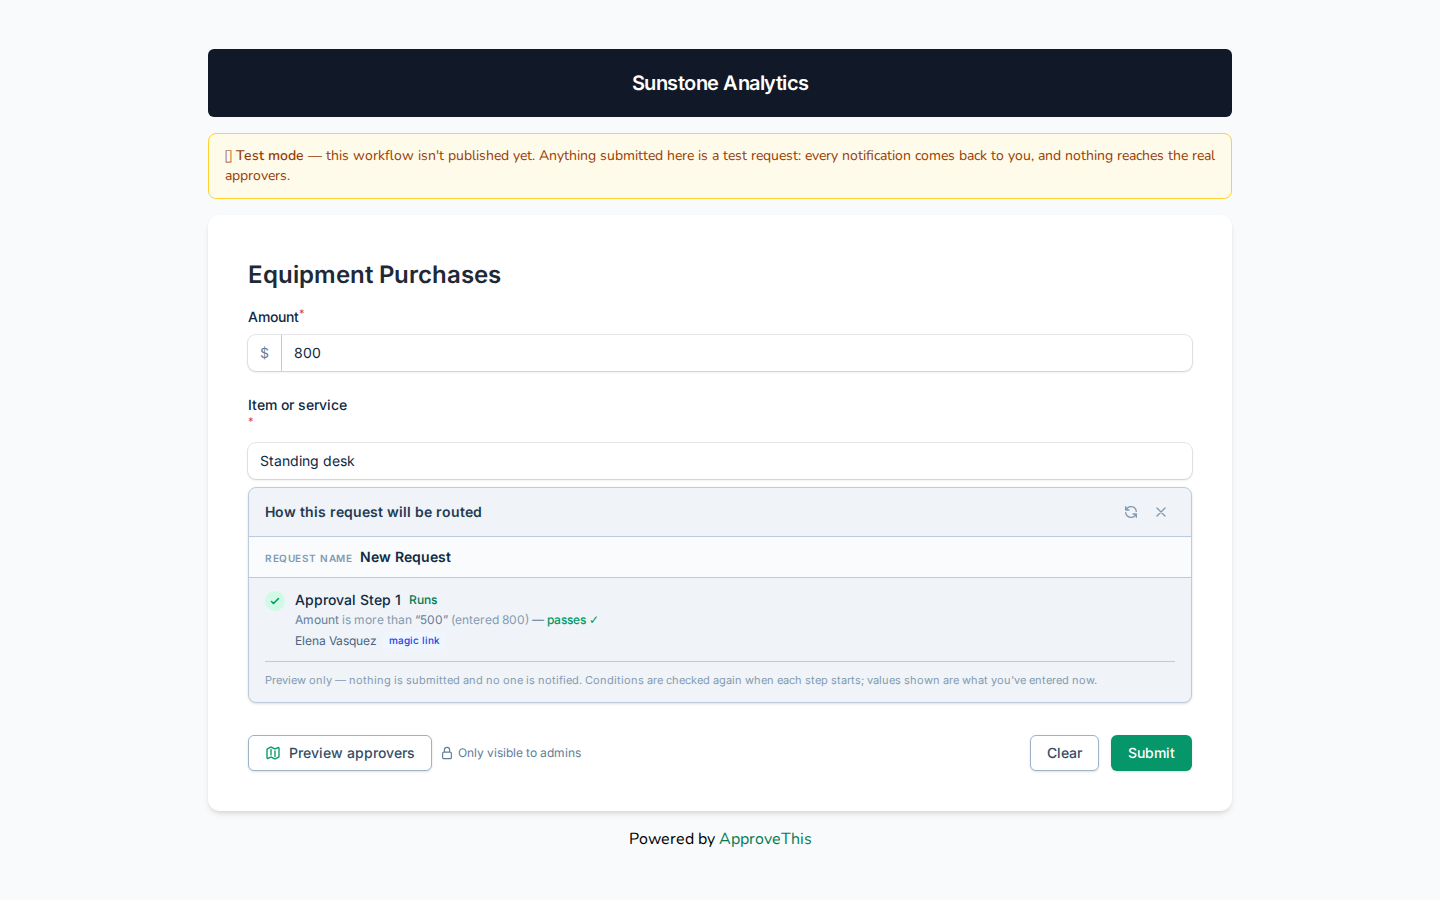
Then lower the amount below your threshold and click Refresh preview. The gated step is marked Condition(s) not met — the example flips an Amount field from 800 to 200 and watches the extra step drop out.
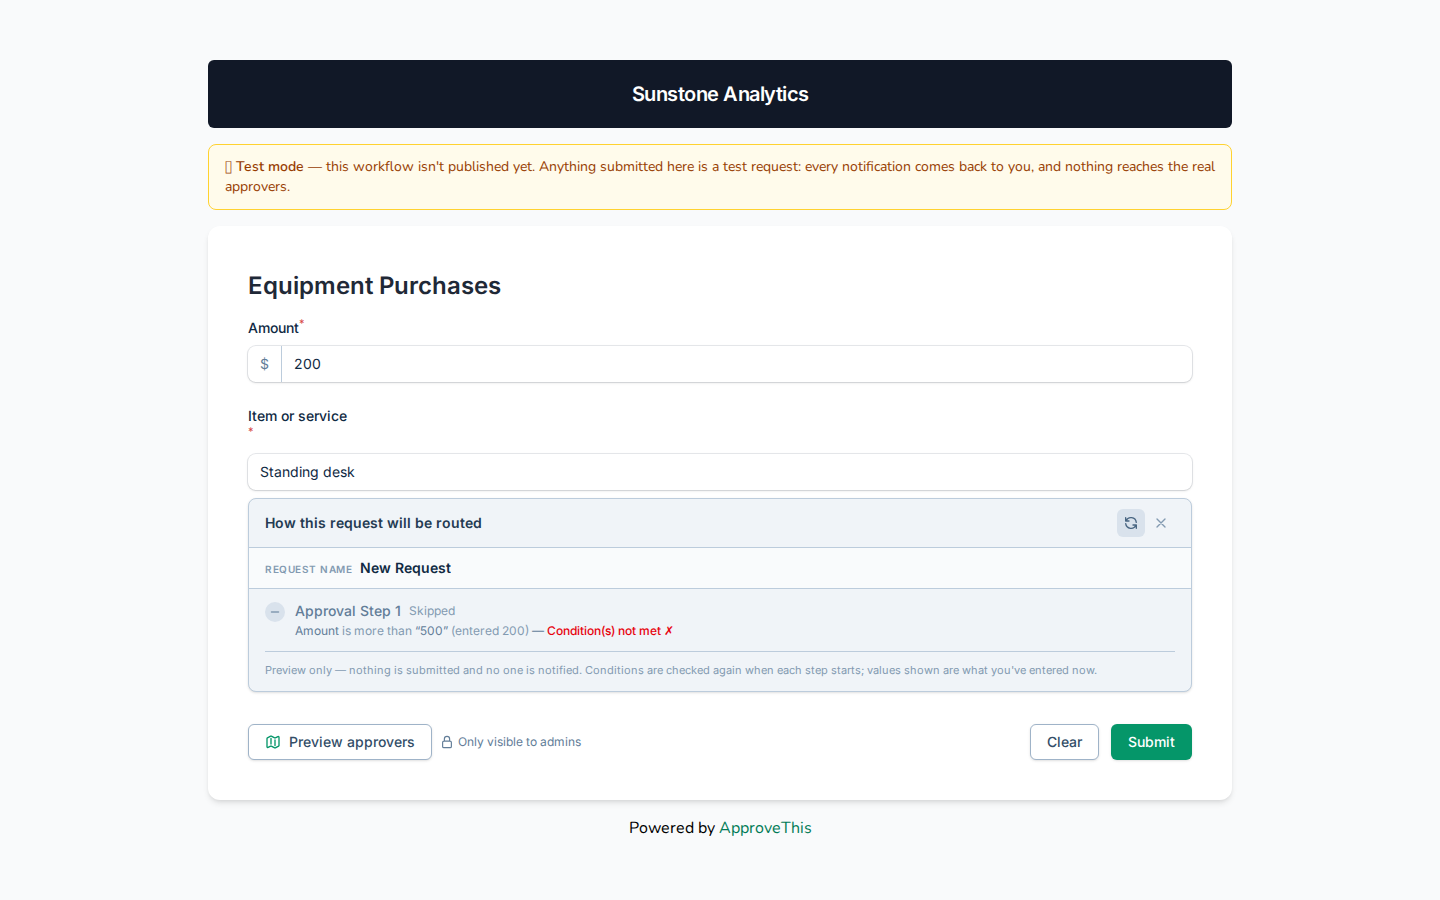
The preview is a simulation. Nothing is submitted and no request is created, so re-run it on both sides of every threshold until the routing matches the written policy.
Full click-by-click: Workflow Preview
A buyer submits, and approvers decide from their inbox
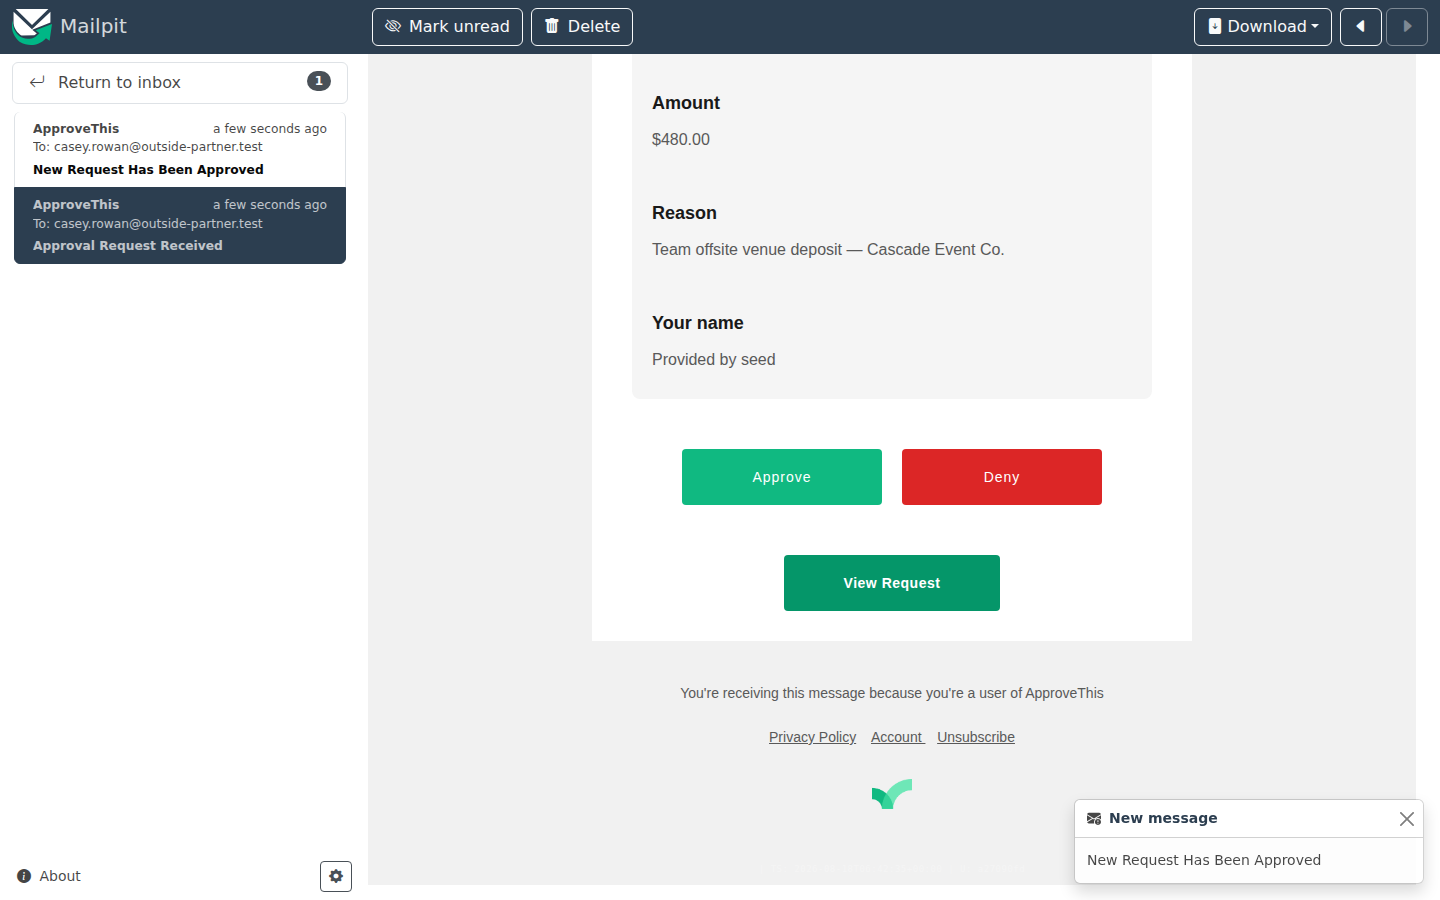
Now the workflow does the enforcing. A buyer opens the form, enters the vendor and line items, and submits; the total computes on submission and the request routes only through the steps its amount triggers. The manager receives a notification email with the Approval Request Received heading, and one click on Approve in that email records the decision — the link carries a signed URL that logs the approver in for that single action, so no password prompt interrupts it. The screen answers with You approved this request. We'll let everyone know. Approvers with 2FA enabled, or on a workflow that requires approvers to log in, sign in first. For a large PO the controller decides next the same way, then the CFO.
Full click-by-click: Login-Free Approval Links
The record the controller actually needs
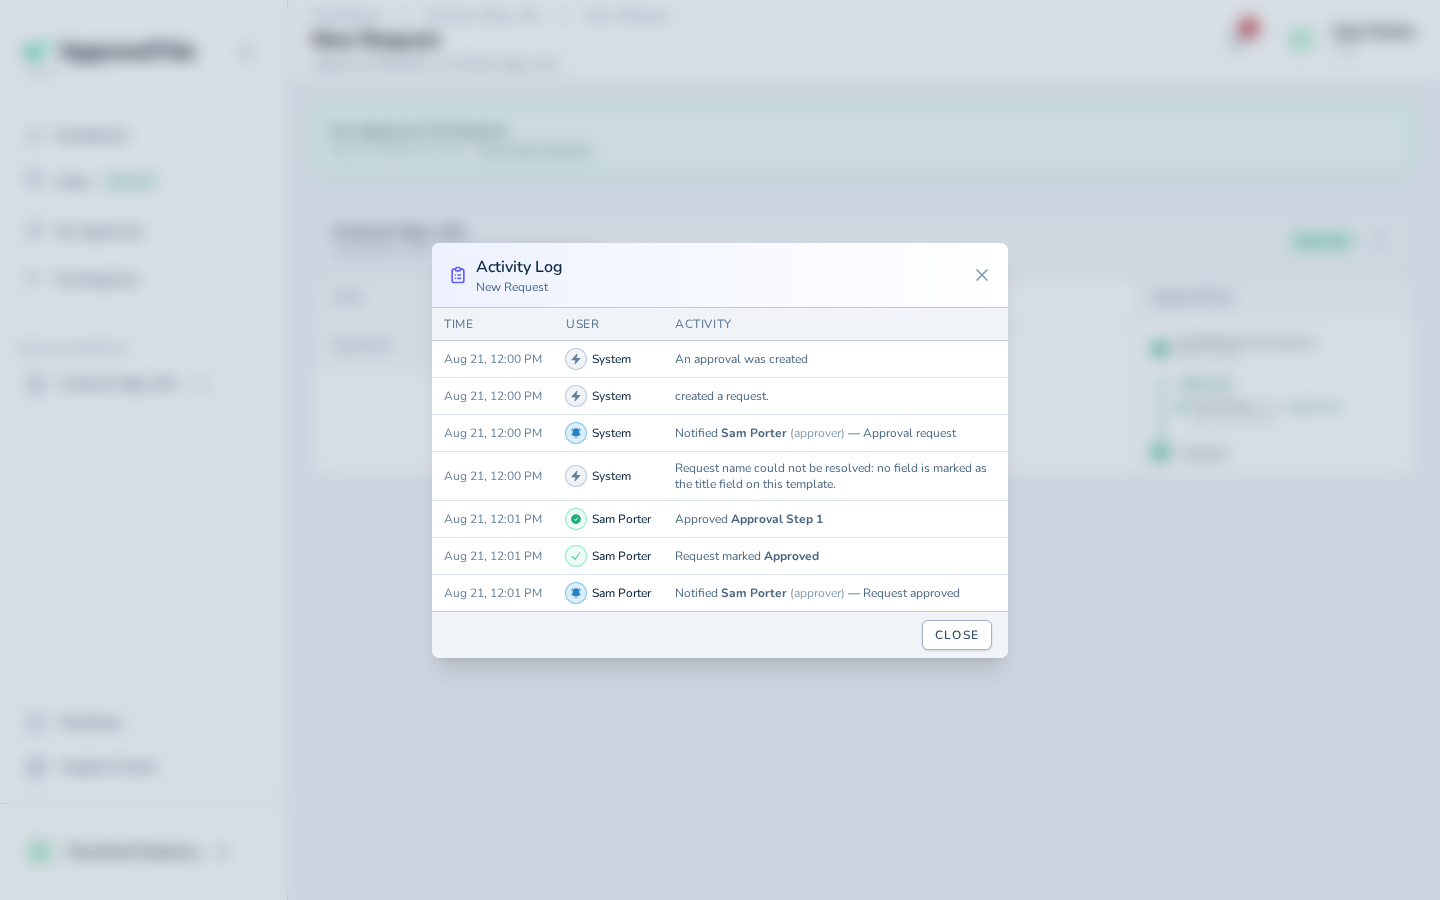
When an auditor, or the CFO, asks who approved a PO and when, the request answers for itself. Open the request and click Activity Log, the clock icon in the request header. The timeline lists every event in order: each decision, each routing evaluation, and each notification with its named recipient, along with who acted (or 'System') and the timestamp. A decided request shows the row Request marked Approved. Workspace members who can edit the workflow also get the workflow's own Activity tab, a searchable audit table across all of its requests with CSV/Excel export, which is the month-end view of spend control working.
Full click-by-click: Activity Log & Audit Trail
Related guides
- Building Workflows — the ways to create the workflow itself: guided setup, ready-made types, or copying one you already trust.
- Template Library — ready-made forms to start from instead of a blank page; approvers and routing are still yours to add.
- Workflow Testing — run real end-to-end test requests before publishing, with every notification redirected back to you.
- Dynamic Request Naming — title each request from its form answers, so a list of POs reads vendor and amount at a glance.
- Approval Reminders — recurring email nudges for approvers sitting on a pending PO; off by default, switched on per flow.
- Activity Log & Audit Trail — the full detail on the request timeline this walkthrough ends on.
- Login-Free Approval Links — the full detail on one-click email decisions, including when a sign-in is still required.