Expense and reimbursement approvals with receipt proof
Claims arrive with receipts attached, over-limit spends escalate to finance, and the paid batch exports and then archives.
Updated
Expense claims arrive however each employee likes to send them: a spreadsheet here, a photo of a crumpled receipt there, sometimes a total with no receipt at all. Each manager approves by their own rules, so a claim one team waves through gets bounced on another. Then it all lands on the finance ops manager, who chases missing receipts, re-keys every line into the reimbursement run, and has no clean record of who approved what.
One expense workflow fixes all three problems. The finance ops manager builds it, starting from a ready-made form in the library. Employees submit claims with receipts attached. Line managers approve from their inbox with the receipt in view, and claims over a limit pick up an extra finance approval automatically. At the end of the month, finance exports the approved batch for the reimbursement run and archives what's been paid.
What you'll set up
- A claim form with category, amount, and receipt upload fields, each marked required so incomplete claims can't be submitted
- A manager approval step, plus a finance step gated by a threshold condition so it only runs for over-limit claims
- Approval emails that preview the receipt inline, so approvers decide without downloading anything
- A CSV export of the request history for the reimbursement run, recorded in the workflow's audit trail
- A bulk archive of the paid batch, keeping the request list focused on open claims
Pull a ready-made expense form from the library
Create a new workflow and open the Form Library tab of the flow-type picker. It holds 146 ready-made workflows in one flat searchable list, each arriving with a complete pre-built form. Type a word like expense into Search flow types... rather than hunting for a department grouping. The library builds the form only; approvers, routing, and conditions are always configured after the workflow exists, which suits you here because the routing is where your company's own limits go.
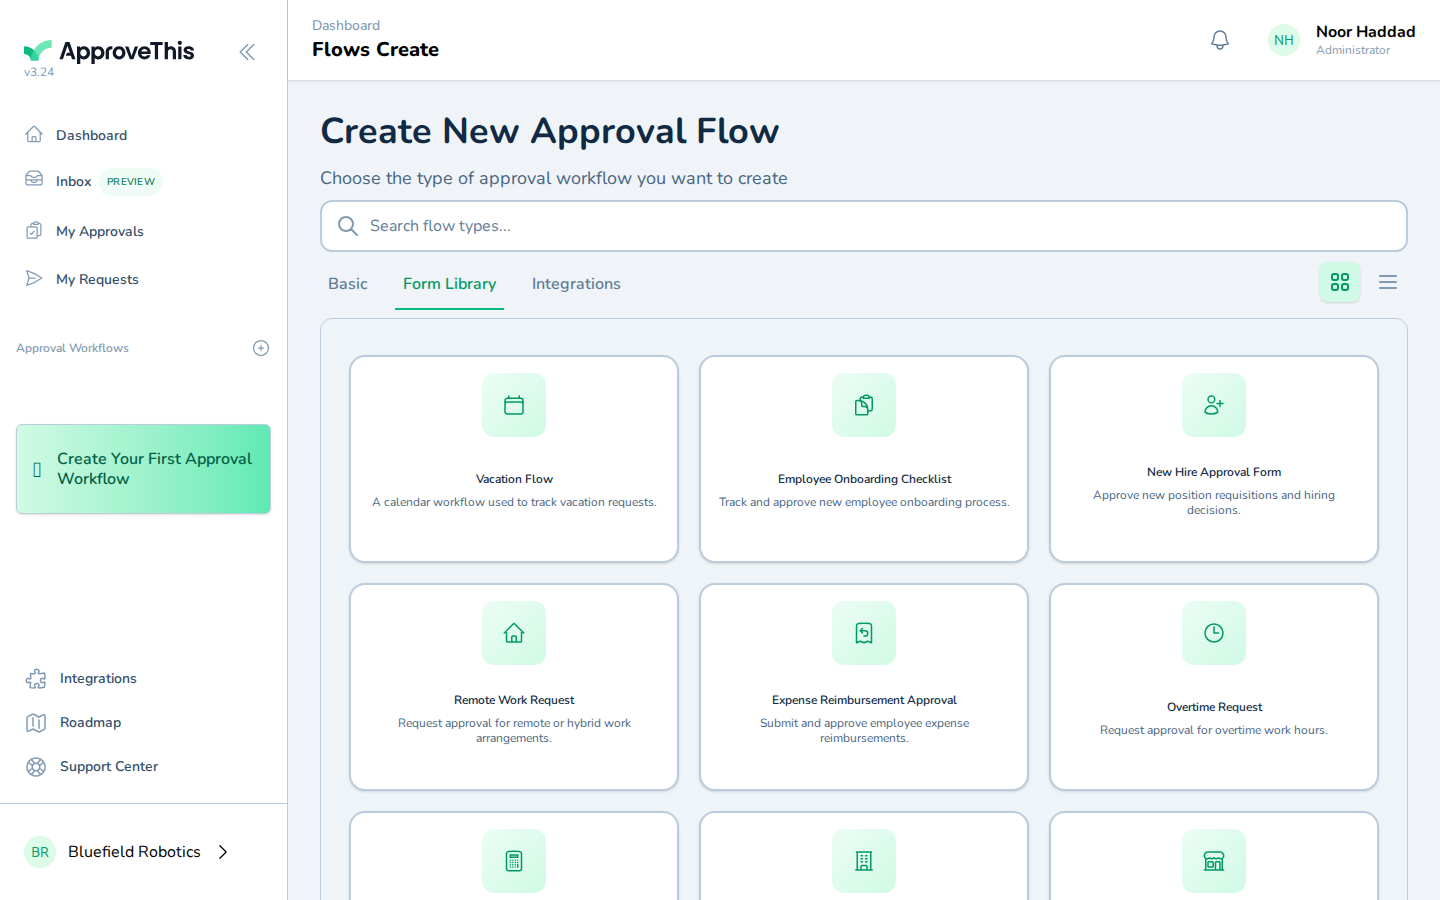
Click the card that fits, review its pre-built fields on the Configure Your Approval Flow screen, name it in Approval Flow Name, and click Create Approval Flow. The example screenshots search onboarding and pick Employee Onboarding Checklist; your search term and card will be expense-shaped, but the flow is identical.
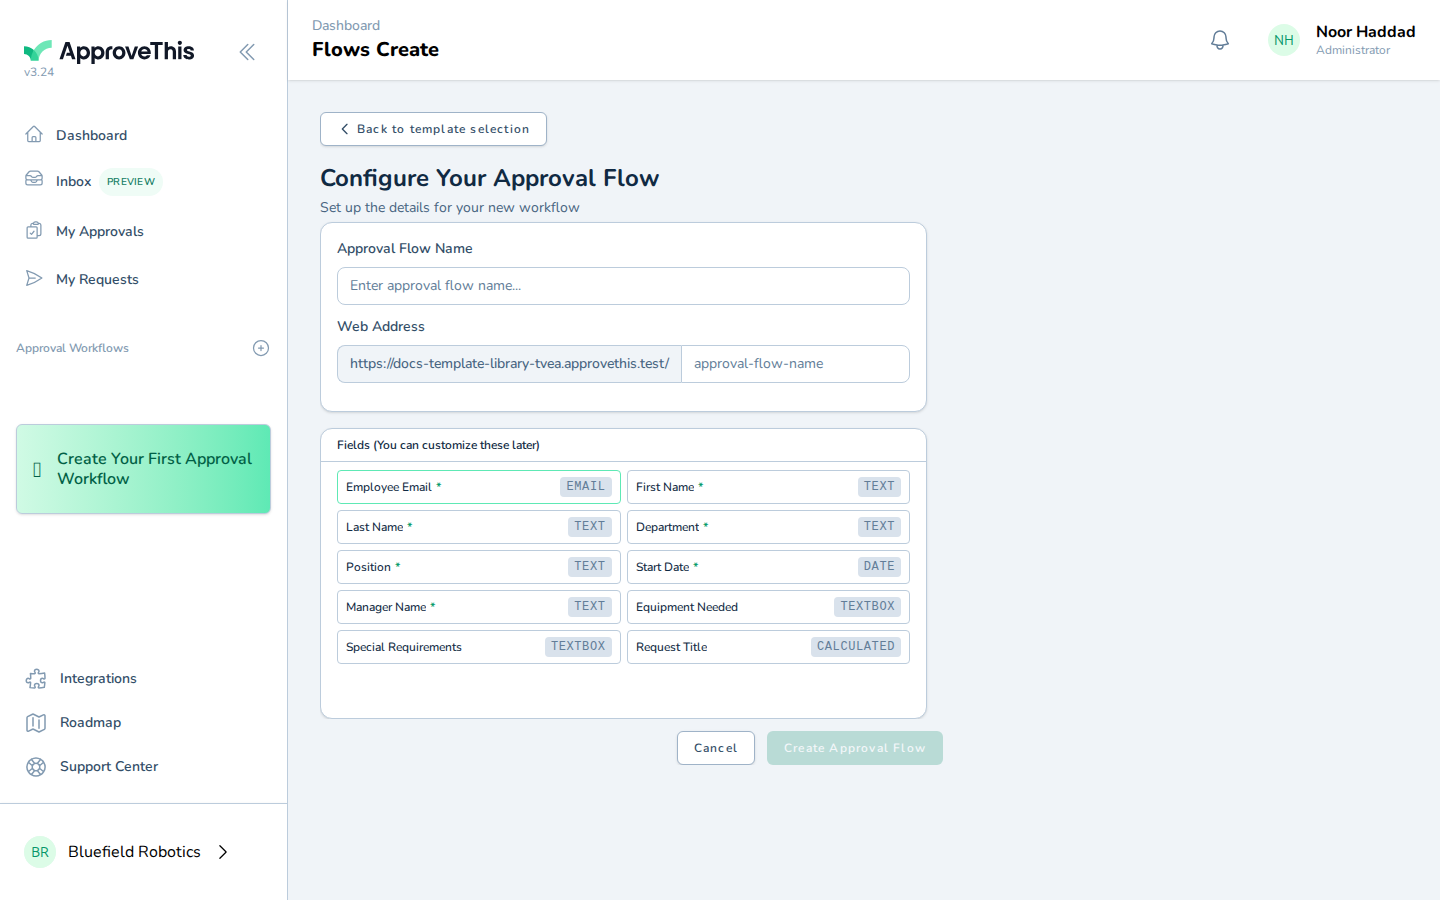
The new workflow lands as Draft — testing mode., so nothing reaches real approvers until you publish.
Full click-by-click: Template Library
Make the form demand what finance needs
Open the workflow's Form tab and shape the pre-built form around finance's three non-negotiables: a category, an amount, and the receipt. Library forms arrive with their field set in place, so most of this is adjusting rather than building. Where a field is missing, click Add Field and pick the type that matches, such as Currency Monetary amounts for the claim amount.
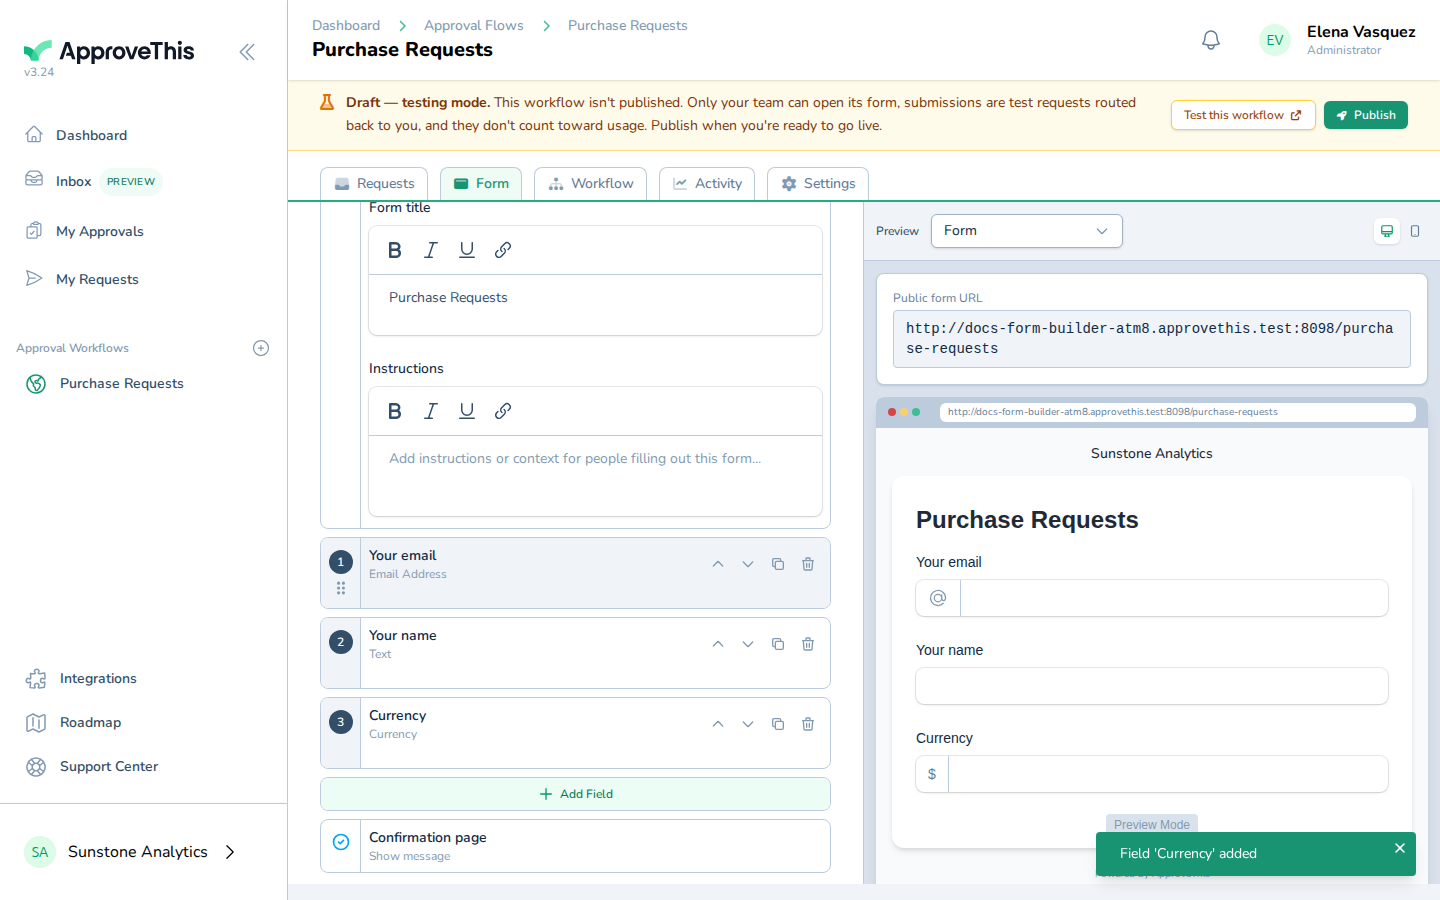
Click each field to set a label employees will understand, and mark the category, amount, and receipt fields Required, because a claim missing any of them is exactly what finance currently spends its time chasing. Add help text where a field invites wrong answers; the example's currency field carries the guidance Enter the total amount in USD, including tax and shipping., which is the kind of instruction that stops under-claimed tax arguments later. Use Move up to put the fields in the order people should answer them.
Full click-by-click: Form Builder
Gate the finance step behind your reimbursement limit
On the workflow's Workflow tab, set up your two approval steps: the line manager first, then finance. The finance step should not slow down a coffee receipt, so gate it. Click Configure step on the finance step, open Conditions, and click Add Condition. Choose your amount field under Field, Greater than under Operator, and your limit under Value.
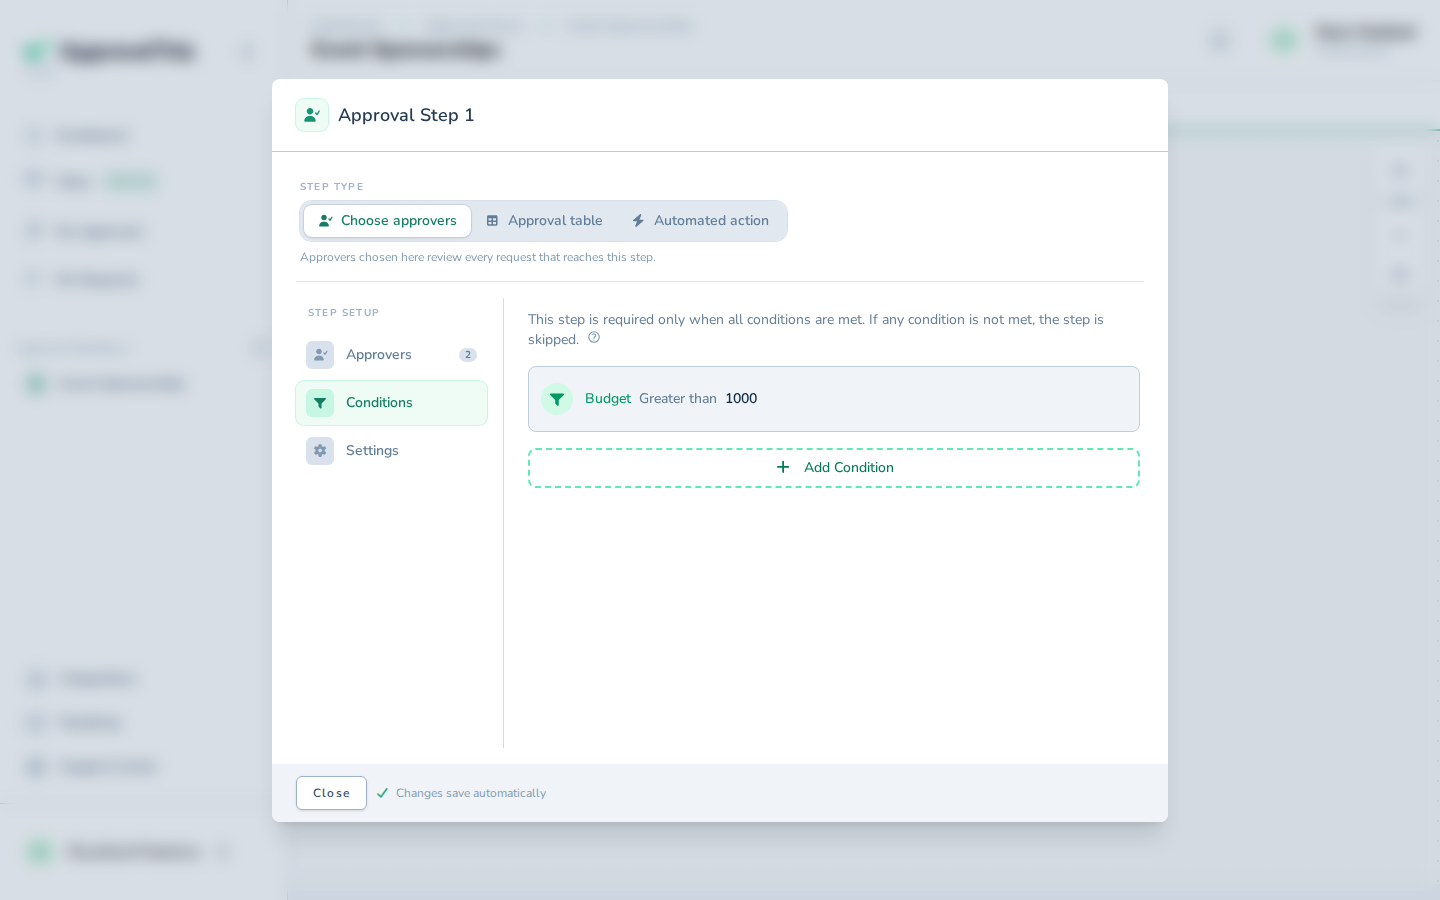
The example gates on Budget Greater than 1000; in your expense workflow the field is whatever you labeled the claim amount. When the condition isn't met, the step is skipped and the request finishes at the manager. Conditions combine with AND logic; a Contains match on a category field would narrow the step further. Changing the threshold only affects claims submitted afterwards — open claims keep their original routing.
Full click-by-click: Conditional & Threshold Routing
An employee submits, receipt attached
Once published, an employee opens the form however you share it, such as a link or the flow's New Request button. They enter the claim in Amount, attach the receipt using Drag & Drop your files or Browse, and describe the spend, then click Submit. Because you marked those fields required, there is no path to a receiptless claim.
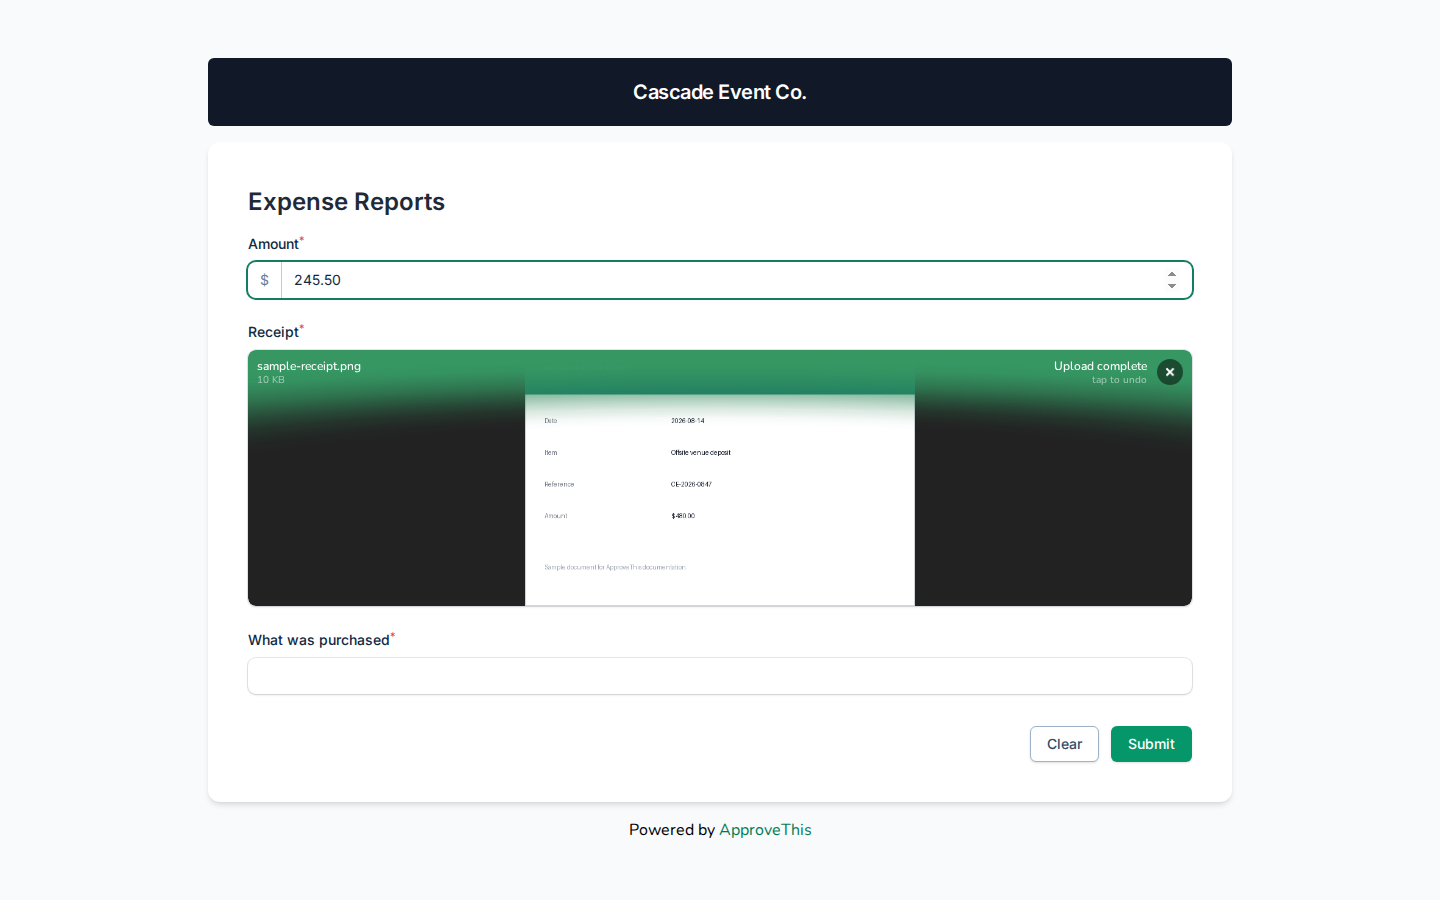
The form confirms the submission and the approvers are notified. The example screenshots walk an Expense Reports form with an Amount, a receipt upload, and a What was purchased field, which is close to what your library form gives you.
Full click-by-click: Submit a Request
The manager decides with the receipt in view
The approval email that reaches the manager carries the receipt as an inline preview: an image thumbnail or PDF preview with the filename, size, and a download button, so they judge the claim without leaving their inbox. Non-previewable file types fall back to a download link — a receipt photo or PDF previews, an odd format arrives as a click.
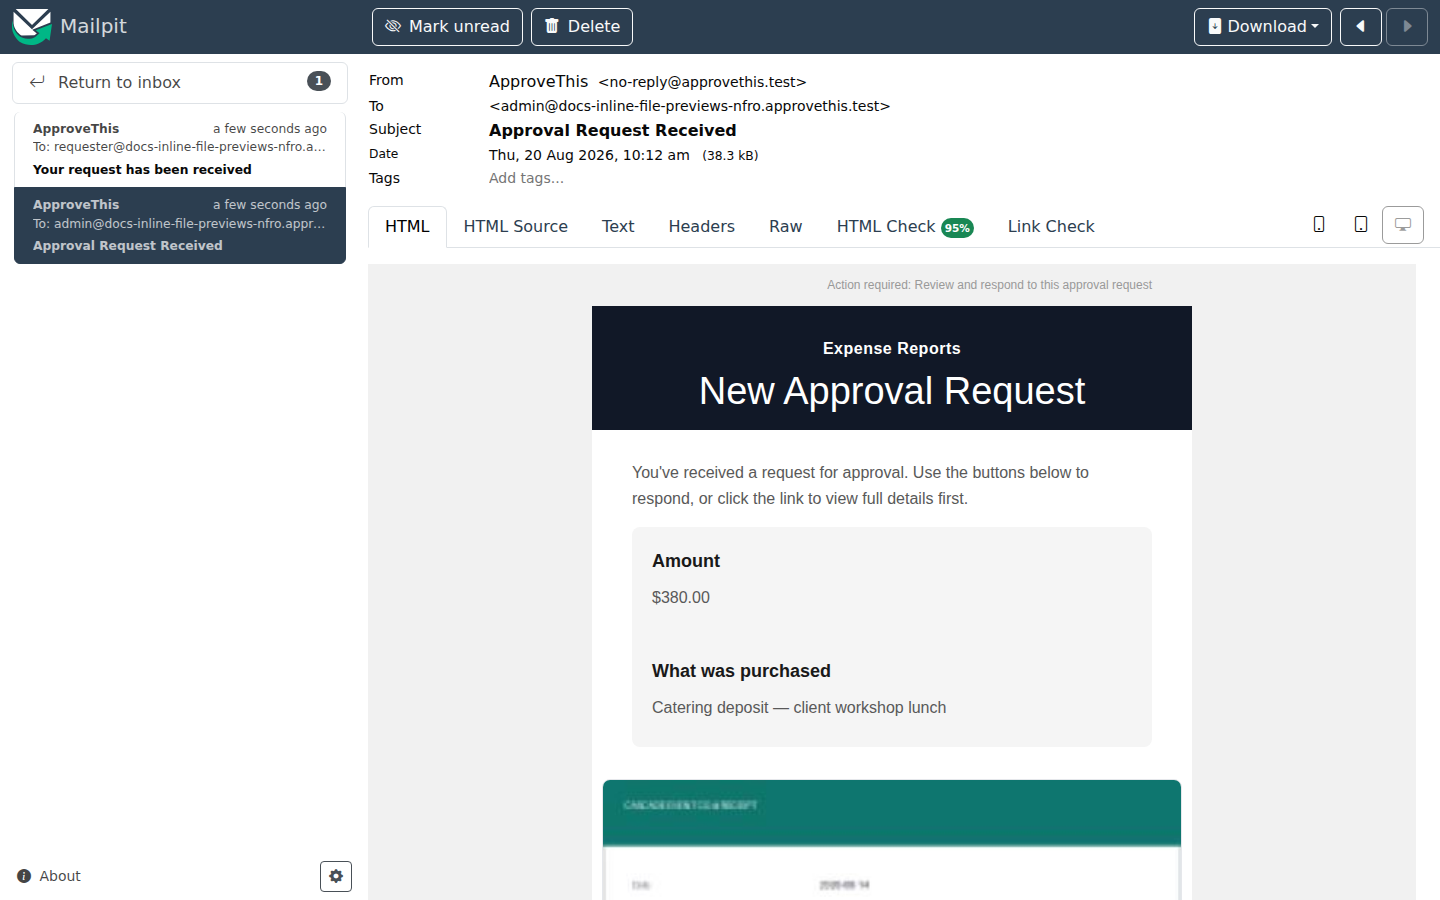
If a manager is about to be away, they set their own vacation window and name a delegate in their account settings, and their approvals route to that person for exactly those dates. No admin intervention, no claims aging in an empty queue. See Related guides below.
Full click-by-click: Inline File Previews
Run the reimbursement batch and clear the board
At reimbursement time, the finance ops manager opens the workflow's Requests view to see what's approved and what's still pending, then goes to the Activity tab, opens the Requests sub-tab, and clicks CSV. The file downloads with one row per request and one column per visible form field, so category, amount, and requester land in spreadsheet columns with no re-keying.
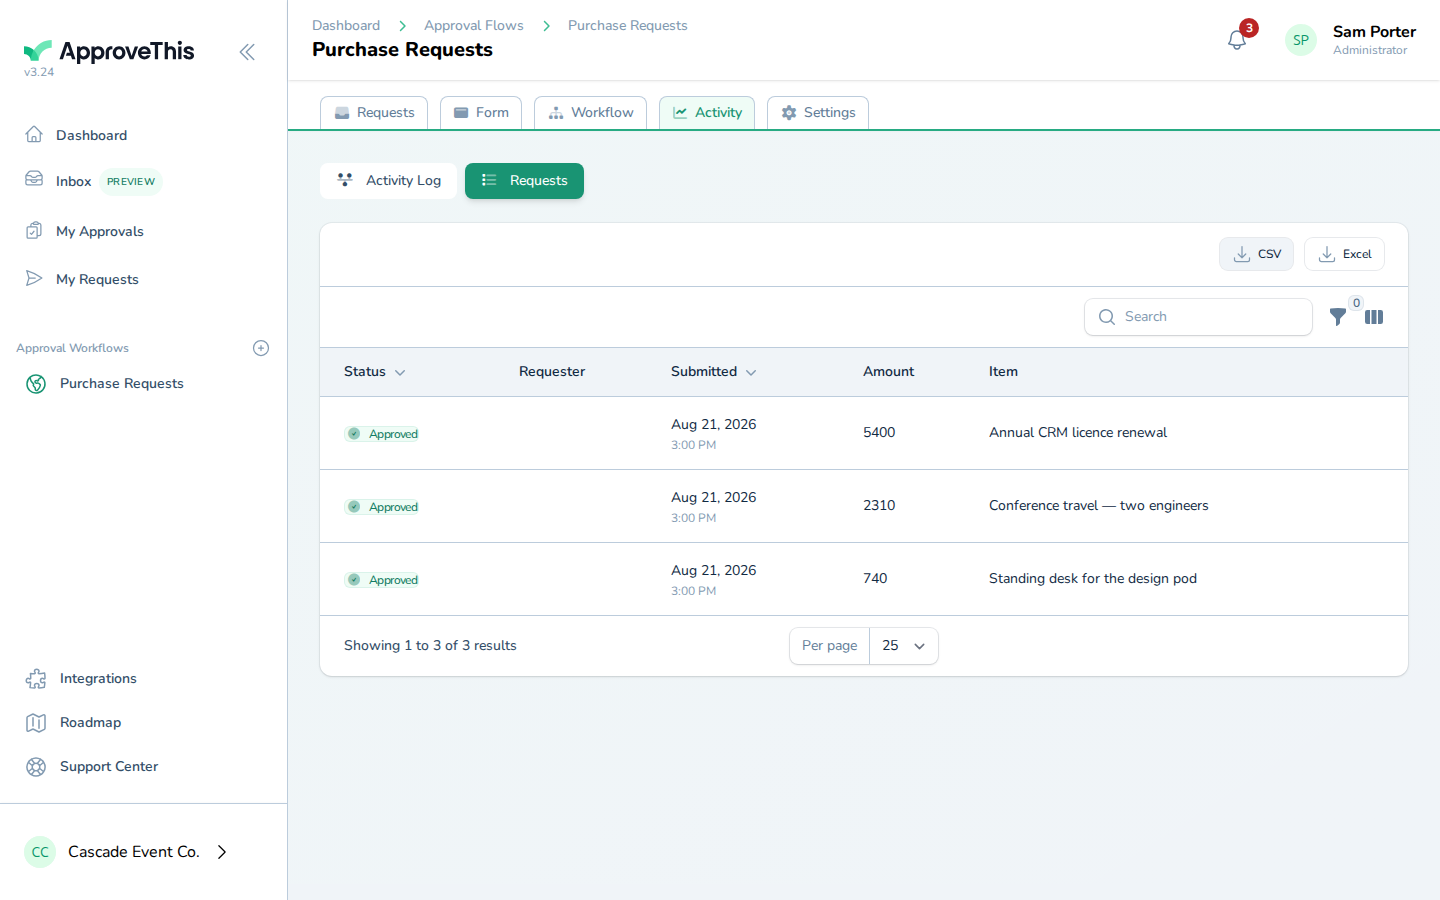
Two limits matter here. The export honors the table's search text and sort order but not the Status or date dropdown filters, so filter the paid batch in your spreadsheet rather than trusting a status dropdown. And the export itself is recorded in the Activity Log as Exported requests as CSV, which is your audit answer for who pulled the data.
After the run is paid, switch the board to its Table view, tick the checkbox on each paid request, click Archive selected, and Confirm.
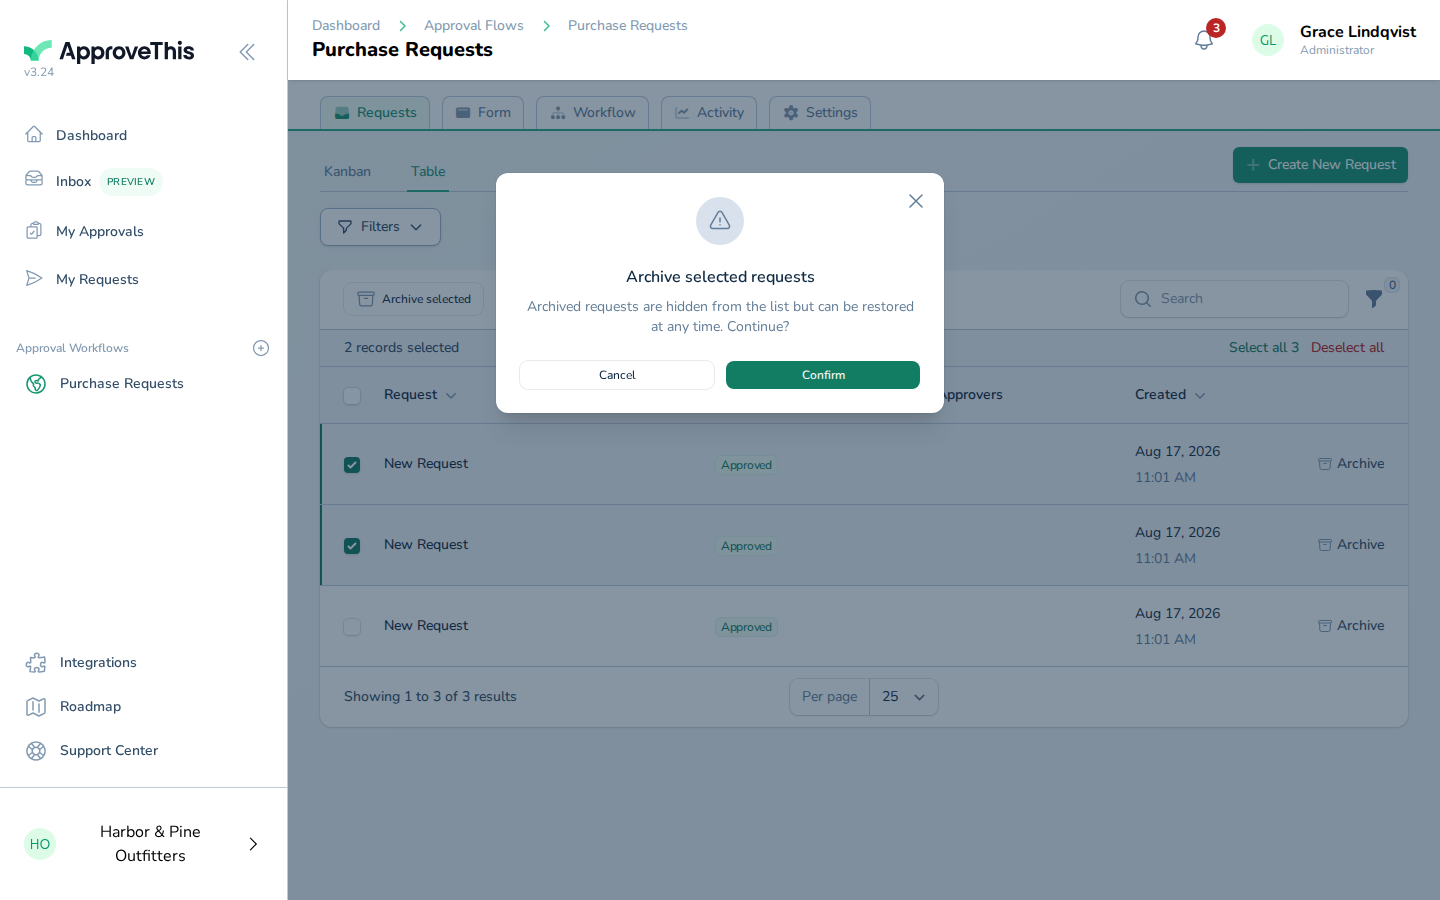
Archived requests drop off the list but are not deleted; the Show Archived filter brings them back and any of them can be restored.
Full click-by-click: Request & Activity Export (CSV / Excel)
Related guides
- Vacation & Delegation — when an approver will be away and their claims should route to a delegate for a set window.
- Workflow Dashboards — when finance wants the same claims as a Kanban board, sortable table, or calendar.
- Bulk Archive Requests — the full click-by-click for archiving a paid batch and restoring anything cleared too early.
- Login-Free Approval Links — when managers should approve from the email in one click, no sign-in.
- Calculated Fields — when a total or reference code should be computed from other answers instead of typed.
- Approval Reminders — when claims stall because approvers forget, not because they object.