Human approval gates inside your automations
Put a human decision inside an automated pipeline. A Zap or webhook raises the request, a person decides, and your systems read the outcome back over the API.
Updated
The ops lead at a software company has wired the stack together well: the CRM talks to billing, form tools talk to the data warehouse, internal scripts move records overnight. What the stack lacks is a place for a human to say no. Refund requests over a certain amount, vendor onboarding records, ownership changes on big accounts all face the same bad pair of options. Either the automation pushes them through unreviewed, or someone breaks the record out into an email thread and the pipeline loses sight of it until a person remembers to follow up.
The build that follows puts a machine-readable approval gate in the middle of that pipeline. The ops admin creates a workflow that upstream systems trigger directly, maps the arriving payload onto form fields once, and adds a threshold so only risky records stop for review. A manager approves or denies from email in one click, and the admin's downstream systems read the decision back over the REST API with a personal token. Four parties act: the upstream system that sends the event, the admin who builds it, the manager who decides, and the downstream system that consumes the outcome.
What you'll set up
- A workflow upstream events can trigger: from the Create Zapier Flow tile if the event lives in a Zapier-connected app, or as an inbound-webhook flow with its own endpoint URL for your own scripts
- A one-time field mapping that turns arriving payload keys into request fields, including who the requester is
- A threshold condition on the manager's step, so records under the line pass without waiting on anyone
- One-click approval from the notification email, no sign-in required
- A personal API token so downstream systems read the decision over the v1 REST API
Give upstream events a place to land
There are two entry paths, and which one you take depends on what sends the event. Keep them distinct: the Zapier path is not an API or token flow, and the webhook path never touches Zapier.
If the event starts in an app Zapier already connects (a CRM stage change, a form submission), go to Integrations in the sidebar and use the Zapier row. Clicking Create Zapier Flow and entering an Approval Flow Name creates the workflow your Zaps will target; the example names it CRM Deal Approvals.
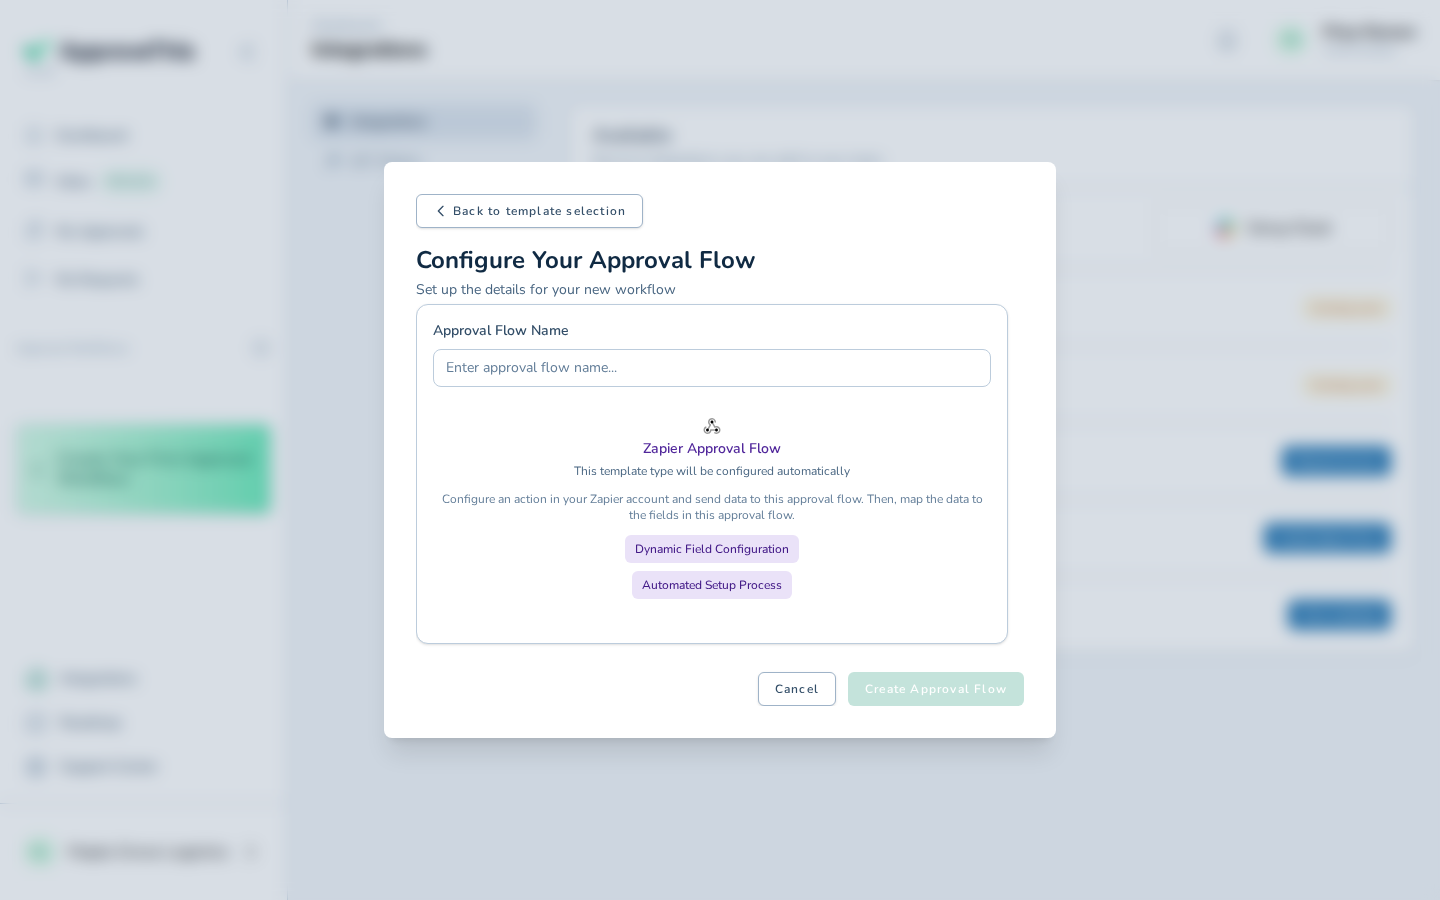
The rest happens on Zapier's side: add the ApproveThis app to a Zap, connect from there, pick this workflow, and every Zap run posts its data in as a new request.
If the sender is your own script or an internal tool that can POST JSON, build the workflow from the new-flow page instead. When the setup asks how requests will arrive, select Another tool; after Create & test, the flow's Webhook endpoint URL is shown. That URL is what your code POSTs to.
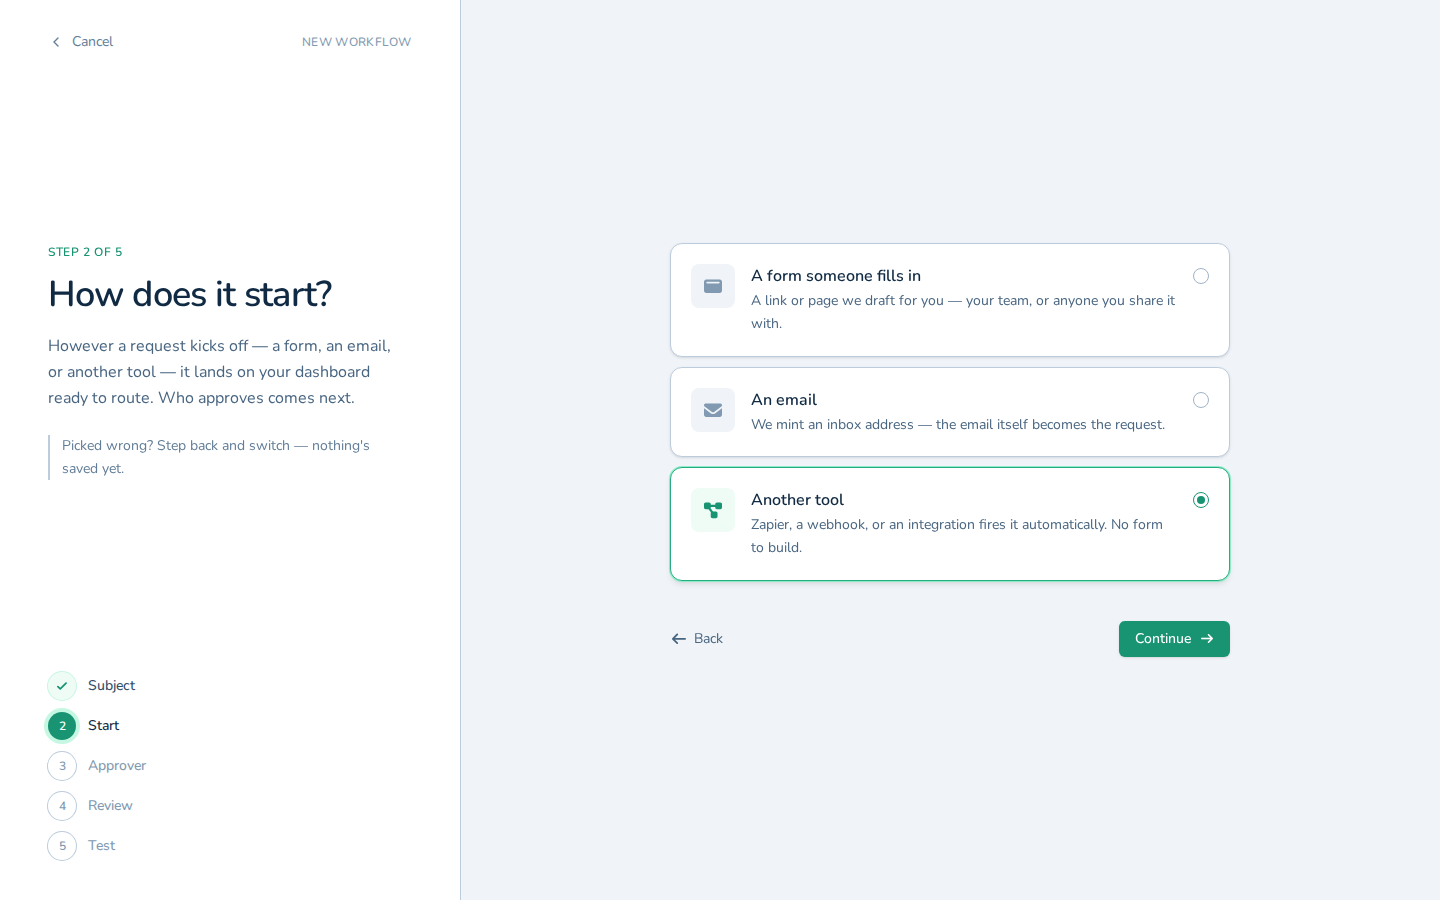
Either way, until you publish the workflow, incoming requests route back to you for testing, which is exactly what you want while the mapping is unproven.
Full click-by-click: Zapier and Inbound Webhook Triggers
Teach the workflow your payload's shape
A brand-new workflow doesn't know your payload yet, so let the first real events fire. Those payloads are held rather than lost, and the workflow's page shows a banner offering to map them. Click Map them to open the field-mapping screen.
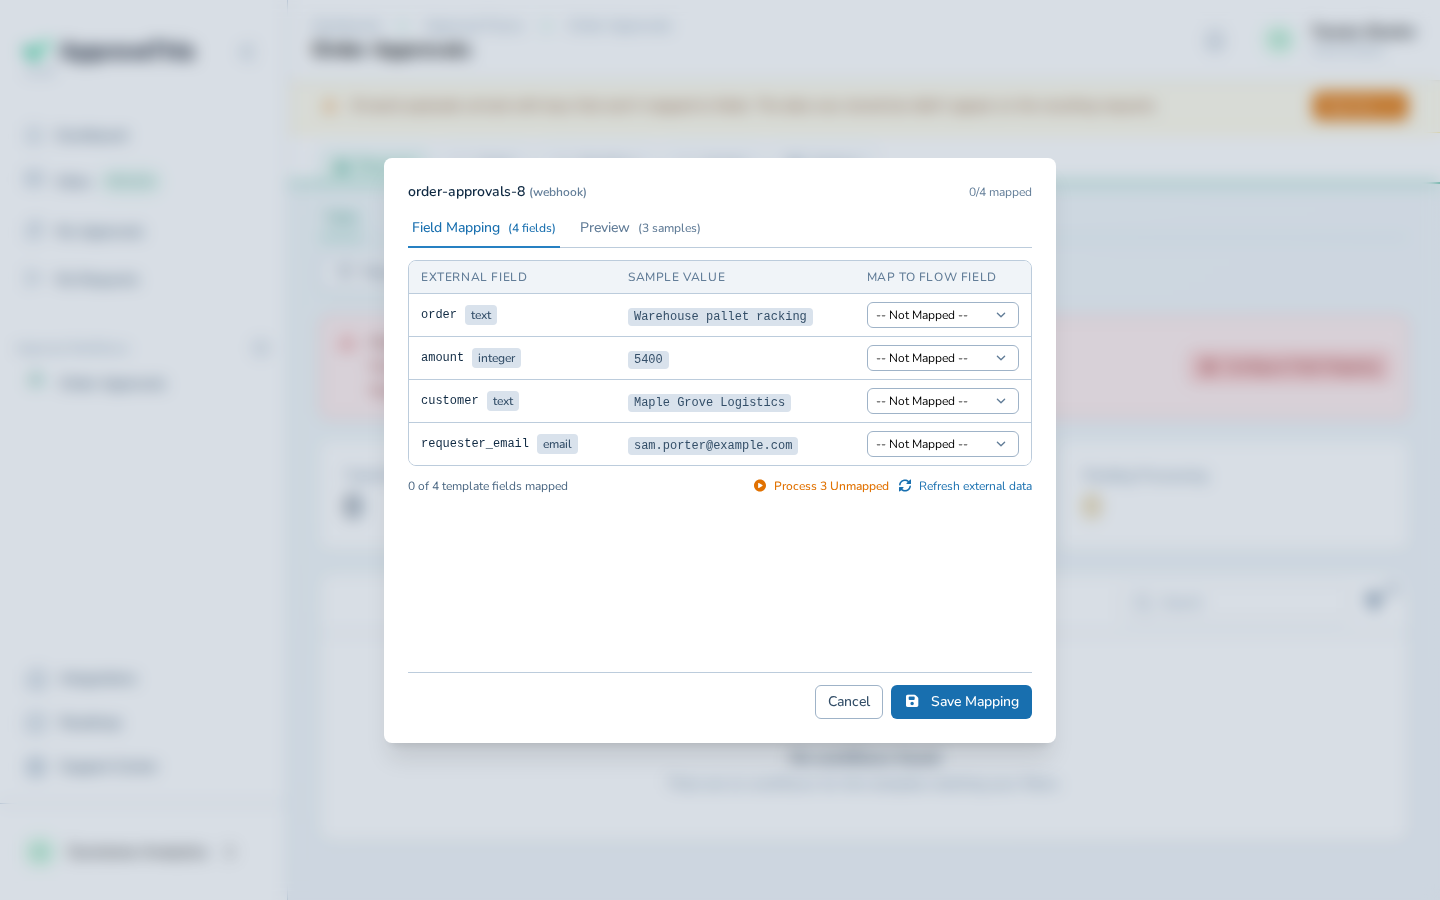
Each selector pairs one payload key with one form field. The example maps order, amount, and customer keys onto Order, Amount, and Customer fields; a refund payload might carry charge_id and refund_amount instead, and the mechanism is the same. The mapping that matters most for an automation is the requester one: point the payload's email key at the requester field so every generated request is attributed to a person, not to the integration.
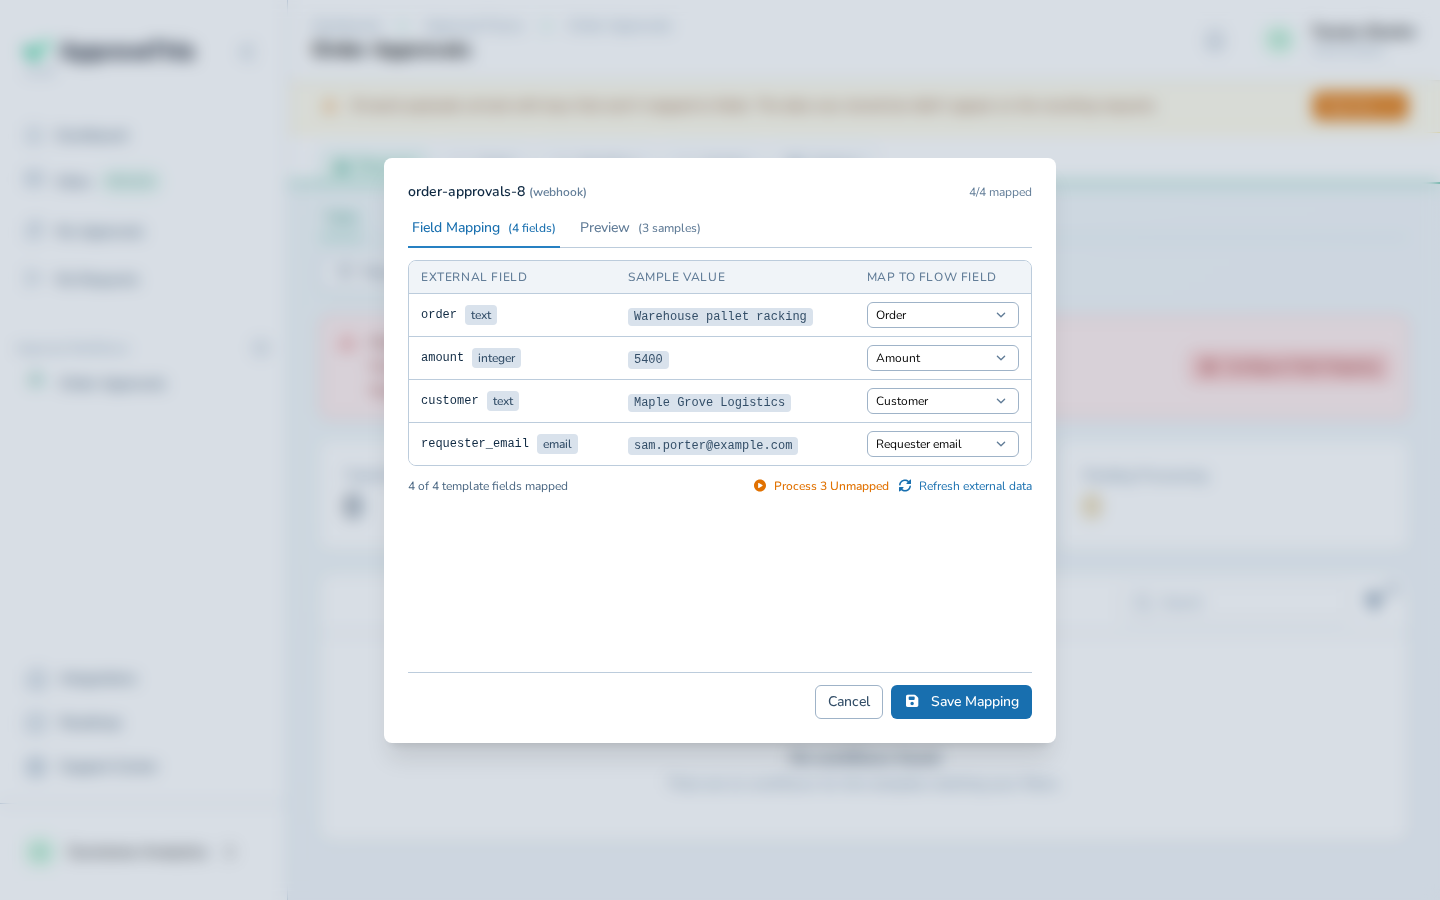
After Save Mapping, the payloads that arrived before the mapping existed are still queued. Click the process button to convert them; in the example three were waiting, so it reads Process 3 Unmapped.
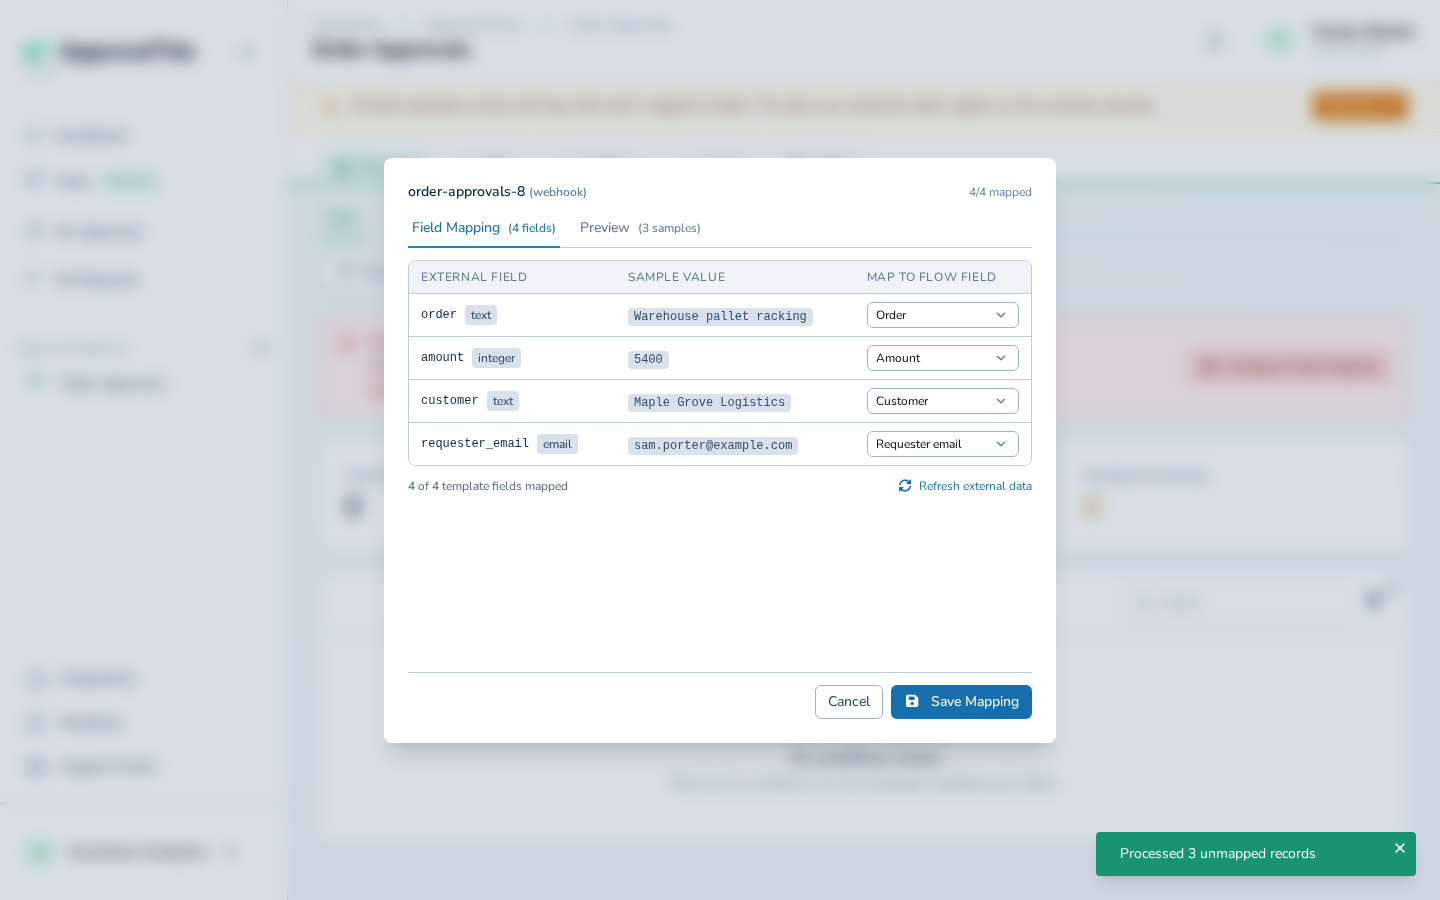
From here on, every payload becomes a request the moment it arrives. One behavior to plan around: a payload with missing or extra keys still comes through with whatever maps. Only a payload where nothing maps at all is held behind the banner again, so don't count on the hold to catch partially formed records.
Full click-by-click: External Data Endpoints
Gate the risky records with a threshold
The point of the gate is that a $40 refund should never wait on a manager while a $4,000 one always does. On the workflow's Workflow tab, click Configure step on the manager's approval step, open Conditions, and click Add Condition. If your chain doesn't have that step yet, add it in the builder first (Add an Approval Step).
Pick the form field to test, an operator, and a value. The example gates on a Budget field being Greater than 1000; in this scenario you'd test the mapped amount field at whatever line your review policy draws.
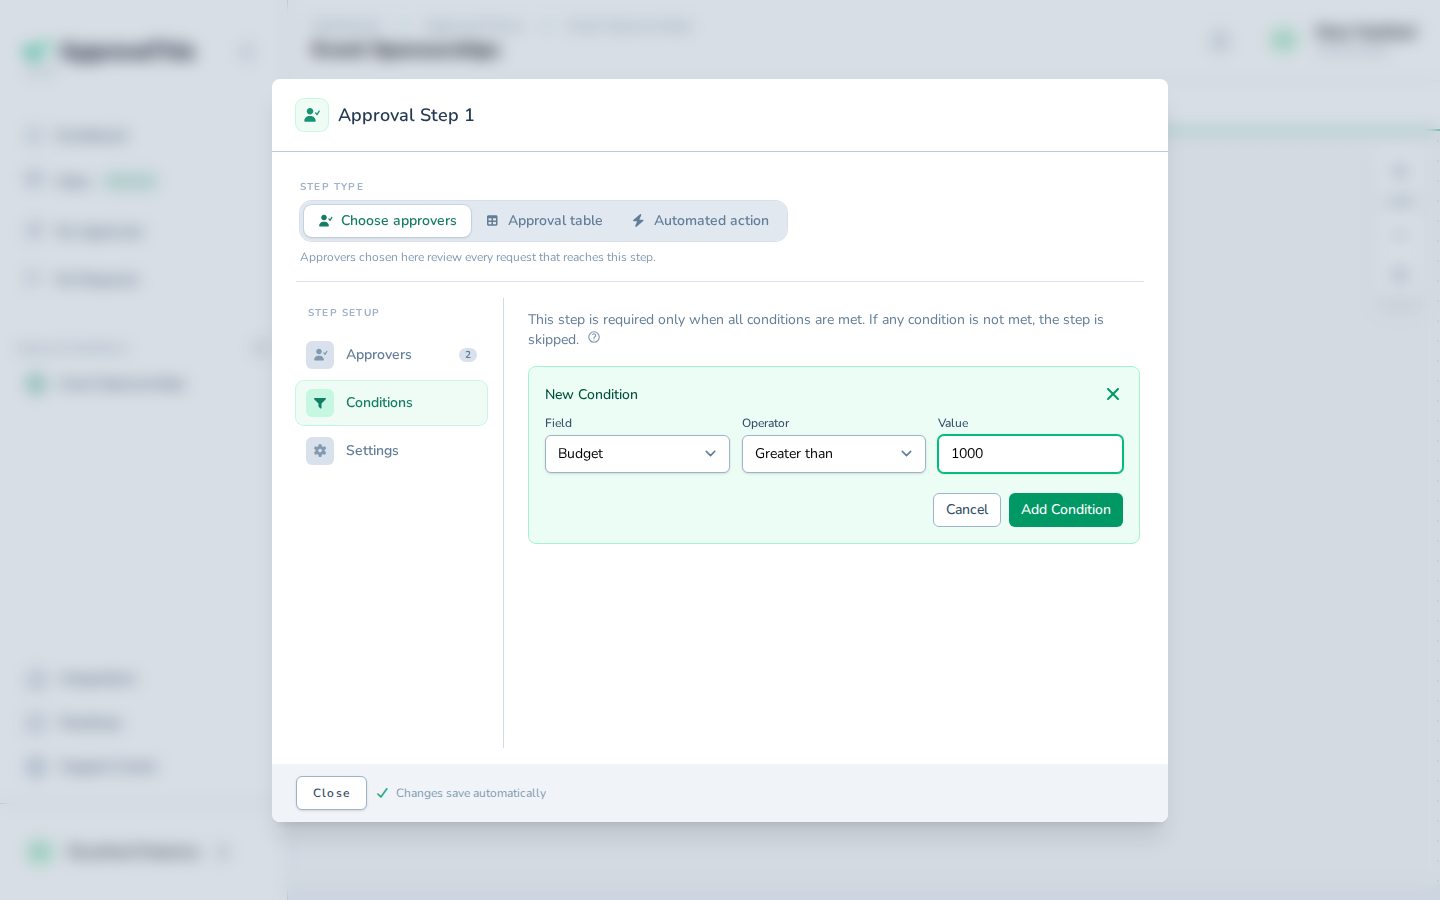
Conditions combine with AND, so a second condition (say, a Contains match on a category field) narrows the step further rather than widening it. Requests under the threshold skip the step and follow the rest of the path unreviewed, which is the designed behavior, not a failure. A condition change applies from the next request onward; requests already created are never re-routed.
Full click-by-click: Conditional & Threshold Routing
One click from the manager's inbox
The manager should not need another dashboard. When a request stops at their step, the notification email carries login-free approval links: a signed URL logs them in for that single action, so clicking Approve in the message records the decision immediately.
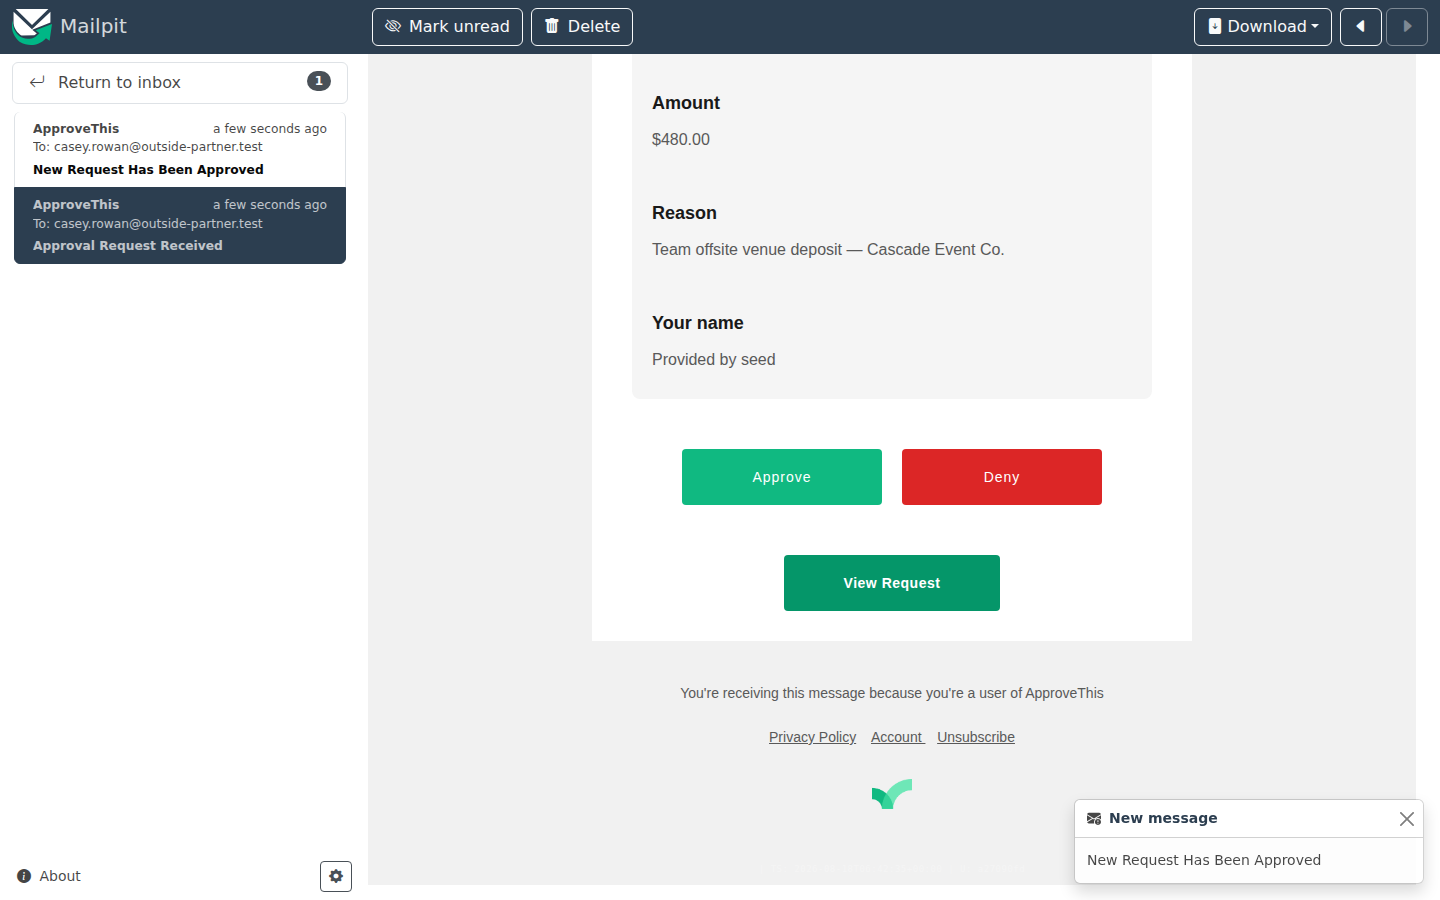
The email answers with You approved this request. We'll let everyone know. Approvers with 2FA enabled, or on a workflow that requires approvers to log in, are asked to sign in first.
Full click-by-click: Login-Free Approval Links
Let downstream systems read the decision
The last leg closes the loop: whatever waits on the decision (the billing script, the provisioning job) reads it over the v1 REST API. On Integrations, open the API Tokens tab, enter a Token Name describing the system that will hold it, and click Create token.
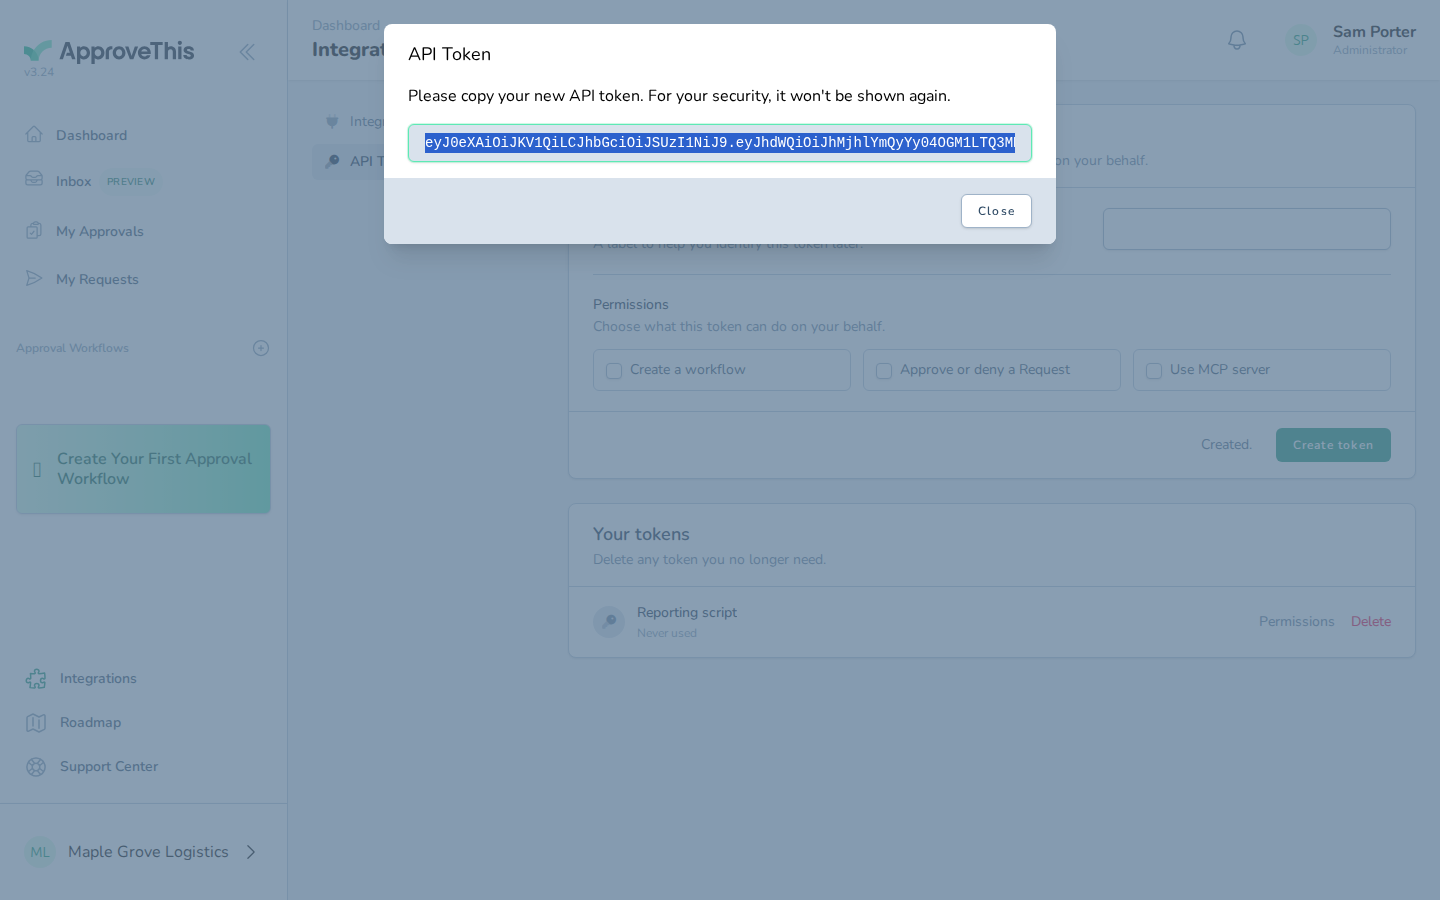
The token value appears once, in a modal that says Please copy your new API token. For your security, it won't be shown again. Store it in your integration's secret store on the spot. Used as a Bearer token under /api/v1, it can list and create workflows, read a workflow's form fields, submit requests, approve or deny pending approvals, and manage outbound webhook subscriptions; the interactive reference at /docs/api documents every endpoint.
Three constraints shape how you build against it. Every call requires an active subscription. Tokens are all-or-nothing, with no scopes, so treat one like an admin credential. And requests are immutable over the API and cannot be created against an unpublished workflow, so publish the workflow before pointing production traffic at it.
Full click-by-click: REST API & Personal API Tokens
Related guides
- Workflow Testing: run real requests through the chain before publishing, with every notification redirected back to you.
- Dynamic Request Naming: title each request from its mapped fields so a queue of machine-created requests stays tellable-apart.
- Email-to-Workflow: when the upstream system is an inbox, give the workflow its own email address instead of an endpoint.
- Activity Log & Audit Trail: the per-request timeline of decisions and notifications, for when someone asks who approved what.
- Login-Free Approval Links: the full detail on the one-click email decision, including when a sign-in is still required.