Invoice approvals straight from the inbox
Vendors email PDFs straight into the workflow. Fields fill themselves from the attachment, and approvers decide without leaving email.
Updated
Vendor invoices arrive as PDF attachments in a shared AP inbox. An AP clerk opens each one, re-keys the vendor and amount into a tracking spreadsheet, then forwards the email to whoever owns the budget and waits. Approvals live in reply chains, the controller hears about large commitments after the money is committed, and month-end close means matching a spreadsheet against an inbox, one forwarded thread at a time.
An email-triggered workflow replaces the routine. The AP manager builds it once: the workflow gets its own inbound email address, a document processor reads each attached invoice onto the form fields, and every incoming email becomes a request titled by vendor and amount. The budget owner approves from the notification email itself, with the invoice previewed inline. Invoices over a threshold add the controller as a second approver. At month end, the requests table exports to a spreadsheet for reconciliation.
What you'll set up
- A workflow with its own Mailbox address, so every emailed invoice becomes a request automatically
- The Invoice document processor, so values extracted from the attachment land on matching form fields
- A request-name formula, so the dashboard reads as vendor and amount instead of a wall of identical titles
- Two approval steps: the budget owner on every invoice, the controller gated behind an amount threshold
- Approval emails the budget owner can act on in one click, with the invoice previewed inline
- A CSV / Excel export of the requests table for month-end reconciliation, recorded in the audit trail
Give the workflow its own email address
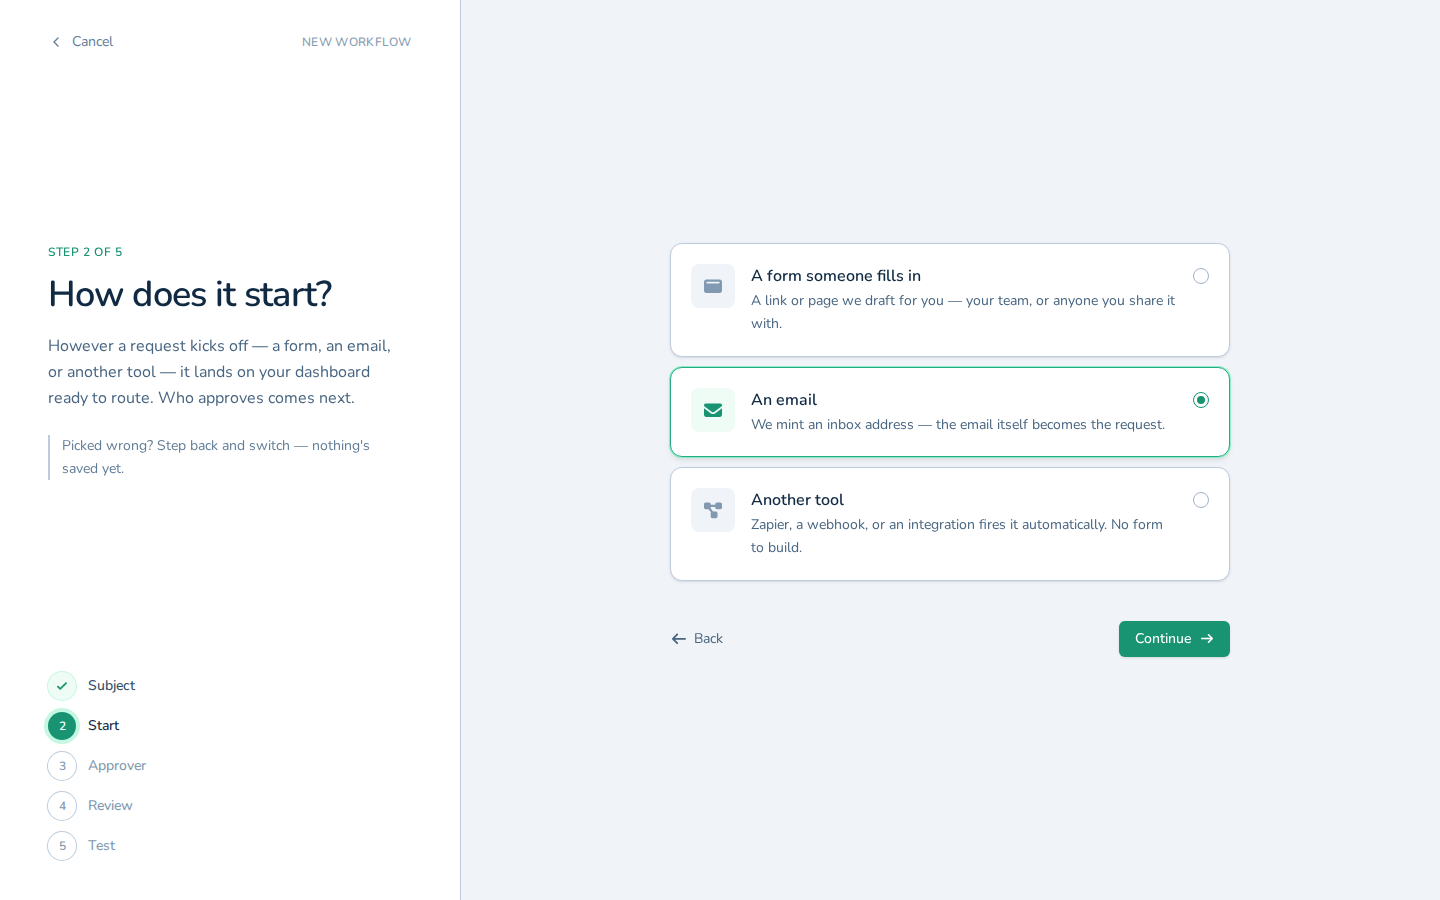
Start from the + beside Approval Workflows in the sidebar, or any New Flow button. The setup asks what needs approval and how requests arrive; the example picks the Invoice approval starting option. The step that matters for this scenario is the arrival question: select An email, because picking email as the arrival is what mints the workflow's own inbound address.
After Review and Create & test, the dedicated inbound address appears under Mailbox address. This address becomes the AP clerk's front door: vendors send invoices to it directly, and anything still landing in the old shared inbox gets forwarded there, since any email sent to the address creates a request, with subject, body, sender, and attachments captured onto its fields. Until you publish, requests route back to you for testing, so forward a real vendor PDF and watch what it produces before going live.
Next, tell the workflow what those attachments are. Under Test & publish, open Settings, then the Attachments tab, and under Document processing choose the processor that matches the documents you expect. For this scenario that is Invoice, one of the available Azure Document Intelligence processors.
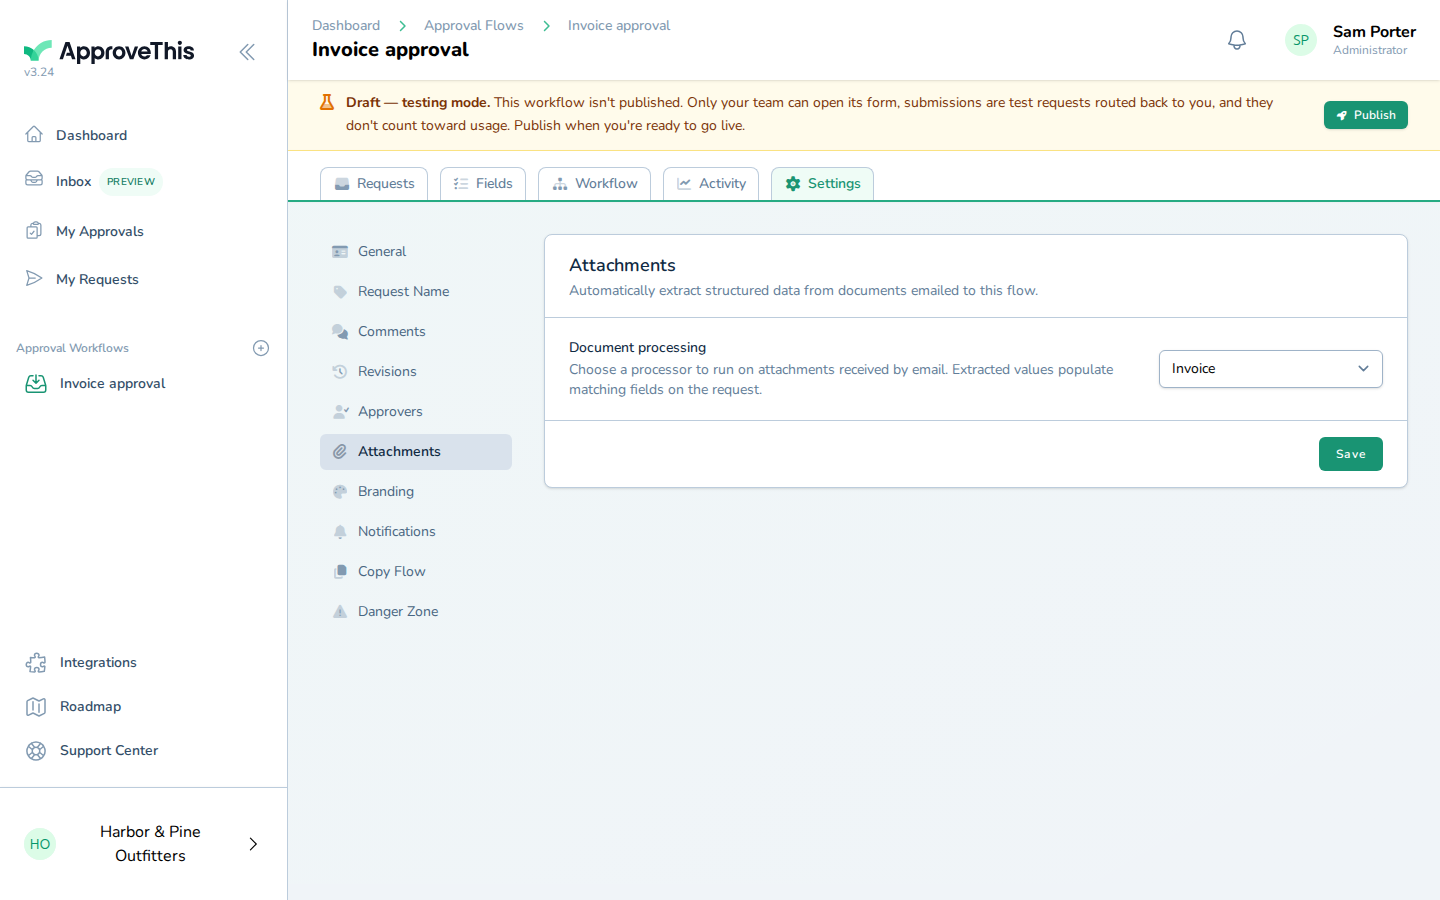
With a processor set, the extracted values from each attachment land on matching fields automatically, so approvers see the numbers without opening the file, and the clerk stops re-keying.
Full click-by-click: Email-to-Workflow
Name each request after the vendor and the amount
Once emailed invoices start becoming requests, they need names an approver can tell apart at a glance. On the workflow's Settings tab, open Request Name and click Edit Formula. Typing {{ brings up an autocomplete of the form's fields, and quoted text between two fields joins them with a separator. The example formula is exactly what an invoice workflow wants: {{vendor_name}} ~ " - " ~ {{amount}}.
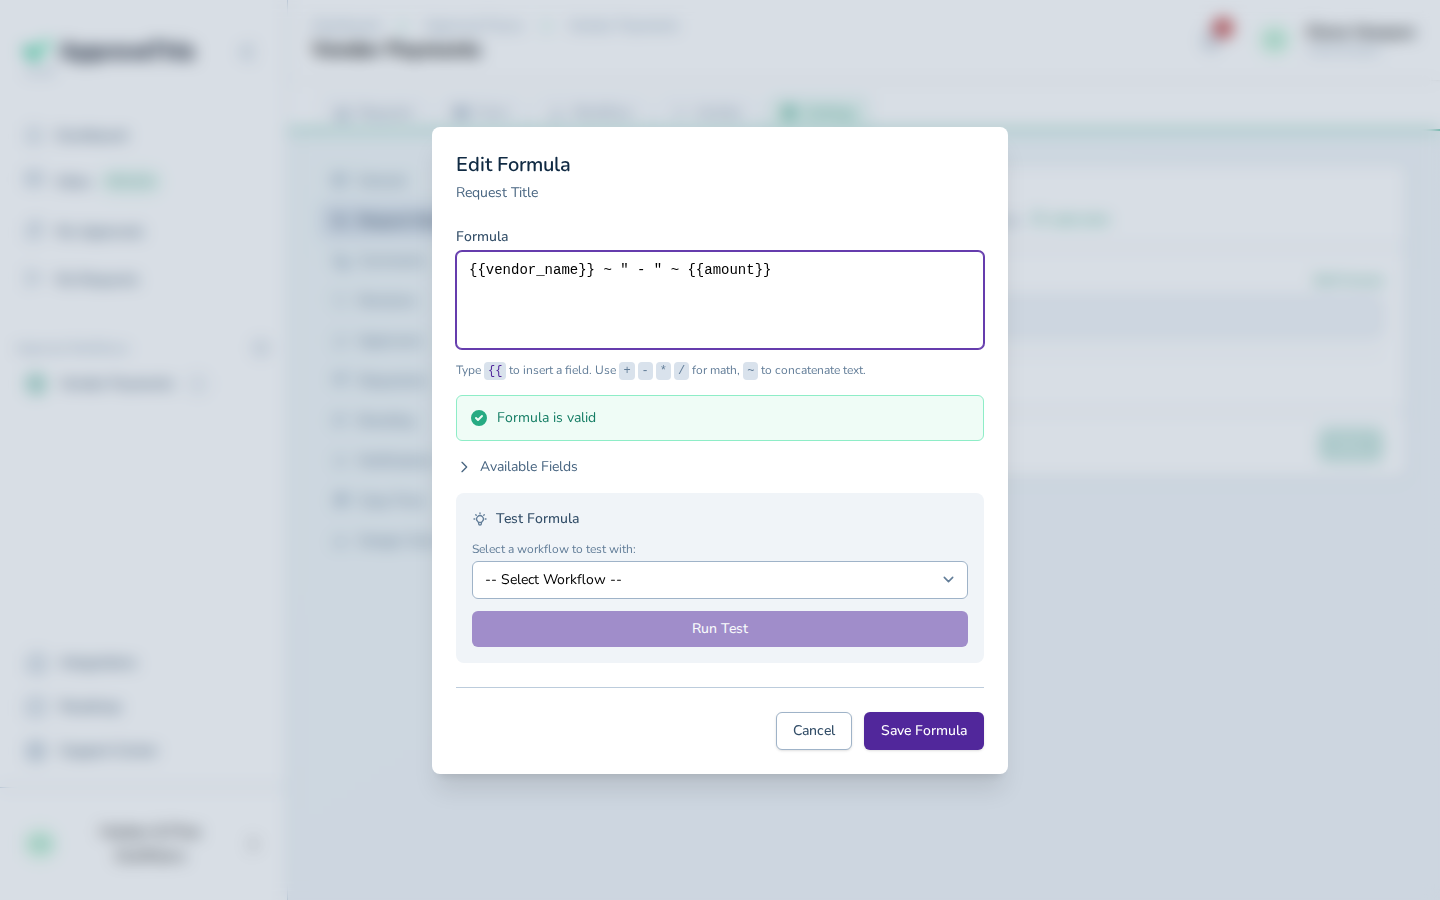
Test the formula against one of the workflow's real past requests with Run Test, then Save Formula. File upload fields cannot be referenced — the title comes from the vendor and amount fields rather than the attached PDF — and the formula applies only to requests submitted after you save it. Requests already in flight keep the names they have, so set this up as soon as the workflow is published, before invoices pile up under generic titles.
Full click-by-click: Dynamic Request Naming
Send large invoices up to the controller
On the Workflow tab, the budget owner's approval step handles every invoice. Add a second step for the controller, then gate it so it only runs past your sign-off threshold: click Configure step on the controller's step, open Conditions, and click Add Condition. Pick the field to test, choose Greater than as the operator, and enter the threshold as the value.
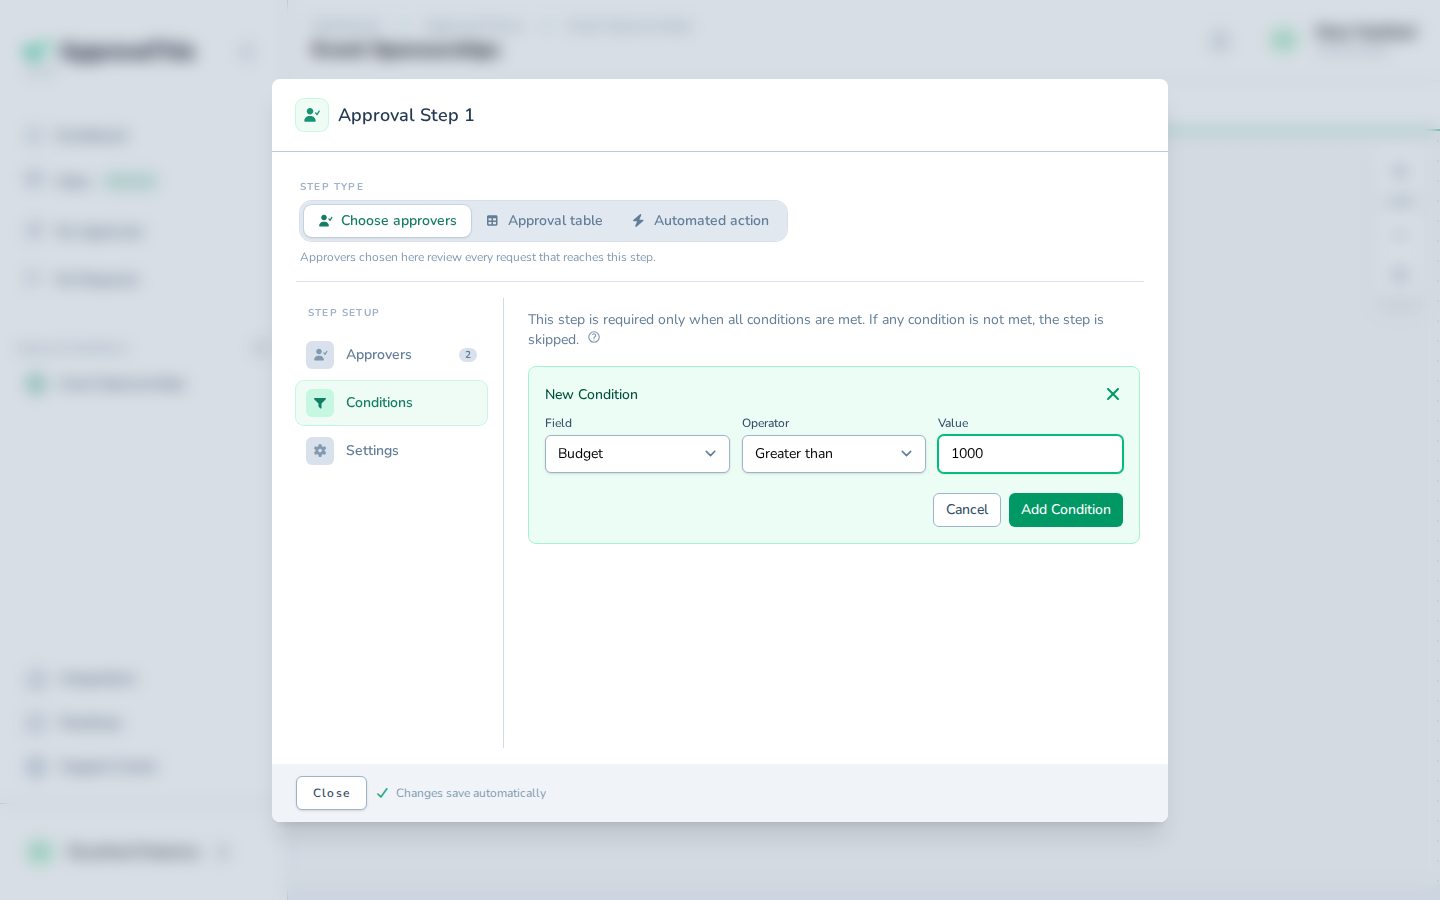
The example gates on a Budget field Greater than 1000; in this workflow you would pick the amount field the processor fills, at whatever limit your controller sets. When the condition is unmet, the step is skipped and the invoice stops at the budget owner. Conditions combine with AND logic, so another row narrows the step further, for instance to one expense category. Routing is fixed at the moment a request is created, so a threshold change only affects invoices that arrive afterwards.
Full click-by-click: Conditional & Threshold Routing
The budget owner decides without leaving the inbox
When an invoice routes to the budget owner, the approval email carries the attachment with it. Because the request includes a file field, the notification shows an image thumbnail or PDF preview alongside the filename, size, and a download button — enough on screen to judge the invoice without opening the app. The example shows a receipt image from an expense flow; a vendor's PDF invoice previews the same way, while non-previewable file types fall back to a download link.
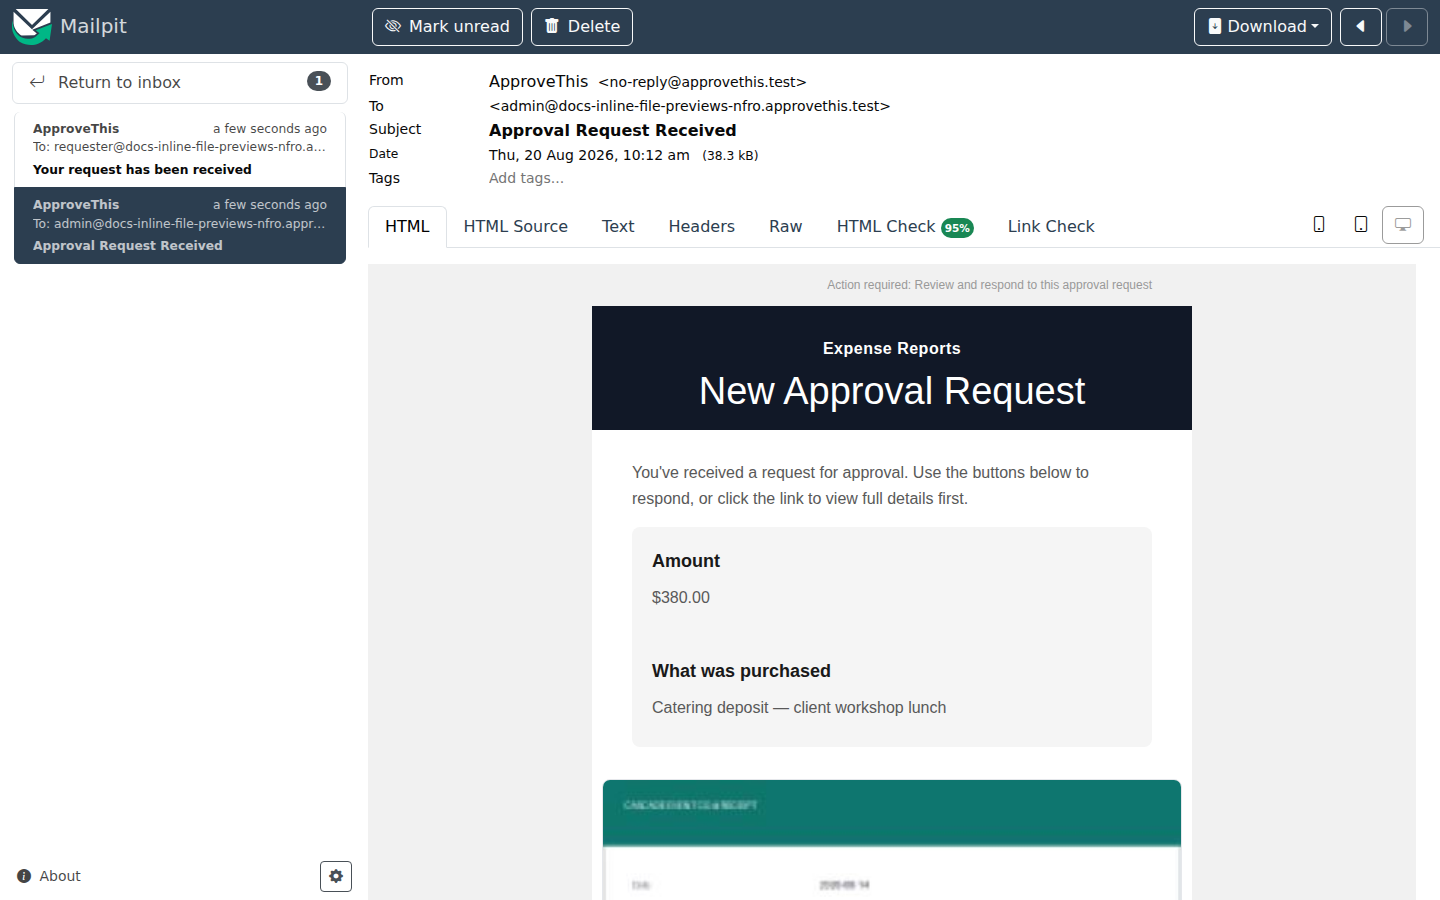
The decision is one click. The Approve link in the email routes through a signed URL that logs the approver in for that single action; no password prompt interrupts them.
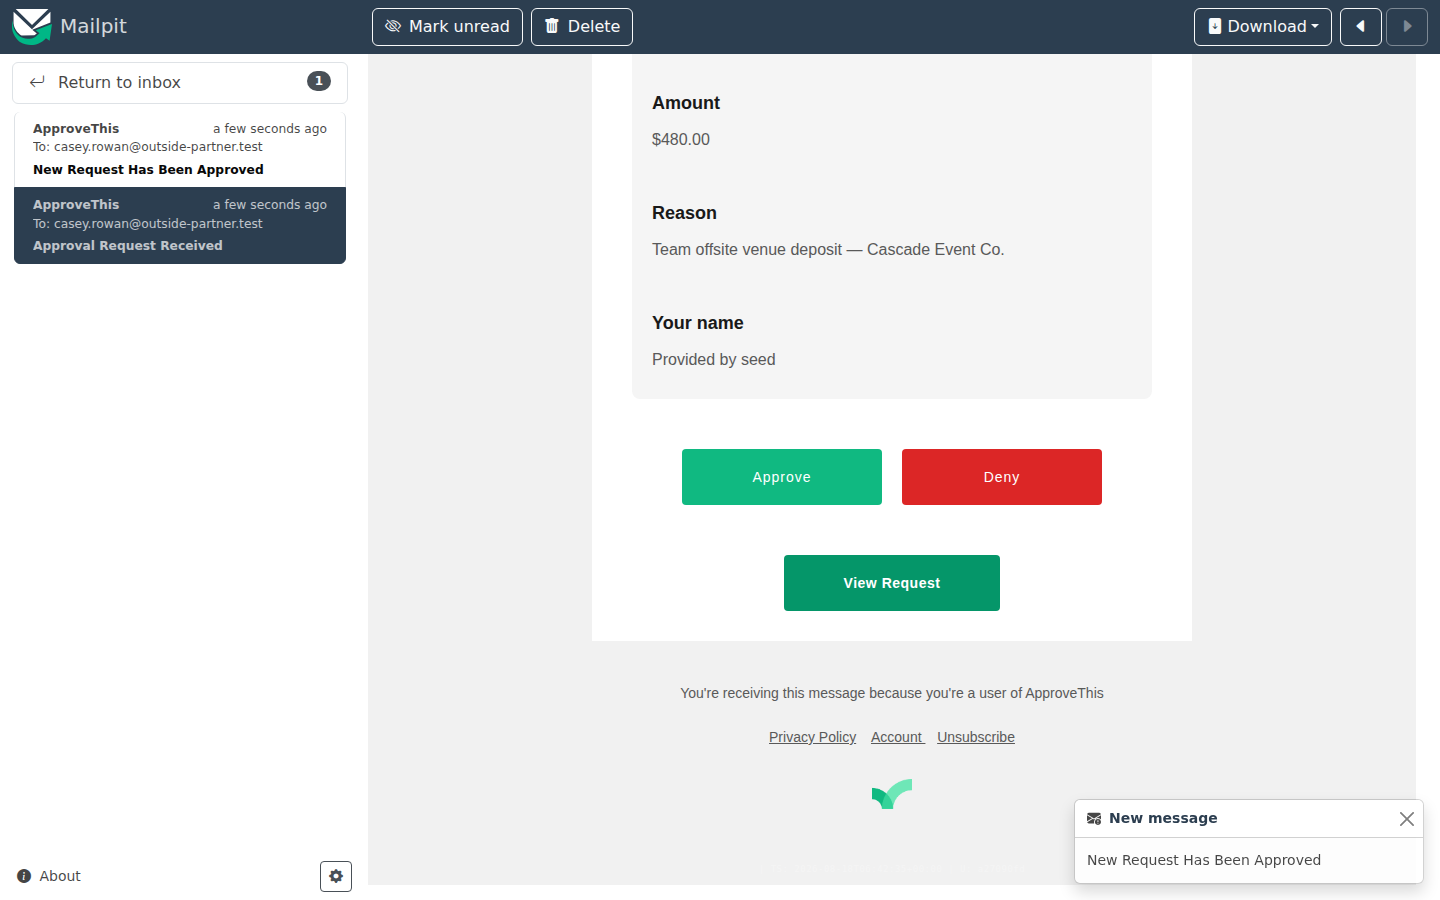
Back comes You approved this request. We'll let everyone know. Approvers with 2FA, or on a workflow that requires logging in, are asked to sign in first. And when a budget owner sits on a decision, you do not have to chase by hand; Approval Reminders can email pending approvers on a schedule, per workflow, until they act.
Full click-by-click: Inline File Previews and Login-Free Approval Links
Close the month with one export
At month end, the AP clerk needs every invoice, its status, and its numbers in a spreadsheet to reconcile against the ledger. Open the workflow's Activity tab, which is shown to members who can edit the workflow, and click Requests to list every request submitted through it. The CSV and Excel buttons export the table with one row per request: Status, Requester, and Submitted, followed by one column per visible form field, so vendor and amount arrive as columns ready to match.
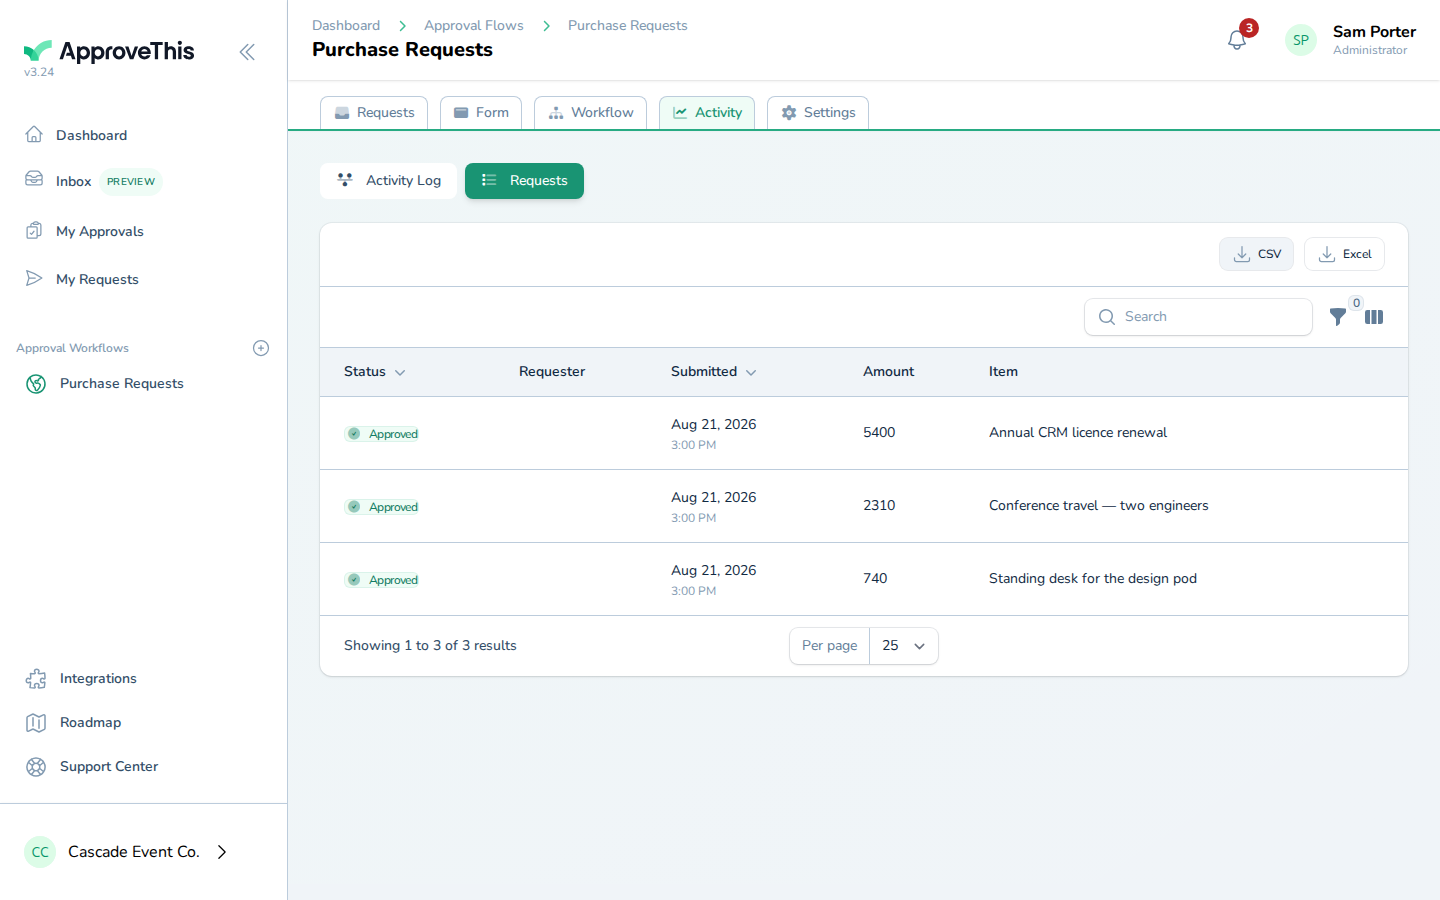
The export includes every matching row, not only the page on screen, and honors the table's search text and sort order. It does not apply the Status or Created From / Created Until dropdown filters, hidden form fields never appear, and once the workflow is published its test requests are excluded. The export itself is recorded in the workflow's audit trail with who exported, which table, the format, and the row count.
Full click-by-click: Request & Activity Export (CSV / Excel)
Related guides
- Approval Reminders — switch on scheduled email nudges for a workflow whose approvers forget rather than object.
- Activity Log & Audit Trail — read a single request's timeline of decisions, routing checks, and notifications.
- Resend an Approval Request — resend the approval email with working links when an approver says it never arrived.
- CC Approval (approvals@ email) — track a one-off approval with no workflow at all by CCing your team's approvals@ address.
- Add an Approval Step — the full step dialog behind the controller step: approvers, how many it takes, and signatures.