Private Fields
Mark a form field Private so requesters still fill it in, but its answer stays out of non-admin views, email notifications, exports, certificates, and search.
Updated
A form sometimes has to collect a bank account, a salary figure, or an ID number that approvers have no reason to read. Marking that field Private keeps it on the form for the requester while holding its answer out of non-admin views, email notifications, exports, certificates, and search. This guide is for Administrators editing a workflow's form, and assumes the workflow and the field you want to protect already exist. Private is visibility shaping rather than encryption or access control — the value still lives in the database, and only super admins, team owners, team admins, and the workflow's owner can read it, in a collapsed Private Fields section on the request and approval pages.
Who this is for: an Administrator.
Mark the sensitive field Private
Sensitive answers stay collectable without being broadcast: once a field is Private, its entries are excluded for every viewer from request list expansions, the per-request data table and its CSV/XLSX export, approval certificates, field-rendering emails, and the search index. Two things to weigh before you flip it: the requester who typed the value cannot read it back on the request page afterwards, and the workflow API and Zapier payload still serialize private entries.
-
Sign in as an Administrator on the workspace that owns the workflow.
-
On the Form tab, click the card for the field holding the sensitive answer to open it — the example screenshots use Account number.
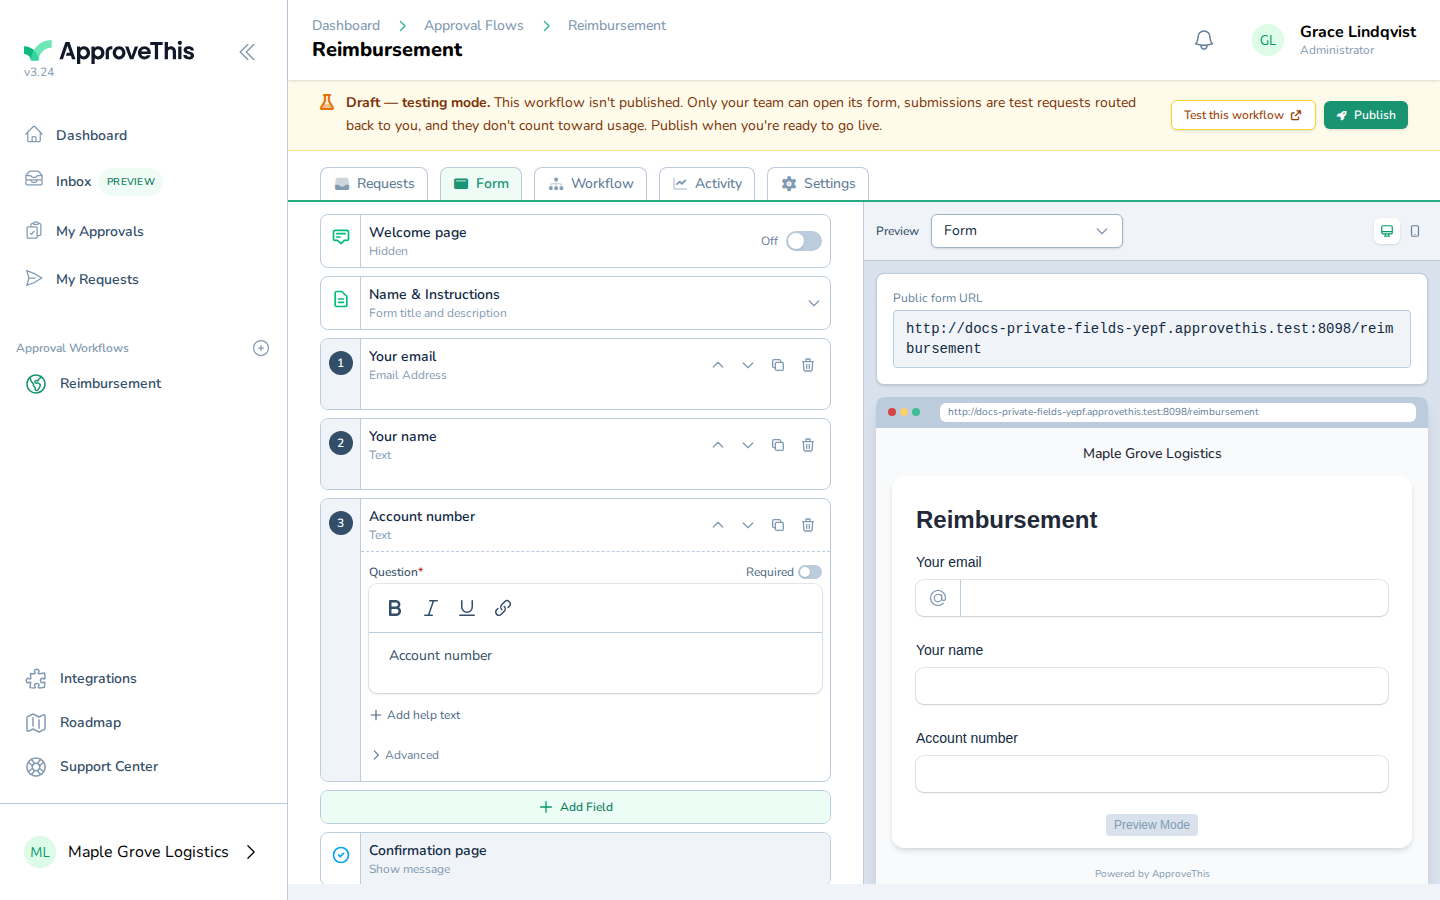
On the Form tab, click the card for the field holding the sensitive answer to open it — the example screenshots use Account number. -
Open the field's Content tab and click Advanced to reveal the extra field settings.
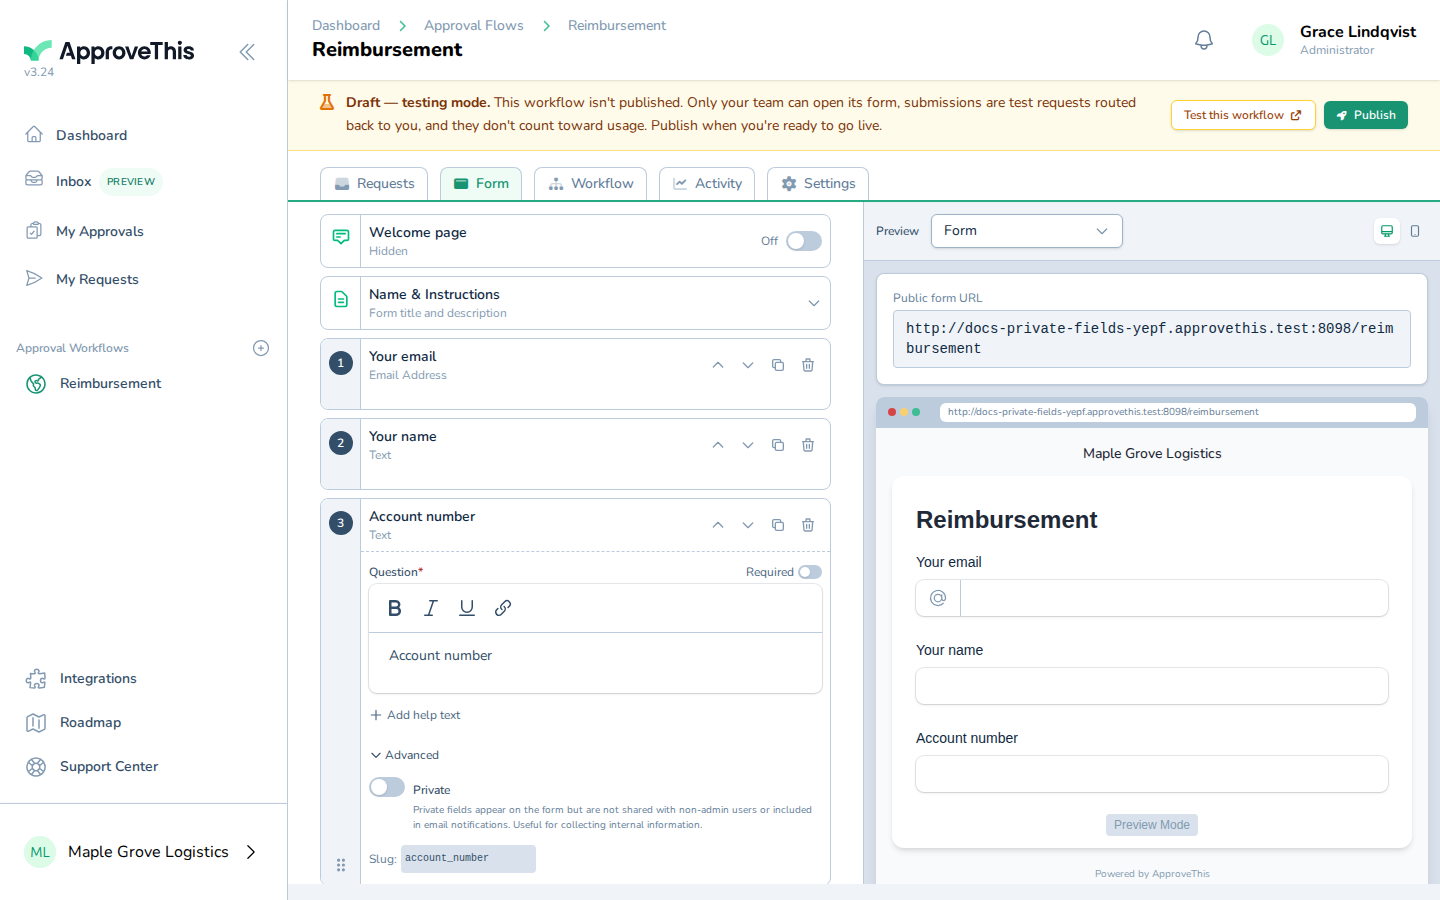
Open the field's Content tab and click Advanced to reveal the extra field settings. -
Click Private. The switch's own copy states that private fields appear on the form but are not shared with non-admin users or included in email notifications.
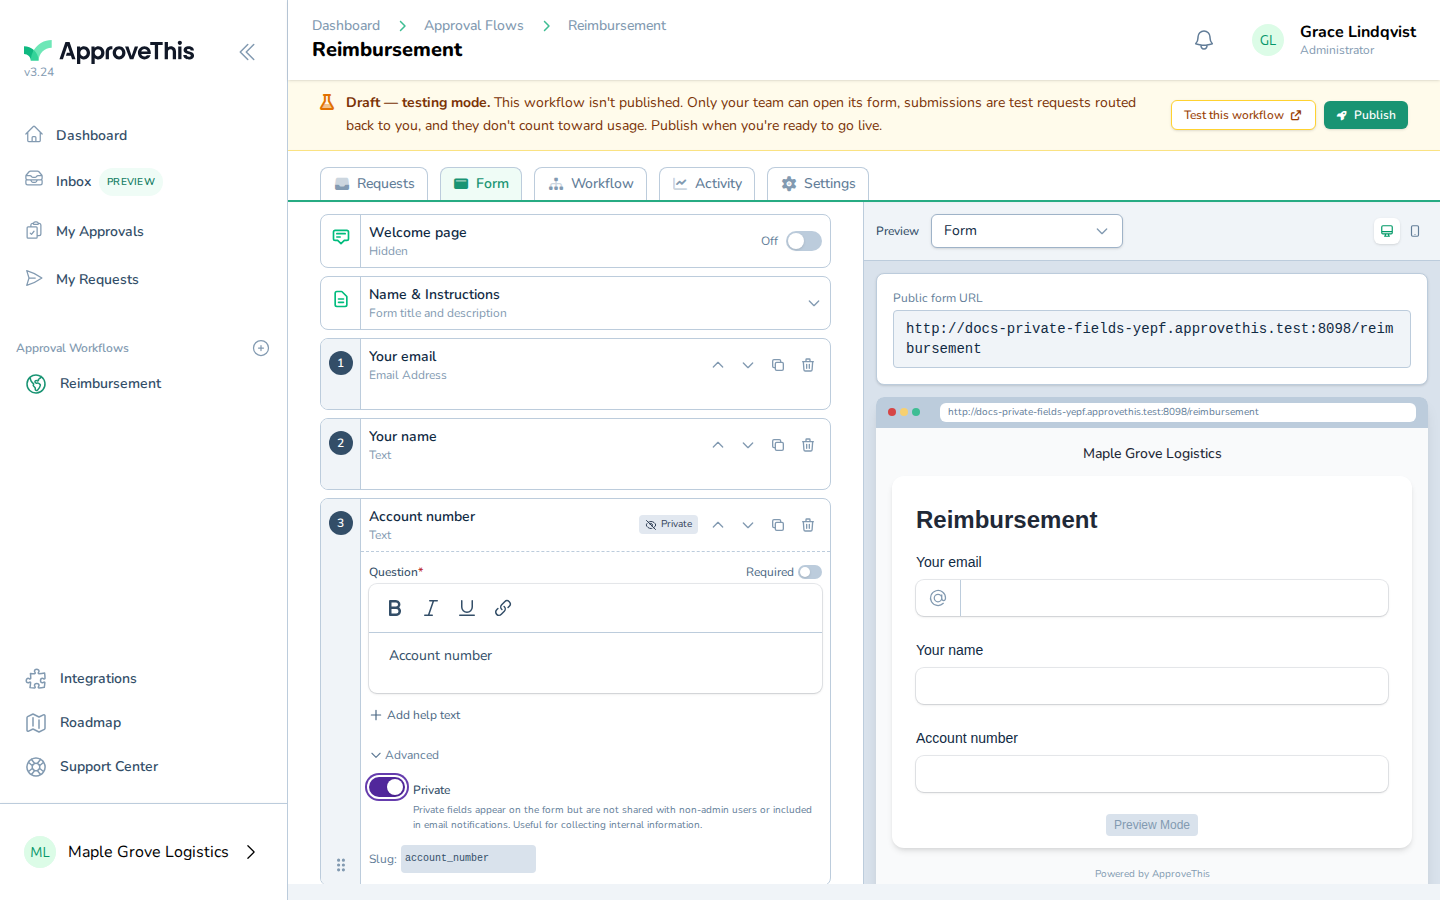
Click Private. The switch's own copy states that private fields appear on the form but are not shared with non-admin users or included in email notifications.