New-hire onboarding that IT and payroll can't miss
One onboarding request that IT, facilities, and payroll all watch — and a slipped start date becomes a visible revision, not a lost email.
Updated
A new hire becomes real in an email: the hiring manager writes to the HR manager with a name, a start date, and whatever else they remembered. HR forwards it to IT for a laptop, to facilities for a badge, to payroll for setup. Each forward has a different subject line, someone is always left off, and nobody can tell which copy is current. The result shows up on day one: no laptop, no badge, a first paycheck that misses the cycle.
This walkthrough replaces the forwarded email with one onboarding workflow that the HR manager owns. You start from the workflow library's employee-onboarding flow so the form arrives pre-built, tune its fields to what your IT and payroll teams actually need, add yourself as the approval gate, and make the IT, facilities, and payroll leads watchers so they hear the moment a request is submitted or approved. Hiring managers then submit each new hire as a request, every request titles itself from the new hire's details, and a slipped start date becomes a new version of the request instead of another email chain.
What you'll set up
- A workflow created from the library's Employee Onboarding Checklist, so the intake form is pre-built rather than designed from scratch
- Form fields tuned to your first day: start date, equipment, systems access
- One approval step with the HR manager as the gate before anything downstream kicks off
- The IT, facilities, and payroll leads as watchers, emailed when requests are submitted, approved, denied, commented on, or sent back for revision
- Request titles built automatically from the form's answers, so every team references the same name
- A revision path for slipped start dates: a new linked version with the change visible, not a fresh thread
Start from the library, not a blank page
Create a new workflow and the flow-type picker opens; if it first asks Guided setup or Advanced, choose Advanced. The Form Library tab lists 146 ready-made workflows as one flat searchable list, and onboarding is one of the common processes it covers. A library workflow arrives with its full field set and a matching web form — the checklist the forwarded email never was.
Type onboarding into Search flow types... to filter the list live by name and description.
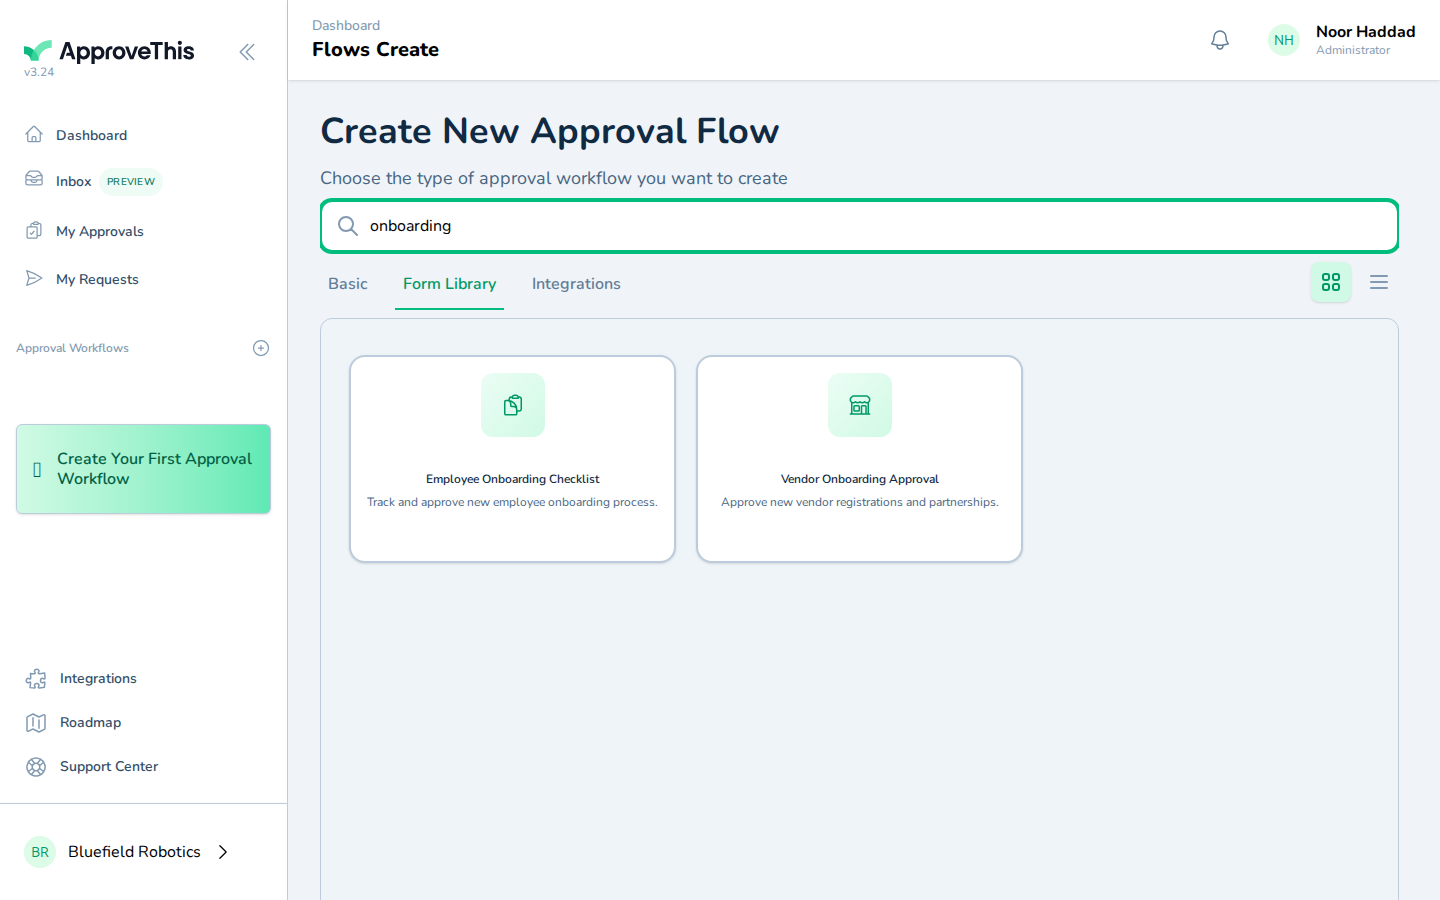
Click the Employee Onboarding Checklist card and the Configure Your Approval Flow screen opens, where you review every pre-built field before creating anything.
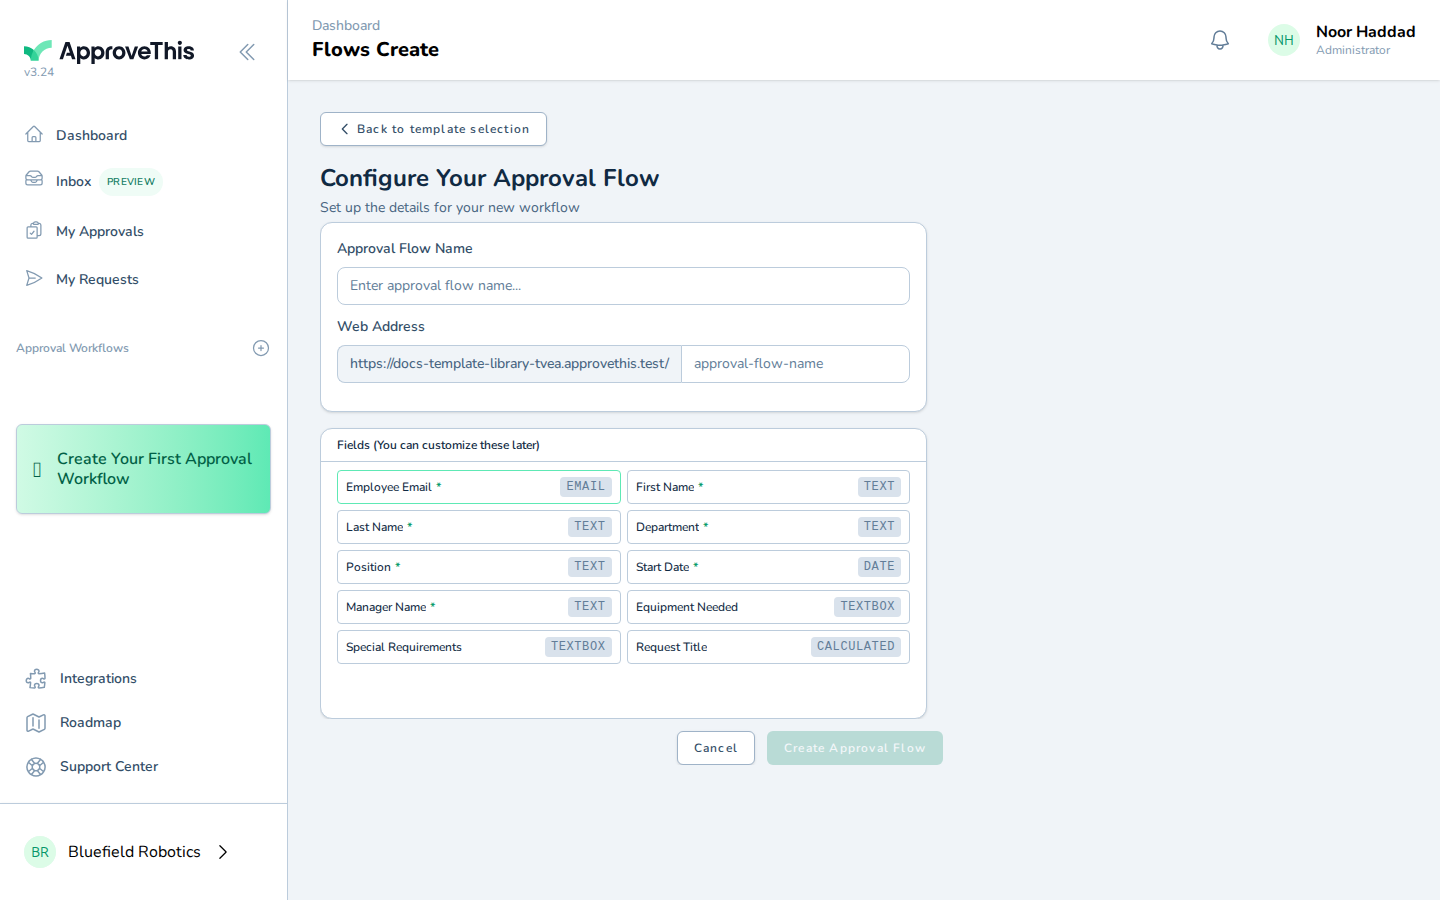
Name it in Approval Flow Name and click Create Approval Flow. You land on the workflow page showing Draft — testing mode. — the workflow exists as an unpublished draft. The library builds the form only, so the approval gate and watchers come next.
Full click-by-click: Template Library
Make the form ask what IT and payroll need
Open the Form tab and shape the pre-built fields around your first day. Delete anything your teams won't use with Delete field, pull the most important questions to the top with Move up, and add what's missing with Add Field: a date field for the start date, fields for equipment and systems access, whatever payroll needs to run setup without a follow-up email.
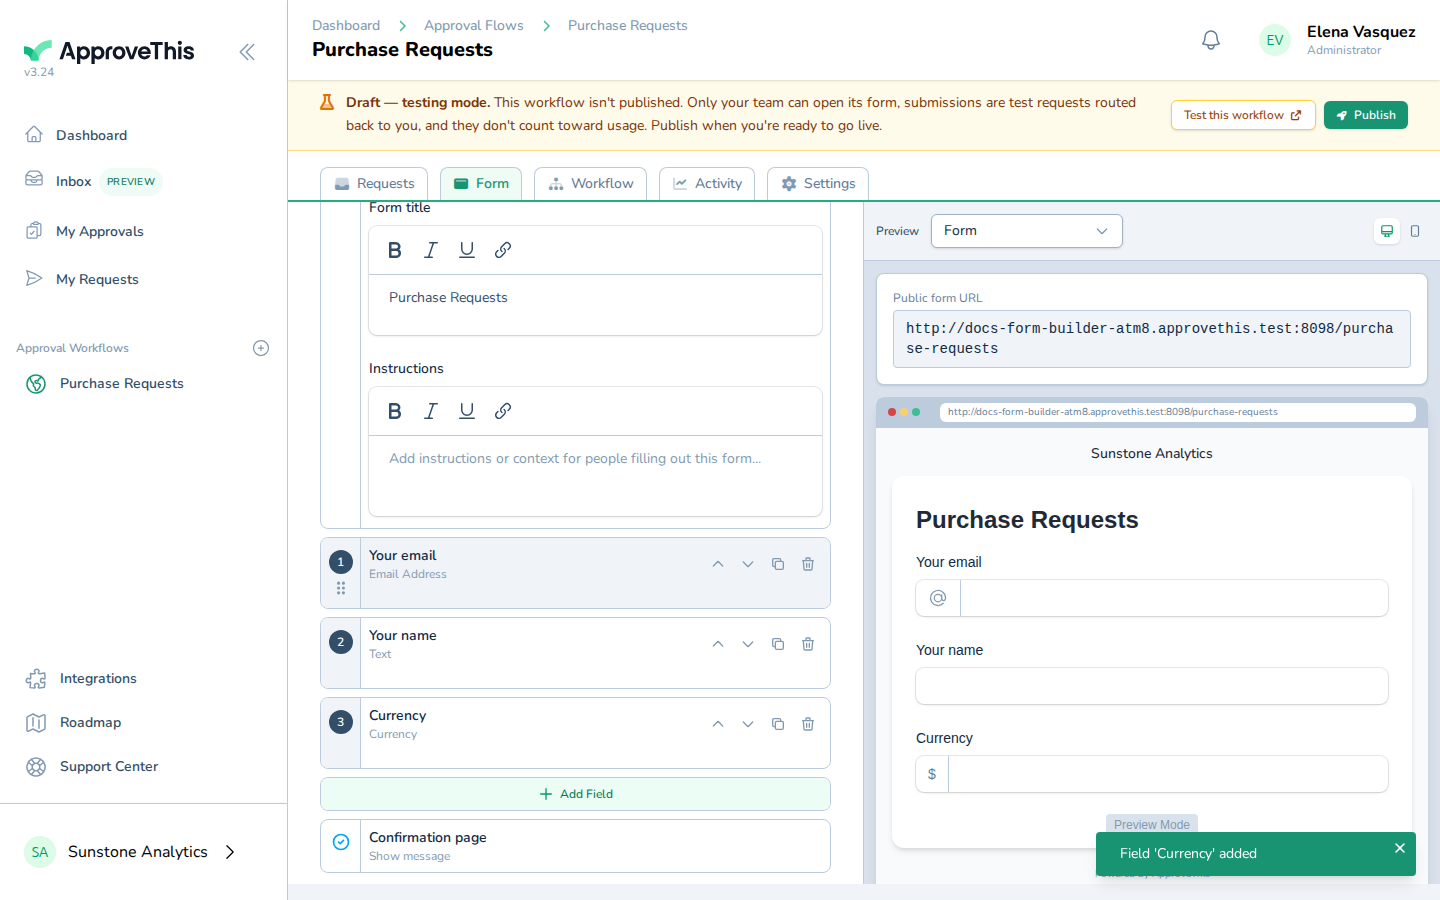
Click a field to set its label, mark it Required so a request can't be submitted without it, and use Add help text to tell hiring managers exactly what to enter. A required start-date field is the single change that does the most work in this scenario: it forces the one fact every downstream team depends on into every request.
Full click-by-click: Form Builder
Gate it on you, then let the right people listen
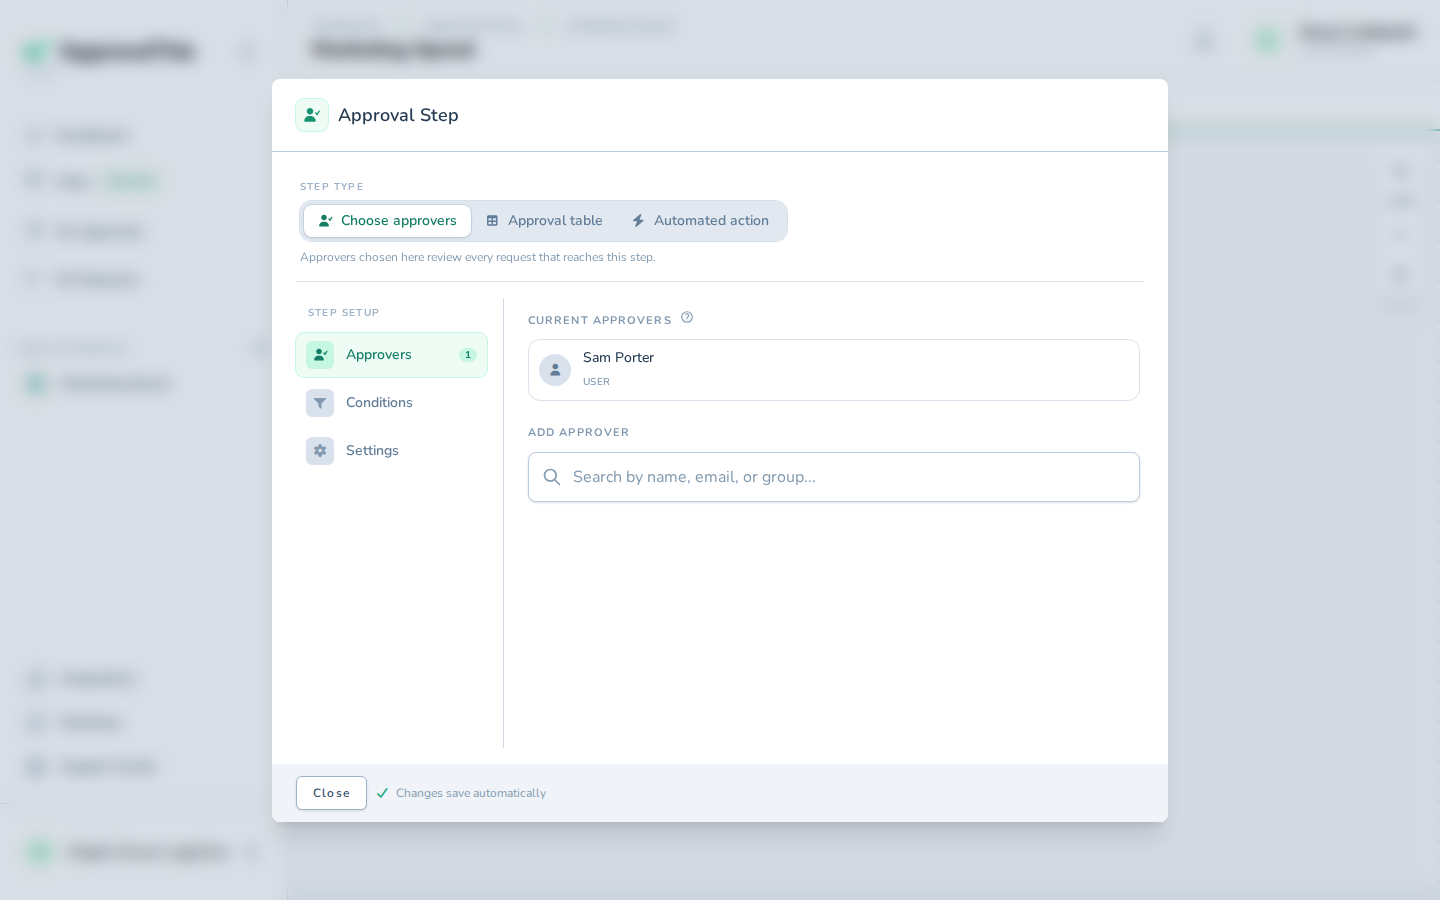
On the Workflow tab, add the approval step. A flow with no steps offers Add the first step on the trigger; type your own name into Search for an approver and click it to add yourself. This is the HR manager's checkpoint: nothing reaches IT or payroll as approved until you've confirmed the details are complete and correct. Changes save as you go.
Watchers are the other half of the fix. On the flow's Settings tab, click Notifications, open the member picker under Search for an approver, pick each lead, and click Save. A watcher is emailed about the flow's requests — when they're submitted, approved, or denied, when comments are posted, and when a revision is requested — without being in the approval chain and with nothing to act on. That is exactly what IT, facilities, and payroll need here: to hear, not to sign off. Only Administrators see the panel for adding others as watchers, and the requester is excluded from watcher emails so they don't get duplicates.
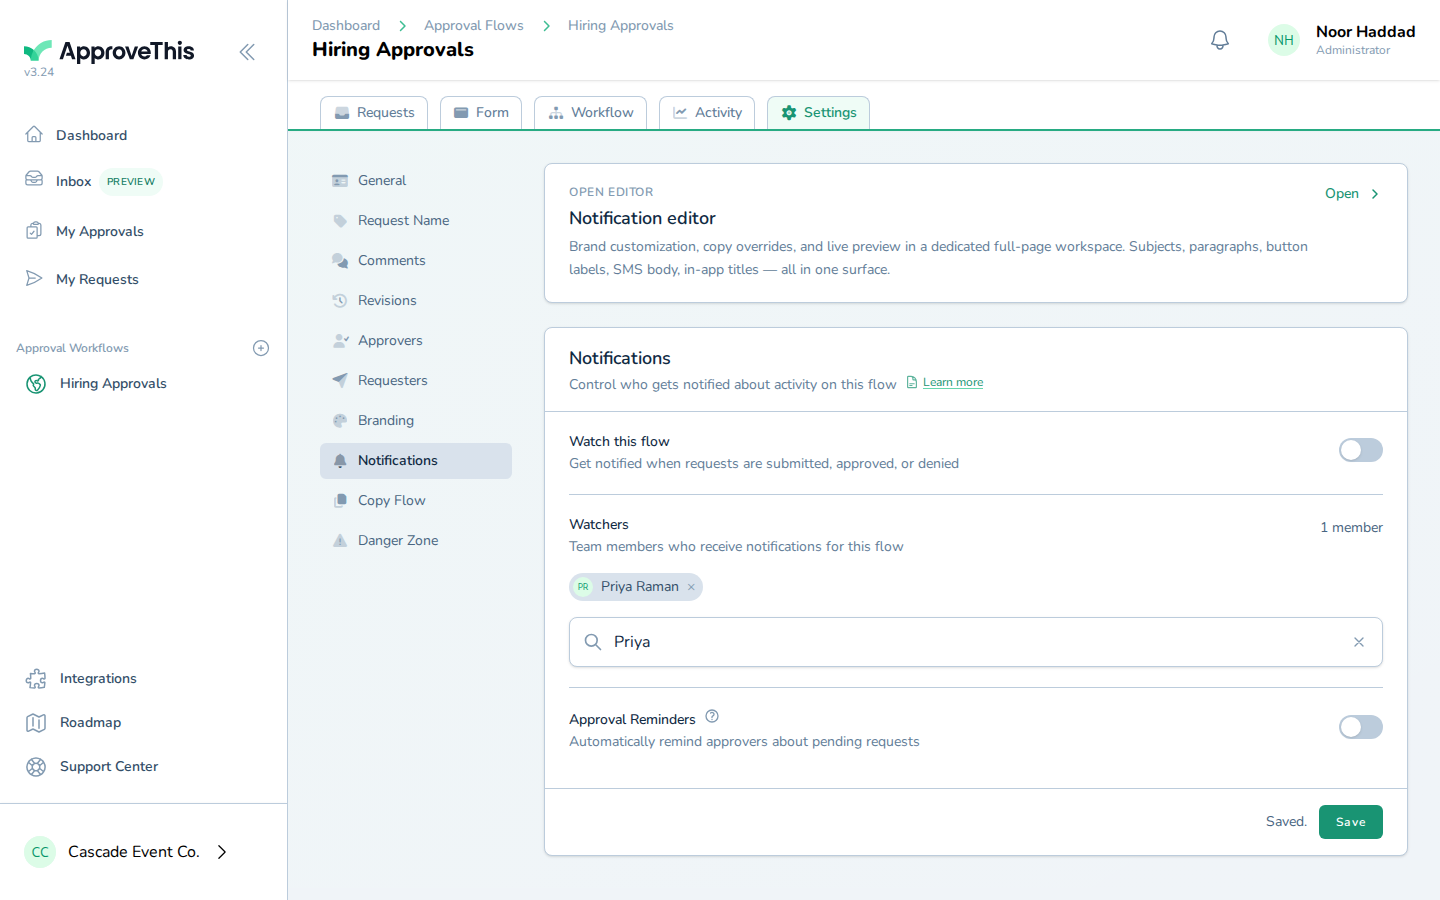
Full click-by-click: Add an Approval Step and Flow Watchers
Let every request name itself
From the workflow page you test and publish the draft. Once the workflow is published and has a request to test against, open its Settings tab and click Request Name, then Edit Formula. Type {{ to bring up the autocomplete of the form's fields and build a title from the answers that identify each new hire — the example combines a vendor and an amount as {{vendor_name}} ~ " - " ~ {{amount}}; in an onboarding workflow you'd combine the new hire's name and start date instead. Use Run Test against a recent request to see the exact title its real answers produce, then Save Formula.
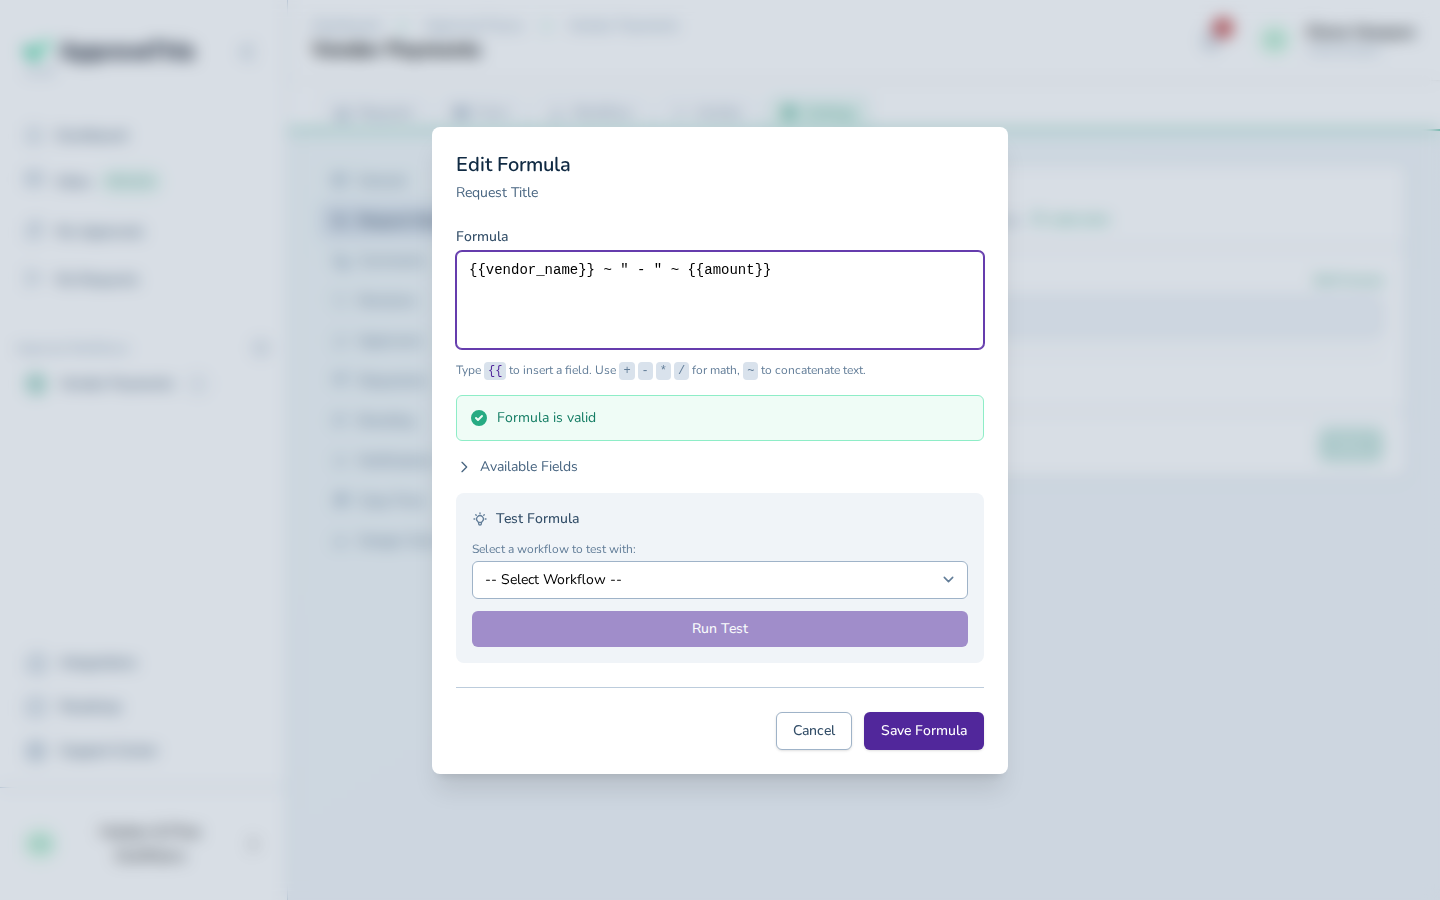
From then on, the request is the single source of truth downstream: the watcher email IT receives, the dashboard card payroll opens, and the request the HR manager approves all carry the same self-describing title. Two limits: the formula applies only to requests submitted after you save it, and file-upload and hidden fields can't be referenced.
Full click-by-click: Dynamic Request Naming
When the start date slips
A hiring manager submits the onboarding request from the workflow's form, you approve it, and every watcher hears. Then the candidate pushes their start back two weeks. Instead of a correction email that half the teams miss, send the request back for revision — watchers are emailed when a revision is requested, so IT and payroll hear the moment something changes.
The hiring manager opens the returned request, where the orange bar at the top shows what was asked, and clicks Edit & Resubmit. Prior field values and uploaded files carry forward, so they change the start date and nothing else, click Review & Resubmit, and note what changed in Reason for resubmission (optional) so everyone sees the change at a glance.
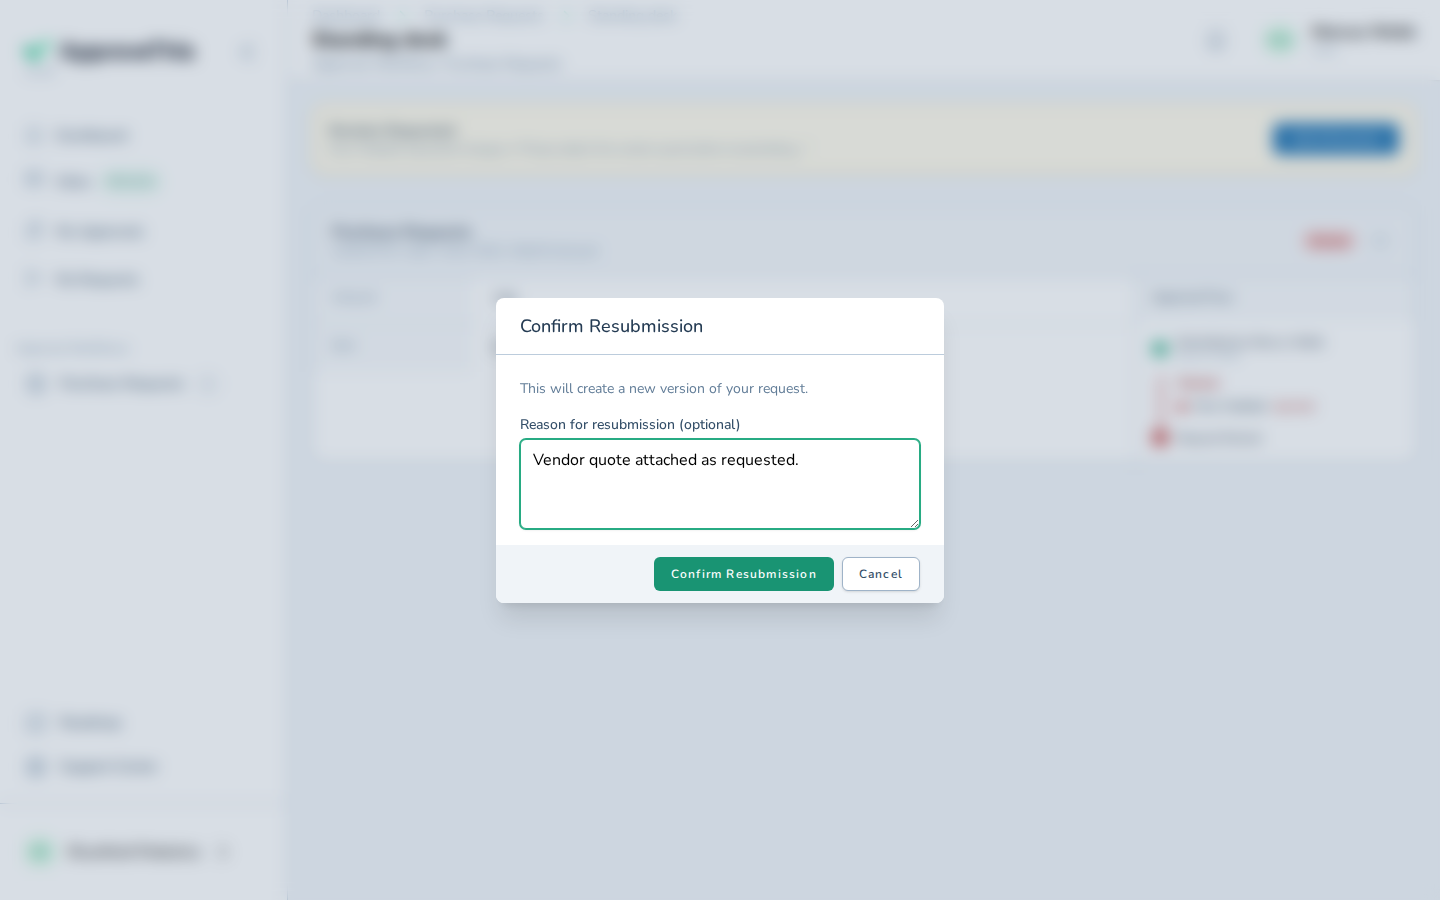
Confirm Resubmission creates a new version linked to the original, marked v2 (current) on the request page, with the whole chain kept together.
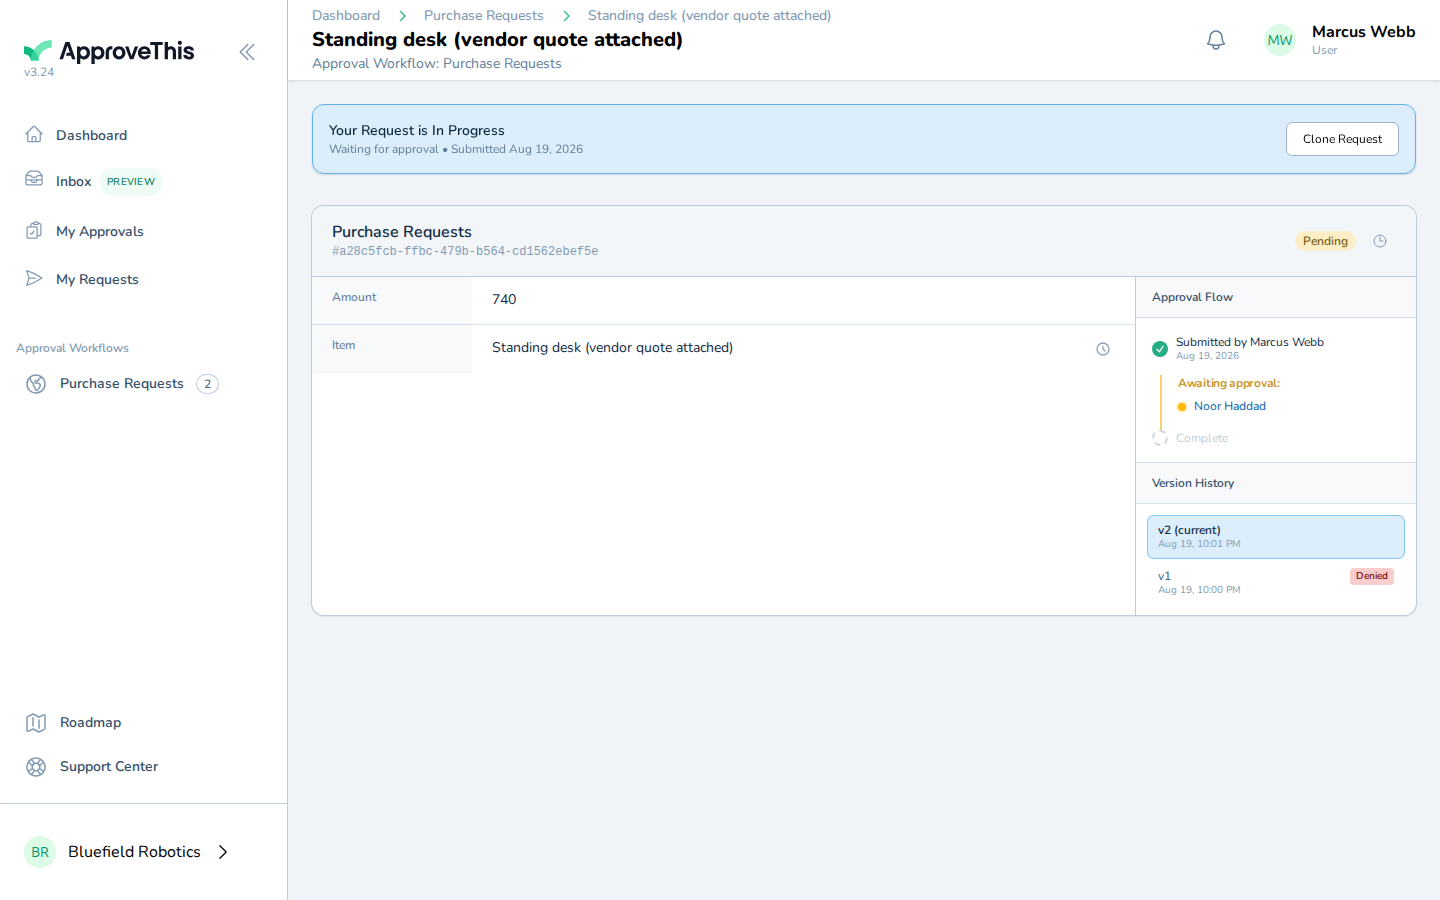
Check this path is open before you need it: resubmission is turned on per flow, only the latest version in a chain can be resubmitted, and an optional cap can limit chain length. When IT wants to confirm the laptop can be reimaged in time, that question belongs in the request's Comments with an @-mention, on the record next to the request instead of in a side channel.
Full click-by-click: Request Revisions & Versioning
Related guides
- Submit a Request — hand this to hiring managers so their first submission goes smoothly.
- Workflow Comments — @-mention a teammate into a request's thread instead of starting an email chain.
- Notification Preferences — each watcher chooses Email or In App per notification type.
- Workflow Dashboards — read the flow's requests as a board or sortable table when several starts are in flight.
- Activity Log & Audit Trail — the request's timeline of every decision and notification, for when someone asks who knew what and when.