PTO and leave requests with team-wide visibility
Managers approve leave from email, delegates cover their vacations, and one calendar shows who is out when.
Updated
At most small and mid-sized companies, leave requests live in email. An employee writes to their manager, the manager replies "fine by me", and someone is supposed to copy the dates into a shared spreadsheet. Someone usually forgets. So the HR manager finds out in the same week that two people on the same team booked the same days off, and nobody can answer the basic question: who is out, and when? When a manager goes on holiday themselves, their team's requests sit unanswered until they return.
One workflow replaces the whole ritual. The HR manager starts it from the workflow library, makes sure the form carries start date, end date, and reason fields, and routes every request to the team's manager. An employee submits a request; the manager approves it straight from the notification email without logging in, and sets a delegate before their own time off so a colleague catches the next batch. HR reads the whole month on the flow's calendar view, and an automatic reminder chases the one manager sitting on a pending decision.
What you'll set up
- A leave workflow started from the Form Library, arriving with its form pre-built
- A form focused on what a leave decision needs: start date, end date, and reason
- One approval step routed to the team's manager — one workflow serves one team
- One-click approval from the notification email, so managers decide from their inbox
- Vacation delegation so a manager's own absence never stalls the queue
- A calendar view of every date-ranged request, plus automatic reminders for stalled ones
Start from the Form Library
There is no reason to design a leave form from a blank page. The Form Library tab of the Create New Approval Flow dialog holds 146 ready-made workflows covering HR and other common processes, each with a complete pre-built form. Create a new workflow from the sidebar's Approval Workflows section; if the dialog asks Guided setup or Advanced, choose Advanced to reach the flow-type list.
Type a word from your process into Search flow types... to filter the list live. Search matches names and descriptions, so try leave or time off rather than internal shorthand — the example screenshot filters on onboarding, but the mechanism is the same.
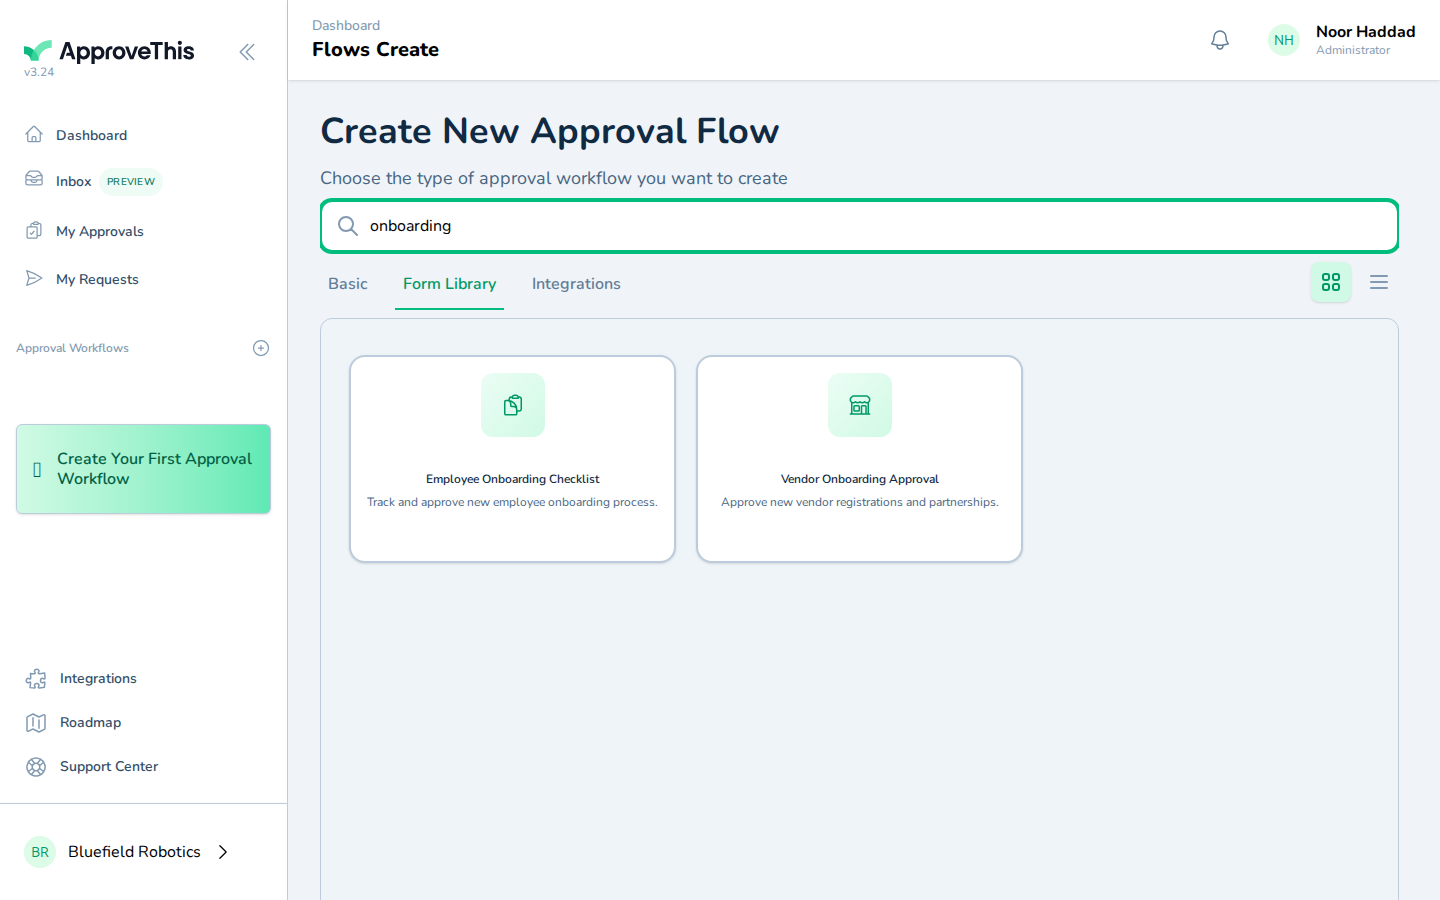
Click the card that comes closest to your leave process, review its pre-built fields on the Configure Your Approval Flow screen, name it in Approval Flow Name, and click Create Approval Flow. You land on the new workflow's page as a draft. Library workflows build the form only — approvers and routing come next, which is exactly the order this walkthrough follows.
Full click-by-click: Template Library
Keep the fields that make the calendar work
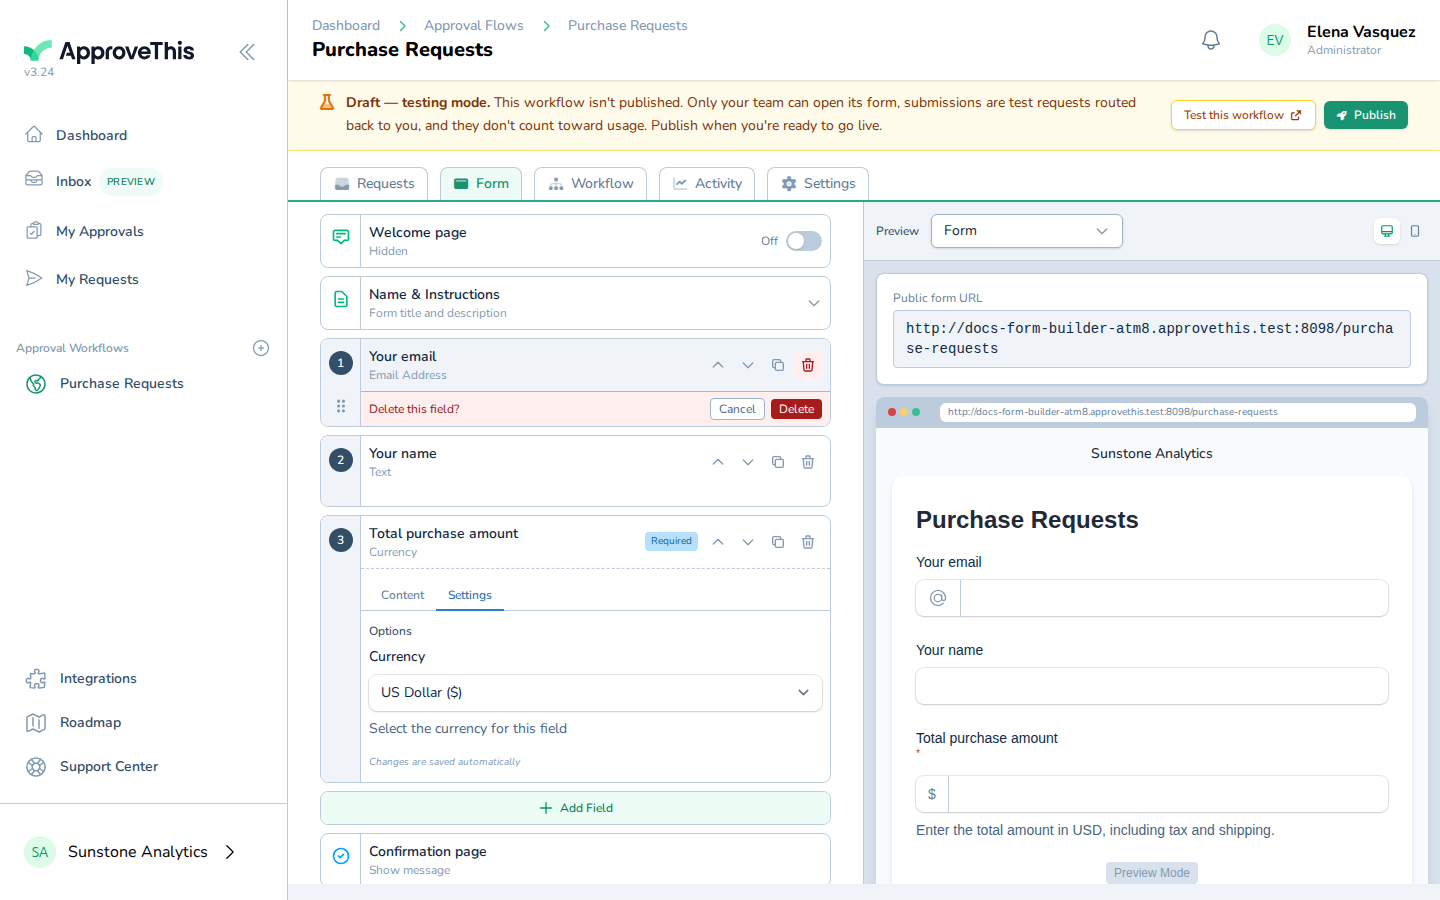
Open the flow's Form tab and read the pre-built form the way a manager will: what does a leave decision actually need? Start date, end date, and reason carry the whole decision. Keep those fields if the card you picked has them, and mark them Required; if one is missing, click Add Field and pick the date type to add it, then click the new field to set its label. The date pair matters beyond the form itself: the calendar view you'll use at the end only appears on date-based flows that have start and end date fields, so make sure both exist.
Anything your policy doesn't need, remove with Delete field so employees only answer questions someone will read — the example screenshots show trimming a purchase form, and the motion is identical here.
Full click-by-click: Form Builder
Route requests to the team's manager
On the flow's Workflow tab, click Add a new step below this one to add the approval step, then type the manager's name into Search for an approver and click the match to put them on the step. The example adds Sam Porter; here you'd add the team's manager, the person who actually knows whether the team can absorb the absence. The step names a specific person, so one workflow serves one team: a company with several teams creates a copy of this flow per team, each routed to that team's manager.
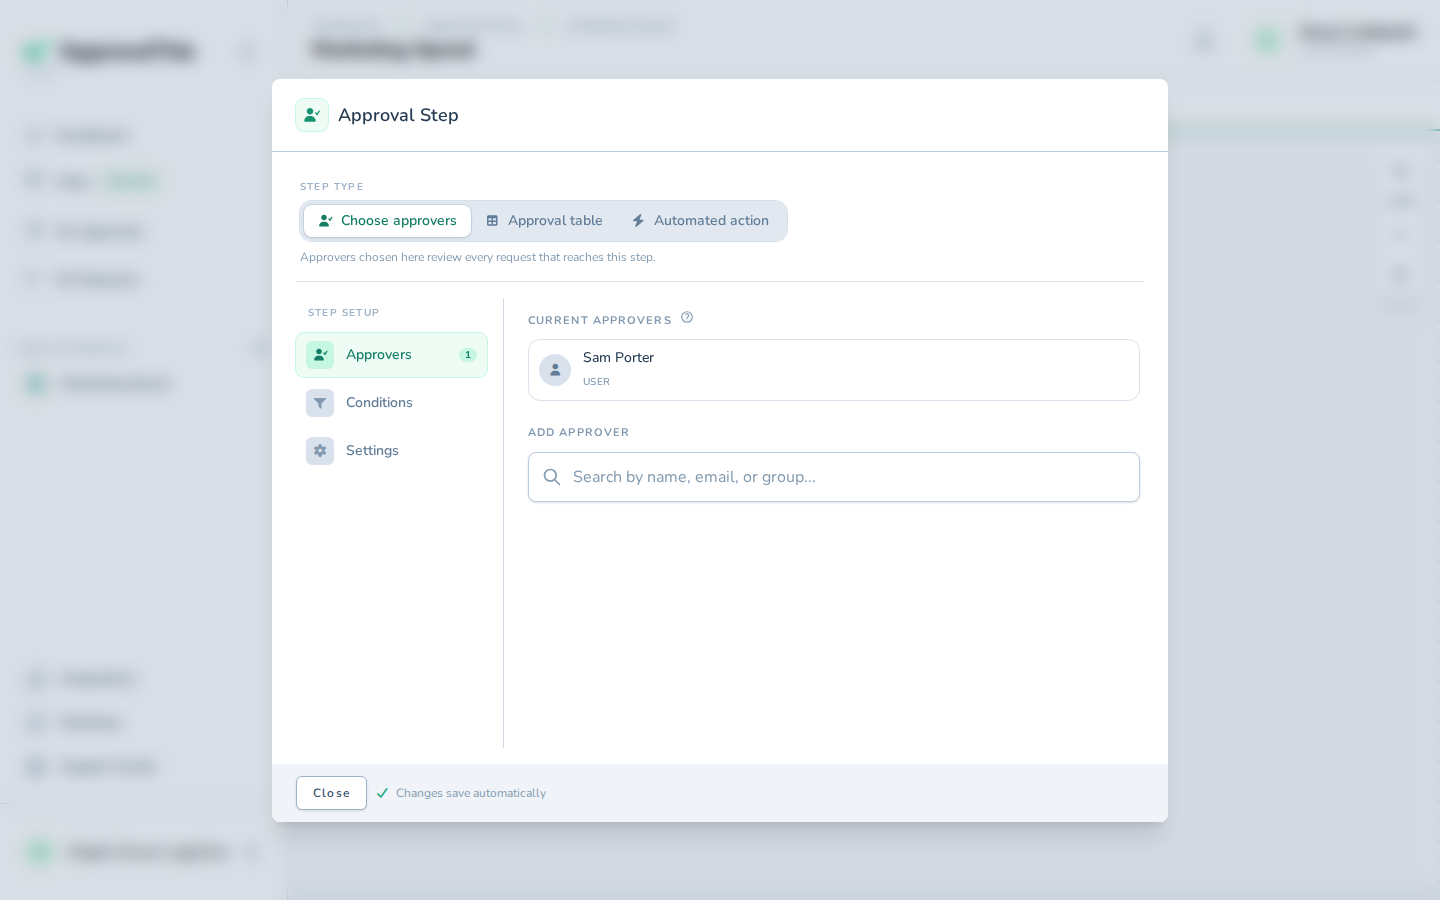
Changes save as you go. With the step in place, test and publish the draft so employees can start submitting.
Full click-by-click: Add an Approval Step
The employee submits; the manager approves from email
An employee opens the form however you share it — a link, or the flow's New Request button — fills in the dates and reason, and clicks Submit. The example screenshots show an expense report form, but the motion is the same: answer the questions, submit, and the approver is notified.
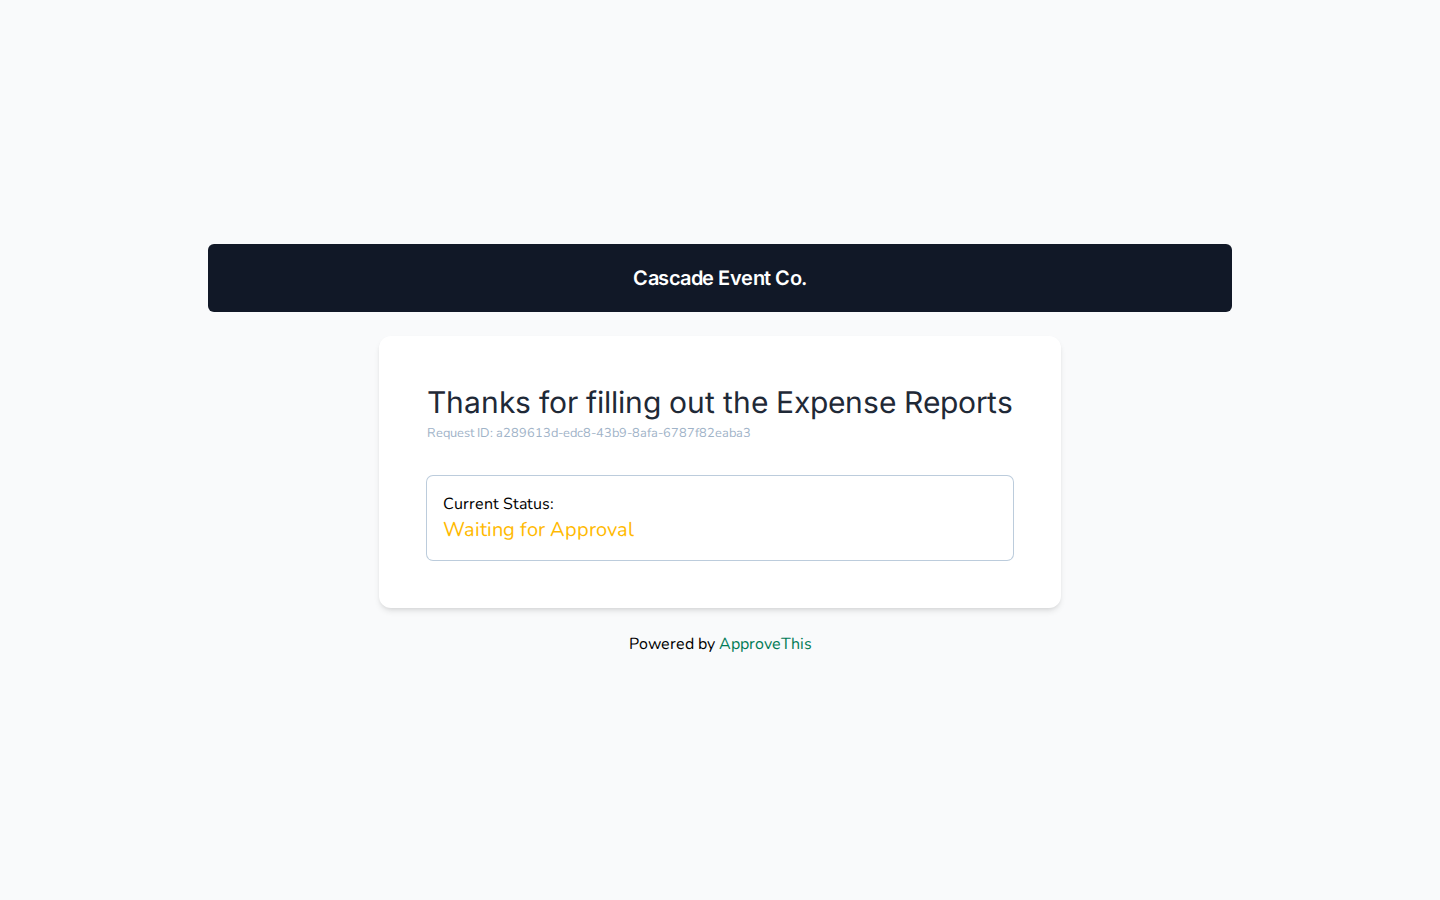
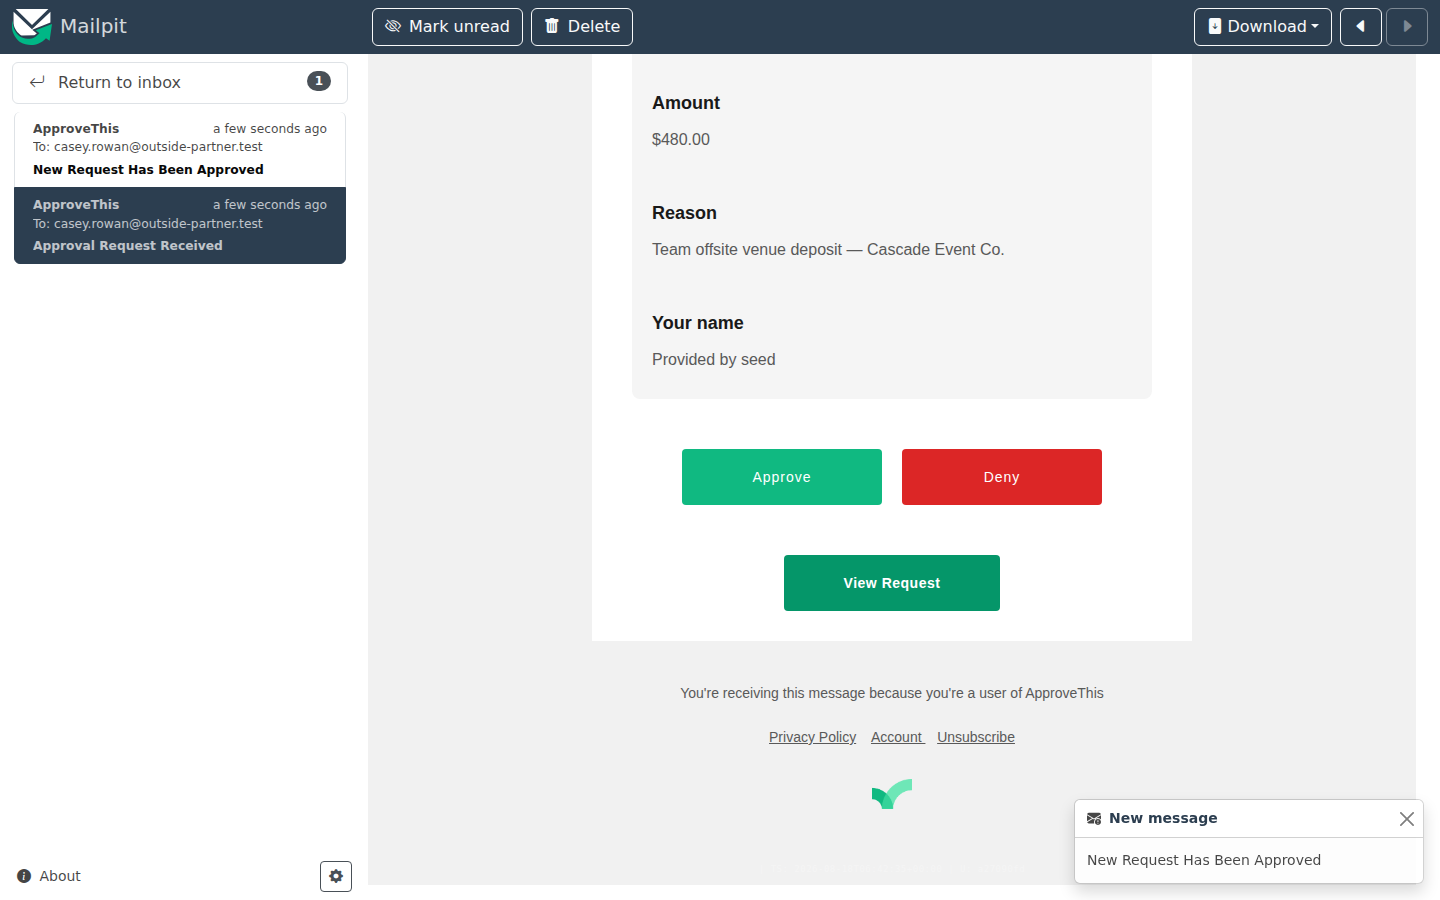
The manager doesn't need to log in to decide. The notification email carries a signed link, so clicking Approve in the message records the decision and confirms it on the spot. That's why manager adoption is realistic: the decision happens where the request used to happen anyway, in the inbox, but now it lands in the workflow instead of a thread. If the manager has 2FA enabled, or the workflow requires approvers to log in, they'll see a sign-in screen before the decision records.
Full click-by-click: Submit a Request · Login-Free Approval Links
Cover the manager's own vacation
Managers take leave too, and in the email-thread world that meant a week of unanswered requests. Before going away, the manager opens their own Profile, goes to Vacation, clicks Add Vacation, and enters the Start Date and End Date of the absence. Then they pick the colleague who will handle approvals from Delegate your approvals to: — the example delegates to Tomás Okafor.
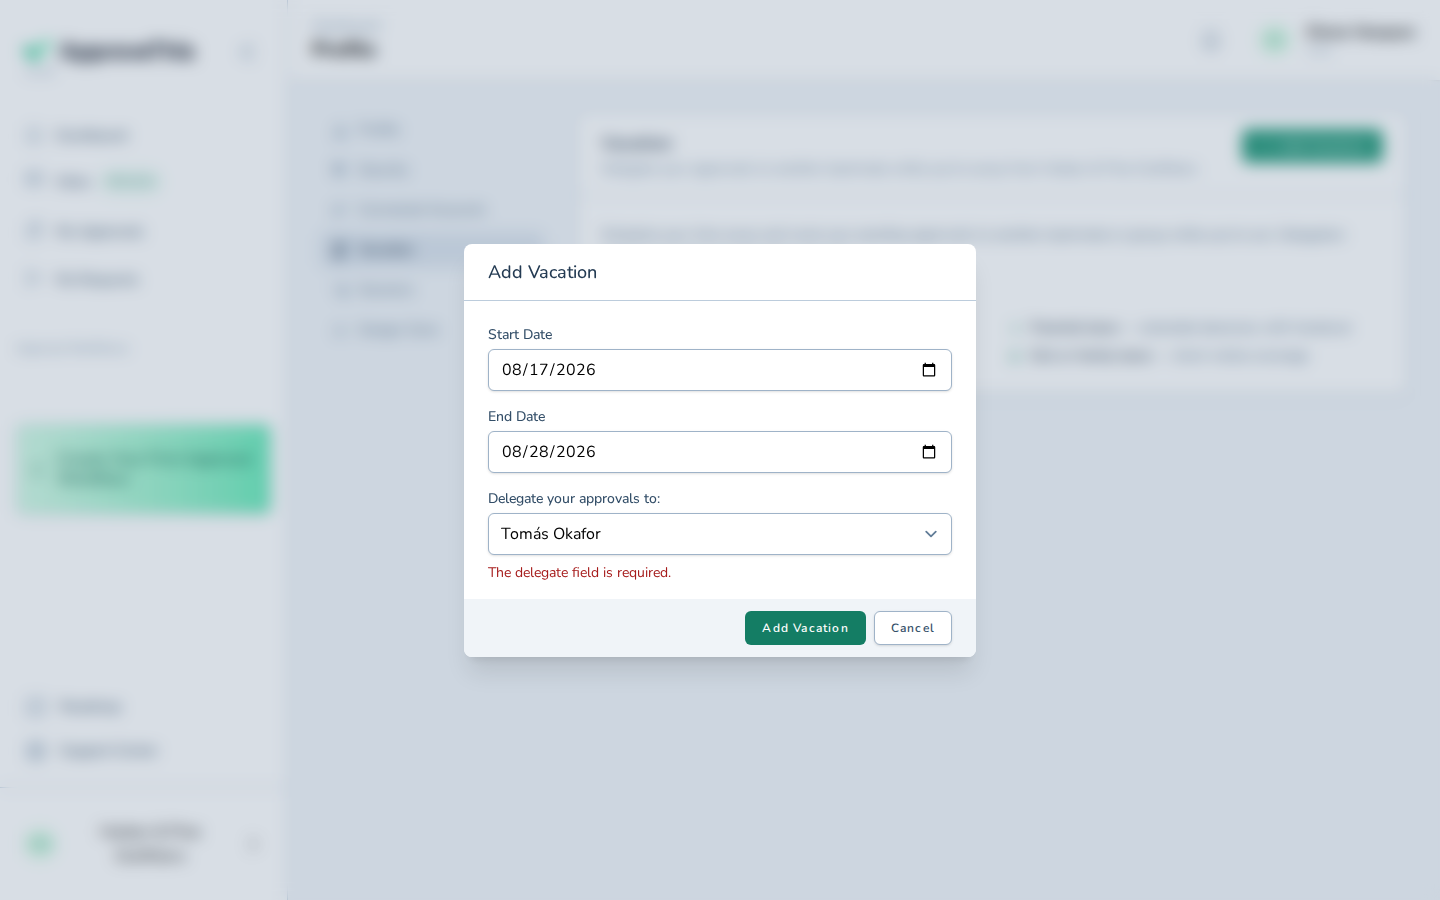
For exactly that window, the team's leave requests route to the delegate instead of piling up. Any user can set this for themselves without asking an Administrator, and coming back early is one click on Remove.
Full click-by-click: Vacation & Delegation
The month at a glance
Open the flow's Requests tab. HR can read the same requests three ways: a Kanban board grouped by status, a sortable Table with inline actions, and — because the form kept its start and end date fields — a Calendar that lays every date-ranged request across the month. This is the view the shared spreadsheet was always trying to be: overlapping absences sit next to each other on the same week, visible before they become a staffing problem.
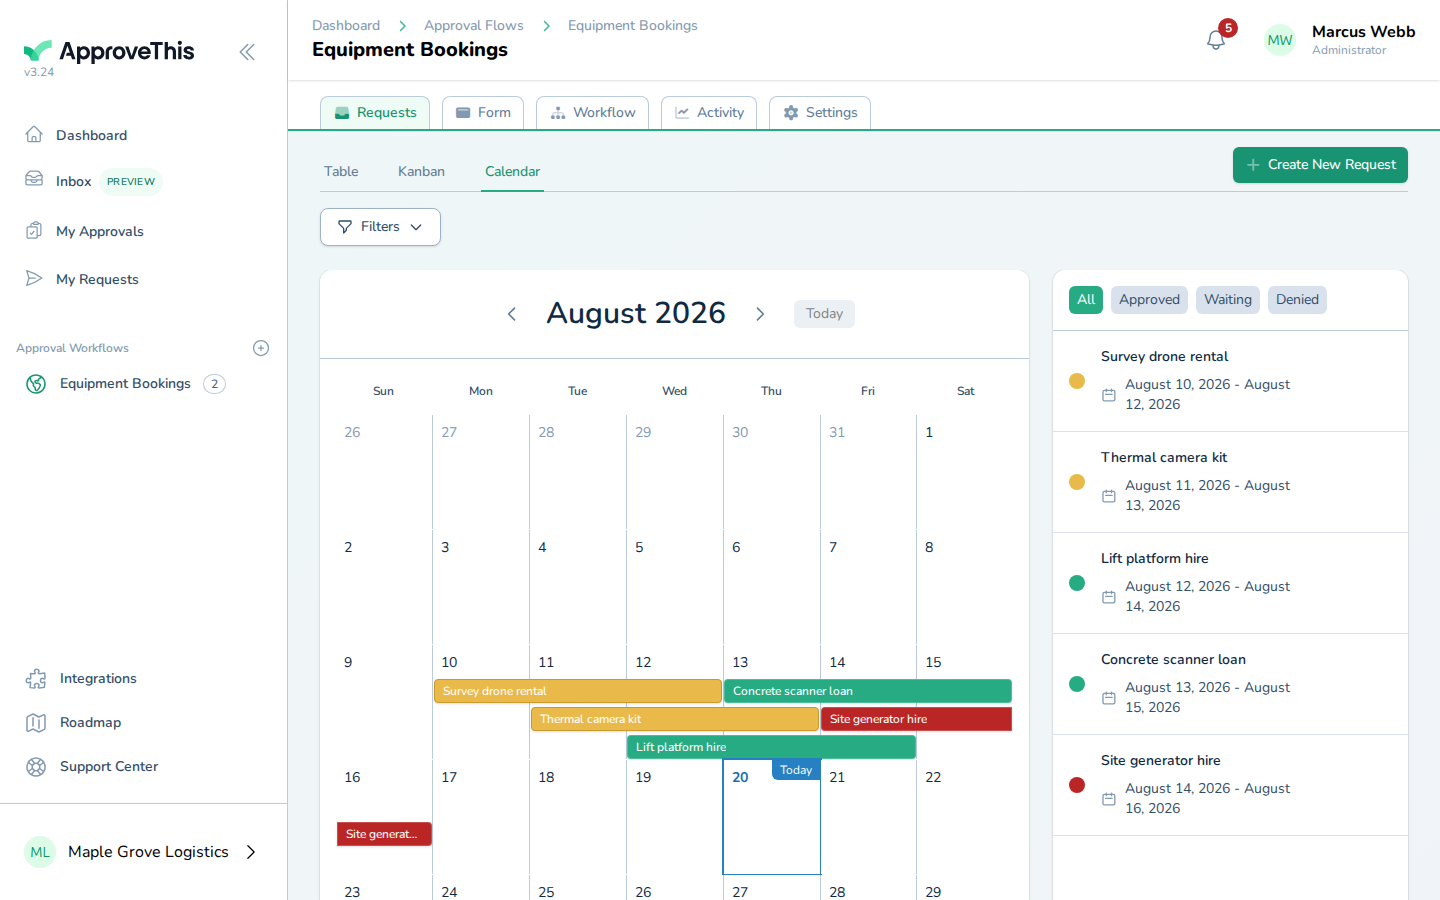
The calendar is read-only — decisions are still made on the request itself, so nothing gets approved by accident while browsing.
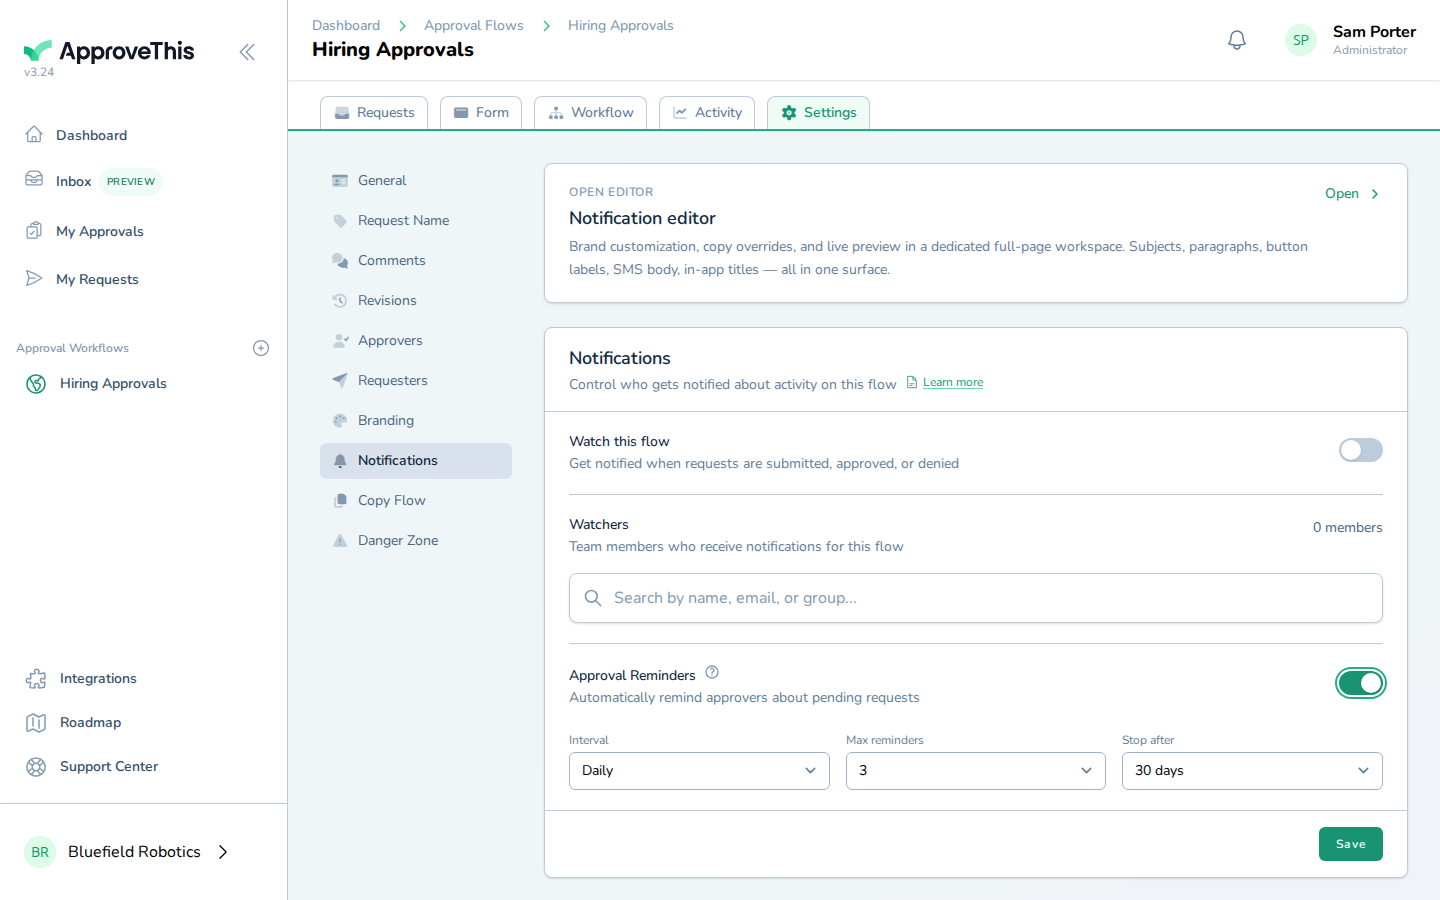
For the one manager who lets a request sit, turn on Approval Reminders in the flow's Settings under Notifications. Reminders are off by default and set per flow: choose an Interval (daily, every 3 days, or weekly), a Max reminders count up to 10, and a Stop after cutoff between 7 and 90 days, then Save. The nudge emails go out until the manager acts or the schedule runs out, so HR stops chasing people by hand.
Full click-by-click: Workflow Dashboards · Approval Reminders
Related guides
- Approval Reminders — the full schedule options for chasing pending approvers automatically.
- Login-Free Approval Links — how one-click email approval works, and when a sign-in is still required.
- Notification Preferences — per-person control of which approval activity arrives by email versus in-app.
- Unified Inbox (Preview) — one searchable feed of every request you can see, for managers juggling several flows.
- Dynamic Request Naming — title each request from its own answers, so the calendar and lists read "who and when" without opening each request.